Butterflies are wonderful subjects for photographs, but not always the easiest subject to shoot. You don’t have to wing it anymore, and let good shots be a product of chance. Follow these tips and you’ll come home with some great butterfly photos.
1. Consider shooting with a telephoto macro lens
To shoot close-ups of butterflies, you’ll want to use a telephoto macros lens. To get great shots, you need to get close to the butterfly, and having a 100mm or longer macro will help. If you don’t have a macro, don’t be discouraged, you can still make great shots with your zoom lens, you’ll just need to shoot more of the environment, but you can make beautiful images that way too.
2. Find a location with flowering plants that attract butterflies
Specific plants, such as the butterfly bush, are known to attract butterflies. See if you can find a location in a park, zoo, or arboretum that has a flower garden with plants chosen specifically to attract butterflies. The more subjects you have to photograph, the better your chances are at nailing the perfect butterfly shot.
3. Pick a spot and wait for the butterflies to come to you
Once you’ve found your garden, find an area that seems to have a lot of butterflies around. While photographing butterflies in flight seems like a great idea, it’s pretty difficult, and it will likely leave you frustrated.
Take a minute or two and just observe. Butterflies seem to come back to the same flower over and over again. Just watch, then pick a flower and wait for the butterfly to come to you. I usually choose a flower that is in the shade. Harsh shadows take away from the beauty of the photograph. I also watch the background to make sure that it compliments the butterfly.
4. Use a monopod or a tripod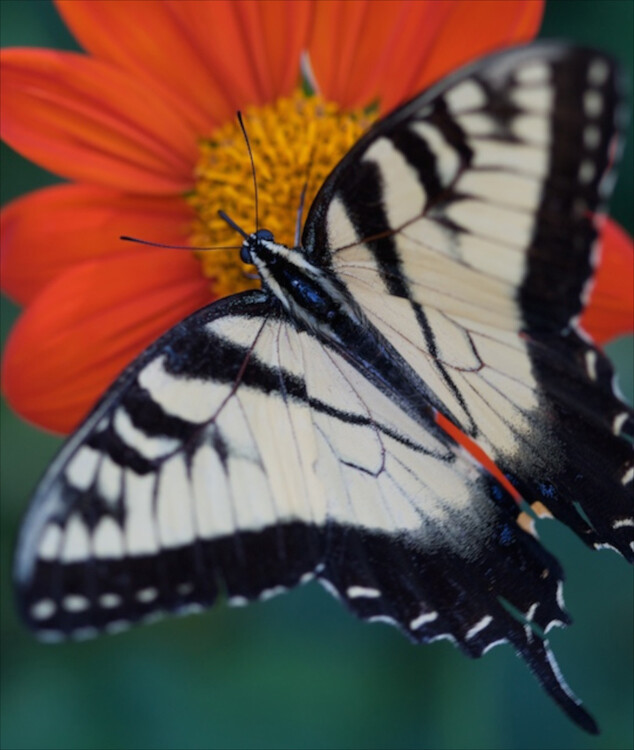
If you use a tripod, don’t lock it in. Leave the head loose, to give you some flexibility. I like using a tripod over a monopod for shooting butterflies. It helps me keep the camera in place and ready, and I can take my eye from the viewfinder as I watch and wait for them to come to my flower. Using a tripod also helps me to frame my photo ahead of time to keep the background very clean.
5. Shoot in manual exposure mode
In a situation like this, I prefer to shoot in manual mode. When I am focused on one particular area, the lighting, and therefore my exposure, isn’t going to change, or at least not very much. I like to shoot at least 1/500th of a second. I prefer to use a wide aperture for a narrow depth of field. But, if you are just starting out, give yourself a break by using an aperture that will give you more depth of field – f/8 would be a great starting point and you can adjust from there.
6. Focus on the butterfly’s eyes
Some photographers like to focus on the wings, I choose to make sure the eye is as sharp as can be, and if the wings fall off focus a little bit, that’s okay. It’s easier to use a bigger depth of field, like f/8 or f/11, so I encourage you to try that first.
I like to use a smaller f/stop in order to throw the background out of focus. It is much more challenging to shoot that way, but I like the effect it gives. It makes the butterfly really stand out from the background instead of blending in to its surroundings.
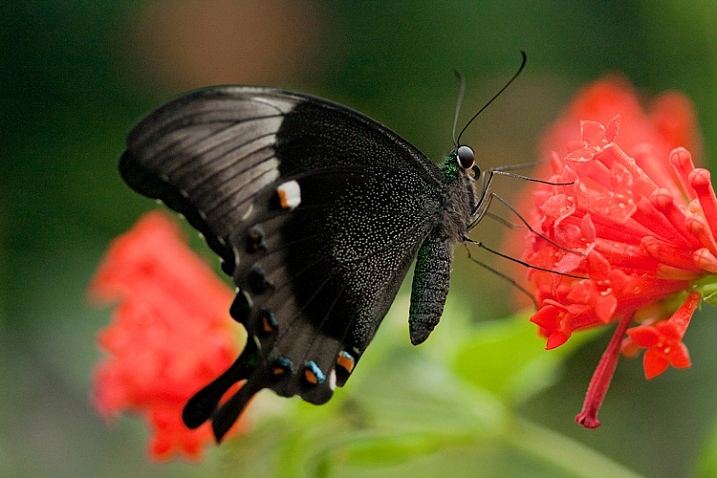
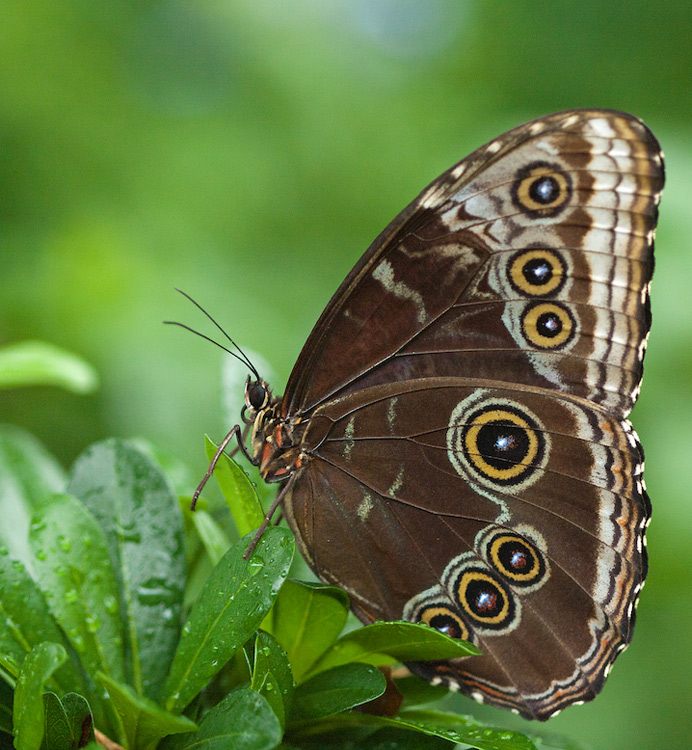
7. Shoot the butterfly in profile

If you are using a larger aperture, and shallow depth of field – shoot the butterfly in profile. That way, you have more of the butterfly in focus. I also love to see how the antennae stands out from the background, and love the details of their legs. Yes, there is beauty in the wings, but there is also an awe in those tiny legs that support the butterfly, as well as its tendril. Look beyond the obvious, to details for outstanding photographs.
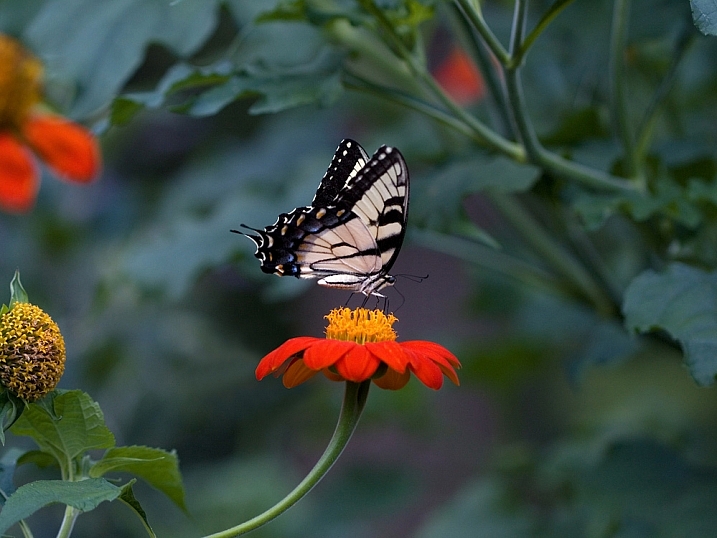
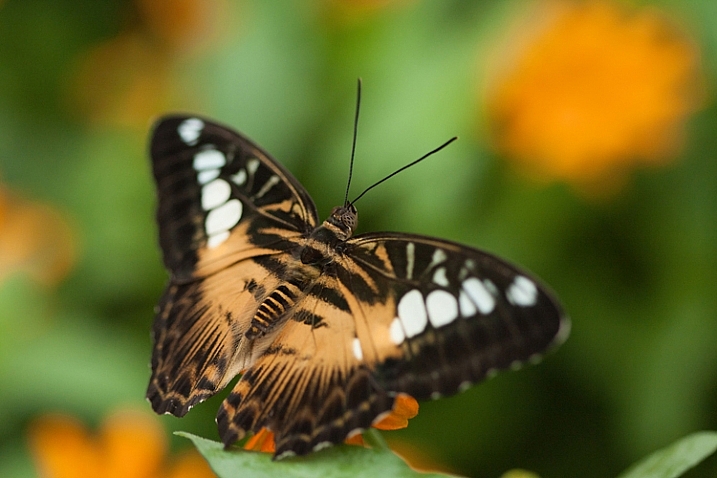
8. Shoot tight as well as loose to capture the environment
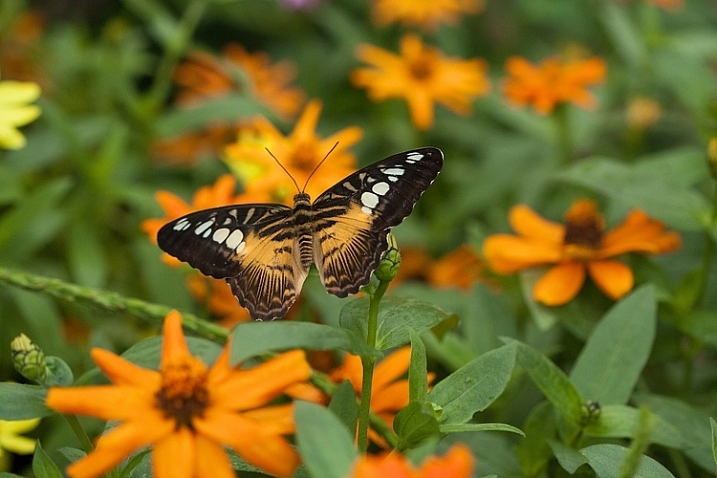
Notice the differences between the photographs above and below. It’s the same species of butterfly, in the same field of flowers – but one shot is cropped tighter and one is framed looser, with more space around the butterfly. Both are successful. Take note in the top photograph, how the antennae are framed with the orange flower to make them stand out. If my angle had been such to have the darker green in the background, it may not have been as successful.
Also note that the orange in the wings mimics the orange flowers. Shooting great butterfly shots goes beyond just taking sharp photographs of wings!
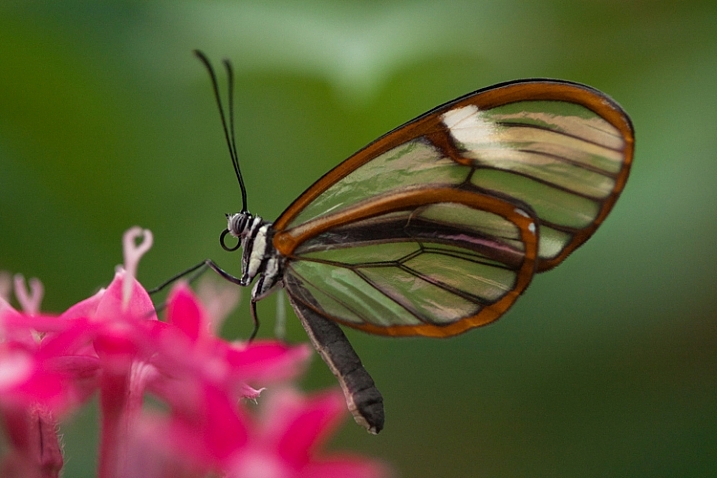
9. Break the profile rule (above)
I love this photograph because it feels like this butterfly is moving forward, into a new place. The head is sharp and the lower wings fall out of focus due to the narrow depth of field, but in this case, it really works because it pulls out attention to the butterfly’s eyes, and into the photograph. It gives the viewer the feel of looking over the shoulder of the butterfly into some new place.
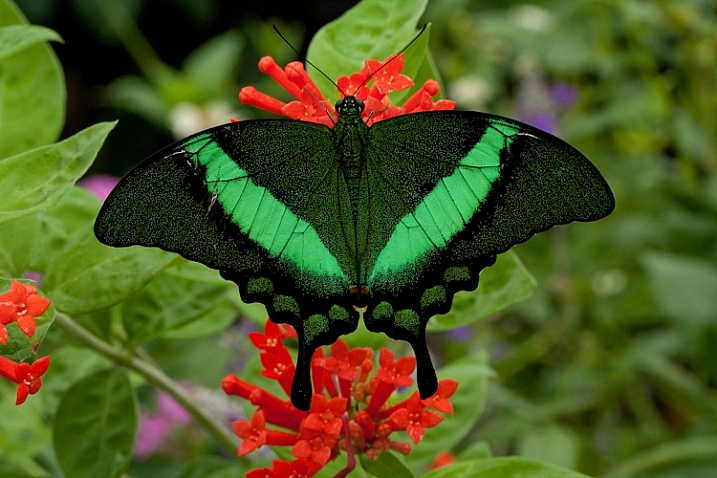
This photo is successful because it moves beyond recording what the wings look like and creates a mood and sense of movement and anticipation.
10. Have patience and have fun!
Beautiful butterfly photos take time and patience, but they are worth it. If you don’t get it your first time out, keep trying. It’s a great chance to hone your skills and you might get an amazing shot.
Please share your questions and butterfly images below and also remember to post them on the weekly challenge: Butterflies and Bugs happening here.
The post 10 Tips for Great Butterfly Photos by Vickie Lewis appeared first on Digital Photography School.