Feeling frustrated with indoor photography?
Harsh shadows and weird skin tones are common problems. In this article, you’ll learn how to improve your indoor photography.

8 tips for indoor natural light photography
Working with natural light indoors can be a little tricky. These beginner tips will help you create beautiful photos using natural light.
1. It’s all about the windows and doors
You’ll want to get to know the light that comes through them. Sometimes it floods the room softly. Other times it beams in, bouncing off the walls and floor.
Soft light will add a soft glow, and harsh light will give a dramatic or moody look.

Take note of what kind of light enters each room throughout the day.
The color of light also changes during the day. It has a warmer look at sunrise and sunset. During midday, it has a cooler or neutral color. Use this to add different effects to your photos.
2. Turn off the lights
Natural light doesn’t like competition. Electric lights can affect your white balance. This is because the color of light varies with the source. Skin tones can look odd when artificial light mixes with natural light. The easiest way to fix this problem is by turning off all electric lights.
3. Shoot in Aperture Priority mode
In Aperture Priority mode, you choose the aperture. With indoor natural light photography, you need to let in as much light as possible. To do that, you’ll want a wide open aperture. The lower your aperture number (f-stop), the wider your aperture is open.
When you use a wide aperture, your depth of field will be shallow. So your subject will be in focus, while your background is left soft and blurry. This adds a beautiful effect to portraits and product shots.
For portraits, an aperture of around f/5 or f/6 will keep the entire face in focus. Focus on the eyes for best results.
Note: Also shooting in RAW is better than JPEG for indoor natural light. RAW files give you a lot more to work with when editing.

Aperture Priority is marked with either an AV (Canon cameras, pictured above) or an A (Nikon cameras). To adjust the setting, you’ll turn the small dial (pictured on the right).
4. Choose your White Balance
To get good white balance take your camera out of Auto White Balance (AWB). The button for changing white balance is usually marked with a WB somewhere on the back of the camera (or use your Canon Quick menu if you shoot that brand).
For proper skin tones choose Daylight (the one with the picture of the little sun). This will give good results, not too blue and not too yellow. If you want to warm things up a little, choose Cloudy. This will add more yellow. Try a shot with Daylight, then one with Cloudy, and see which looks right or which you prefer.
You can adjust your White Balance while editing (if you shoot in RAW) but getting it right while shooting makes editing easier.
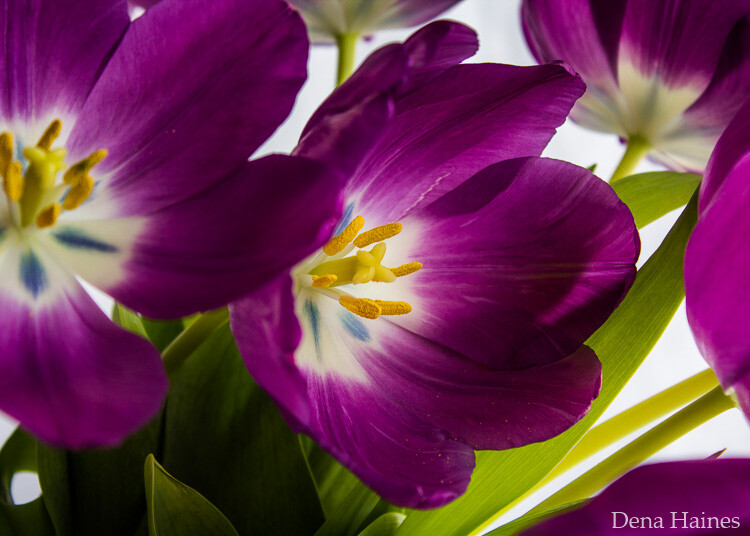
5. Use a light catching backdrop
A backdrop will help catch the light and bounce it back on your subject.
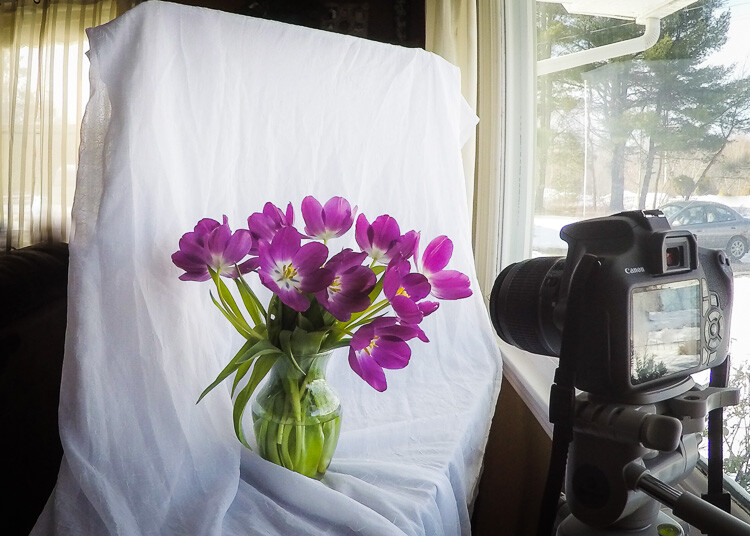
In the above image, the white material helps to cradle the light around the flowers.

This backdrop is made with a freestanding collapsible clothes rack and a long piece of white material. I love how easy it is to set up and move around.
6. Use a light box
A light box will create a similar effect as the backdrop, but it will help control the light even more.
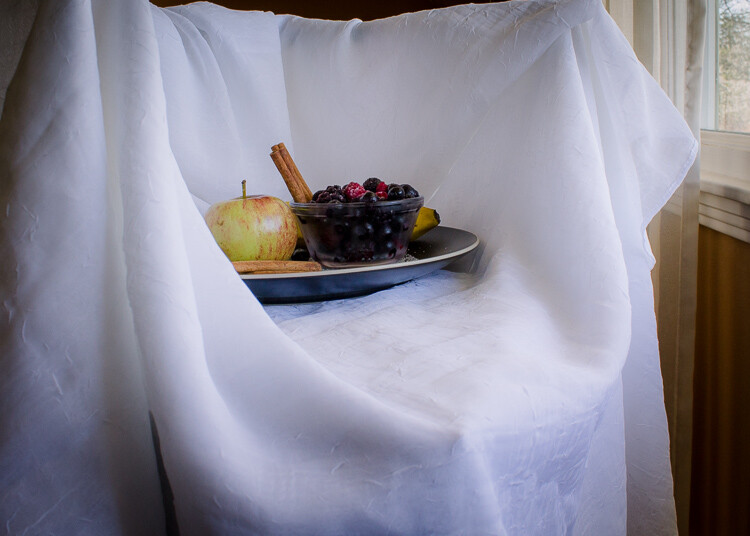
I made this light box out of Lego and used the same piece of white material pictured in tip #5.

7. Use a reflector
A reflector is used to bounce natural light back on your subject.
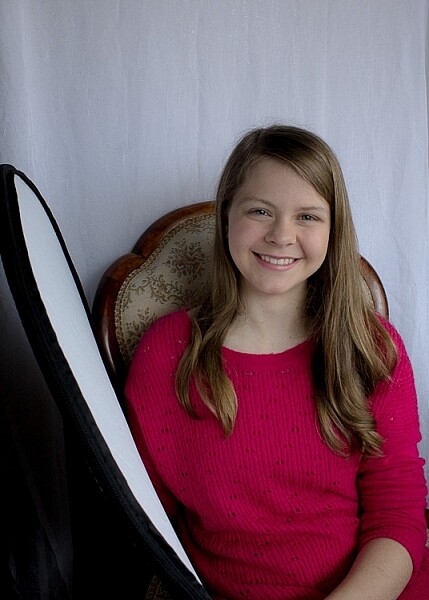

For these shots, I used a reflector and the backdrop. My daughter was sitting with her left side facing the window. She was holding the reflector in her right hand, which helped lighten the shadows.
8. Use a mirror
A mirror is another great way to control natural light. Hang a mirror in the window. I used a large suction cup with a hook to hang the mirror.
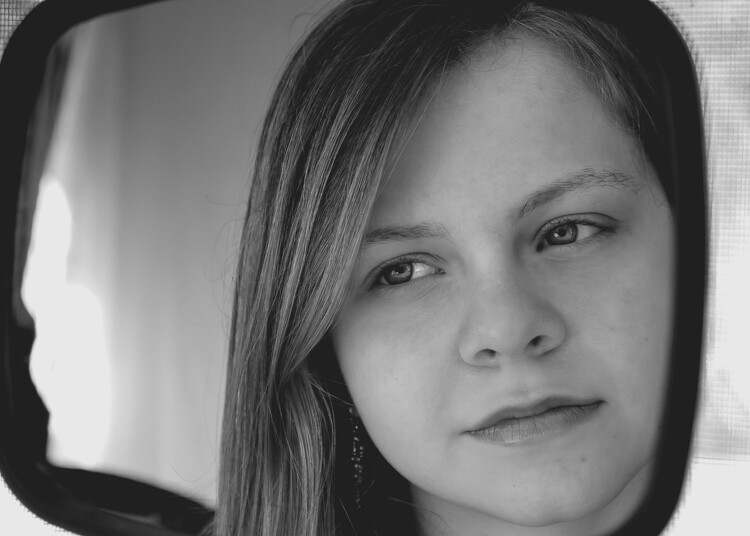
Have your model look in the mirror. As you take your shot make sure your reflection is not in the mirror. It can take some patience to get the angles and reflections under control, but it’s worth it.
I used a small handheld mirror for this shot. A larger mirror would require less cropping.

9. Tidy up
There are often things lying around the house, especially if you have kids. This clutter can be distracting in a photograph. It’s worth taking a couple minutes to tidy up before you start shooting.
In a small space, a backdrop can serve a double purpose. It will control light and create a blind to background clutter. It can help make a small space more workable. For most of the photos in this article, I pushed our sofa and table into the middle of our living room, so I could set up in front of our largest window. Without the backdrop, this location wouldn’t work.

10. Place your subject close to the window
Place your subject a foot or two away from the light source. This way you’ll make the best use of the natural light, and avoid the harsh contracts that can be created by being too close to the window/door. Try backlit, side lit, and full light by having your model face different angles to the window.
11. Use the curtains
Use curtains or blinds to help diffuse harsh light. When the sun is beaming into the room, the light can blow out your photos. Pulling the curtains can soften the light and help with proper exposure. If the curtains are not suitable, you could use a sheer piece of material to hang over existing curtain rods.
12. Shoot reflective objects
Natural light can turn the most common thing (like the moisture on the window pictured below) into something beautiful.
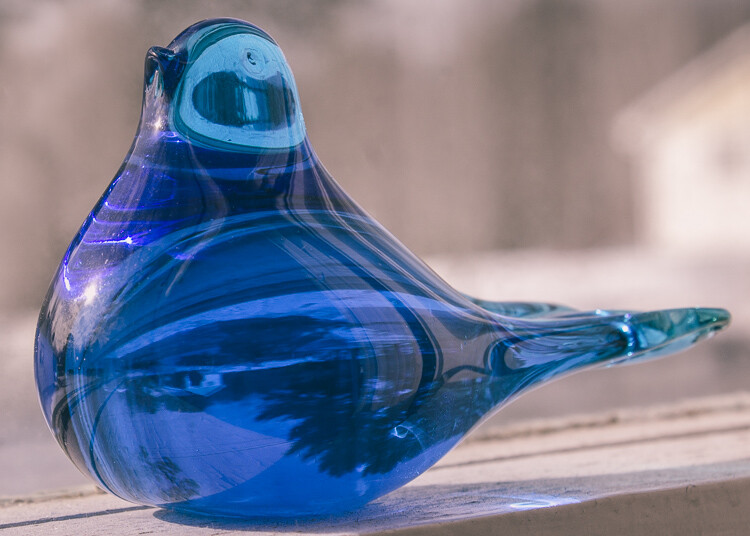
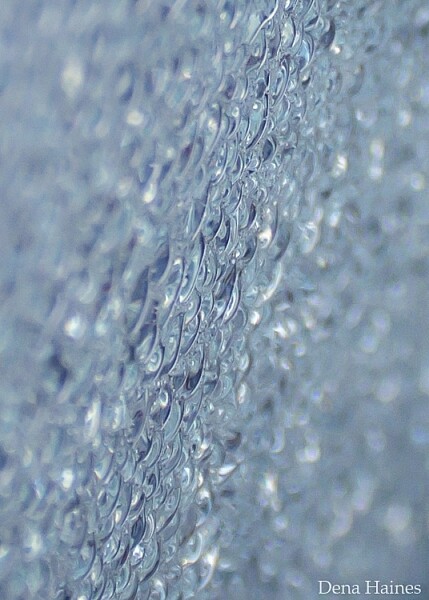
Have fun playing around with reflective objects and natural light. I love the way light creates reflections and glistens on shiny/iridescent objects.
You’ve got to love it
It’s easy to love indoor natural light photography.
The setup is inexpensive, portable, and easy; and you can create beautiful photos no matter the weather or time of day. Don’t forget to have fun, and let that inner beauty shine through.

Your turn
Let me know how your experimenting goes by commenting below. I can’t wait to see what you create. Please share your photos as well.
The post 12 Tips For Indoor Natural Light Photography by Dena Haines appeared first on Digital Photography School.