Even the most famous photographers started out as beginners. Nobody is a master after day one, and learning is a big part of the process. However, nobody likes to appear as a beginner or an amateur, we all want to create images that looks more professional than just a snapshot.
There are certain mistakes that makes it very obvious that you’re a beginner, and if you want to gain some exposure online, these mistakes might turn people away. Here are four mistakes beginning landscape photographers make and you can can avoid them.
An example of when a spirit level is important to see if the horizon is straight.
Mistake #1 – Uneven or crooked horizon
In many photographers’ opinions, there are few things more annoying than viewing landscape images with a uneven or crooked horizon. I see so many images with great potential that are ruined because of this issue. The reason we find this annoying is that the composition is severely weakened with an uneven horizon. Instead of using the composition to lead the eye towards the subject, the horizon will grab your attention and lead the eye straight out of the image.
I know many photographers struggle, or simply forget, to straighten it. This may be because they are so excited to capture the image that they forget to look at it (hi mom!) or because they just don’t know how. Still, straightening the horizon is a huge step towards improving your landscape photography.
Luckily there are a few simple tools to fix this problem, both in the field and in the post-production stage.
In the field: Use a spirit level
If you’ve ever done any sort of construction, this should be a tool you likely know well. But did you know it’s also a highly valued tool amongst photographers?
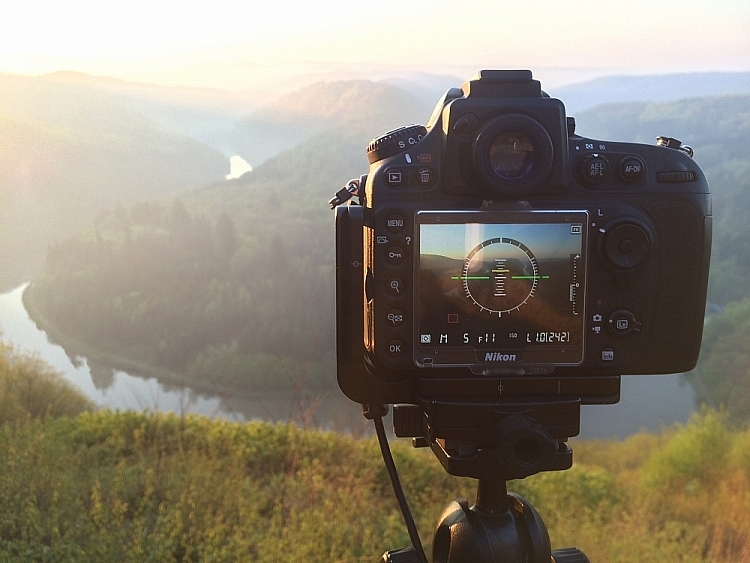
It’s becoming more common, even for mid price-range cameras, to have a built-in spirit level. Nikon names it Virtual Horizon, and Canon has the Electronic Level. Personally, I use the Virtual Horizon for all my compositions when the camera is mounted on a tripod (which is 99% of the time). This tool shows you a spirit level on the camera’s LCD screen, so you need to be working in Live View. Note: Keep in mind that using Live View will drain your battery much quicker.

Even though a Virtual Horizon or Electronic Level is becoming more common, there are still many cameras that don’t have this feature, and there are those who prefer the old school method: using a spirit or bubble level on top of the camera. This small and handy tool can be found in most photography stores, and shouldn’t cost more than a few dollars (see photo right).
In post-production: Fix it in Adobe Lightroom
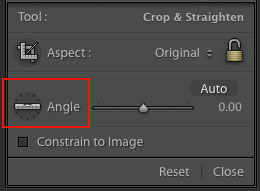 If you weren’t able to get a straight horizon in the field, there’s also a easy method to fix it in post-production.
Adobe Lightroom has a great tool called Straighten. You can find this by going into Develop > Crop Tool (the keyboard shortcut is R). You then see a spirit level followed by the word Angle (outlined in red on the right).
There are three methods to easily straighten your shot using the crop tool:
- Click Auto and see how Lightroom does at straightening the image. It usually does a pretty good job so try that first, you can also undo it if it’s not right and try the other methods.
- Select the spirit level and drag a line along the horizon. Adobe Lightroom will then automatically straighten the image according to the data you gave it.
- Manually insert amount of straightening you need, or drag the point back and forth until you’re pleased.
Mistake #2 – Being stuck in Automatic Mode
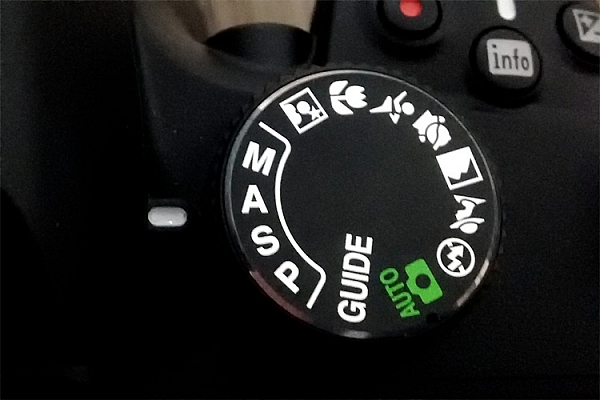 While Automatic Mode may have its benefits for those who just bought their first camera, the sooner you stop using it the better. I always recommend mainly using Manual mode, even though both Shutter Priority and Aperture Priority are acceptable for beginners.
There are several reasons you want learn how to manually control the camera, and understand how the settings work together. Even though the camera does a decent job exposing the image correctly, it doesn’t take the image quality into consideration. In other words, the aperture and ISO will rarely be optimum if you wish to get a sharp result.
I know it may seem scary in the beginning, and I still remember how I tried to understand the basics when I was starting out, but I guarantee you it’s worth the extra effort. When you can use the ideal settings, the final result will be much better.
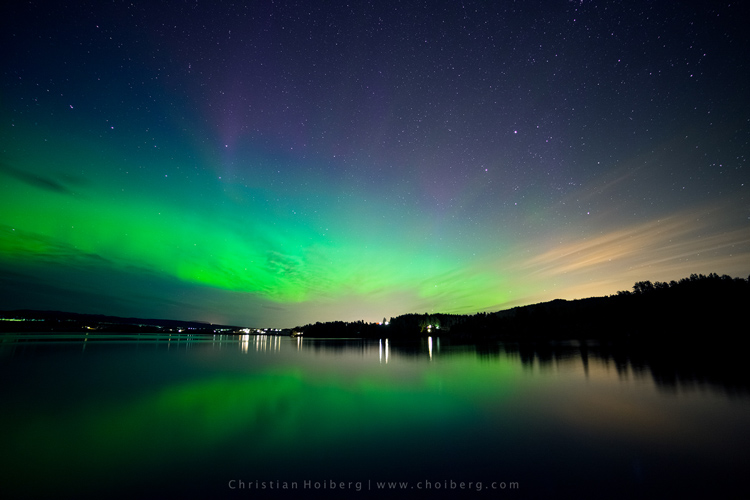
It would be nearly impossible to get an image like this in Automatic Mode
Mistake #3 – Not using a tripod
Besides the camera itself, a tripod is the most important tool for landscape photography. While some may complain that it’s not practical to travel with, trust me when I say – there’s an ocean of opportunities when you begin using a tripod.
Not only will your images become noticeably sharper, you will also be able to do certain techniques that aren’t possible without a tripod (such as long exposure photography). Let’s look at some of the advantages of using a tripod for landscape photography:
- You’re able to achieve longer exposures without getting blurred images.
- You don’t need to use a high ISO to keep the image sharp. Keep the ISO low and use a longer shutter speed instead.
- You can carefully make your composition and keep it for many images.
- Since the camera stays in the same spot you can take multiple images and stack them later (for things like: HDR, time-lapse or techniques to remove people).
- You’re able to keep the image straight by using Live View, and carefully adjusting the tripod.
- The amount of motion is reduced so your images become sharper.
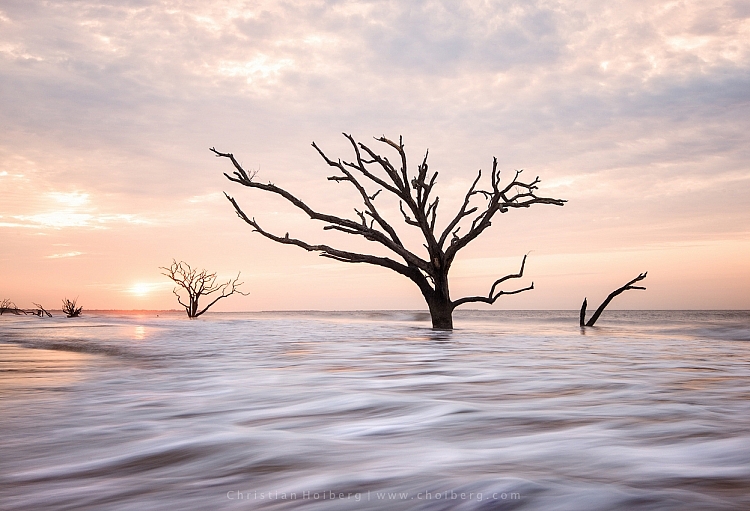
Using a tripod makes it possible to have a longer shutter speed to make images like this.
You don’t need to blow your wallet on the most expensive tripod on the market, but I do recommend getting something that’s more durable than the $ 20 one at the electronics shop. A solid tripod will last for a long time and might save you money in the long run. A sturdy tripod is more flexible to work with, and it’s still gonna do a good job even in windy conditions.
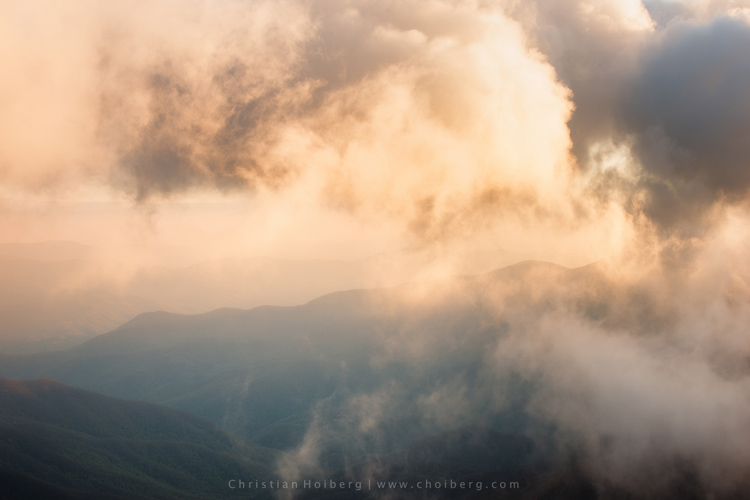
Mistake #4 – Shooting during the daytime
I know I might start some discussion with this point, but good landscape images are not taken during daytime. In landscape photography, light is everything.
You might have heard about the Golden Hour, at times referred to as the Photographer’s Hour. The time around sunrise and sunset is when the sun’s position in the sky is ideal for photography. The low light gives a soft and golden glow to the landscape.
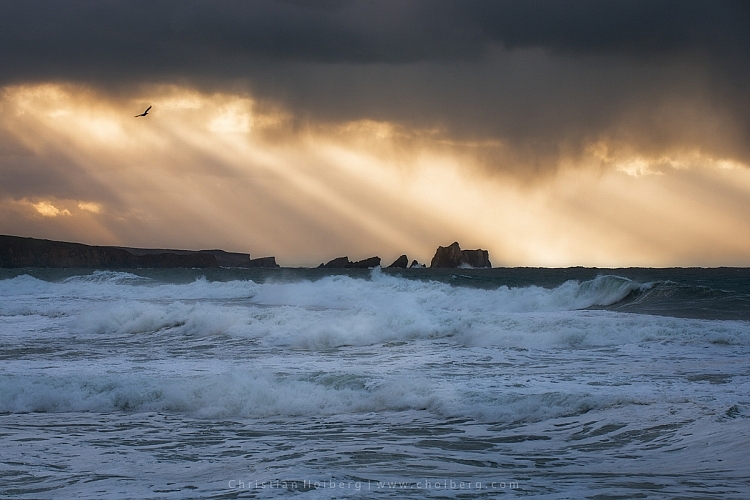
Bird flying through a stormy sunset at Liencres, Cantabria.
During midday the light is harsh, and very few images looks good in these conditions. If you want to improve your landscape photography you need to go out and photograph during sunrise and sunset. Daytime is perfect for scouting locations or sleeping.
As always, there’s a few exceptions to the rule:
- Commercial travel photography: If you’re photographing for tropical hotels and resorts, they do need sunny pictures, as this is what attracts tourists.
- Cloudy days can be okay for photographing waterfalls.
Read also: 5 Reasons Why Bad Weather Days are the Best Times for Photography and 5 Ways to Create Dramatic Landscape Photos at Midday for other ideas.
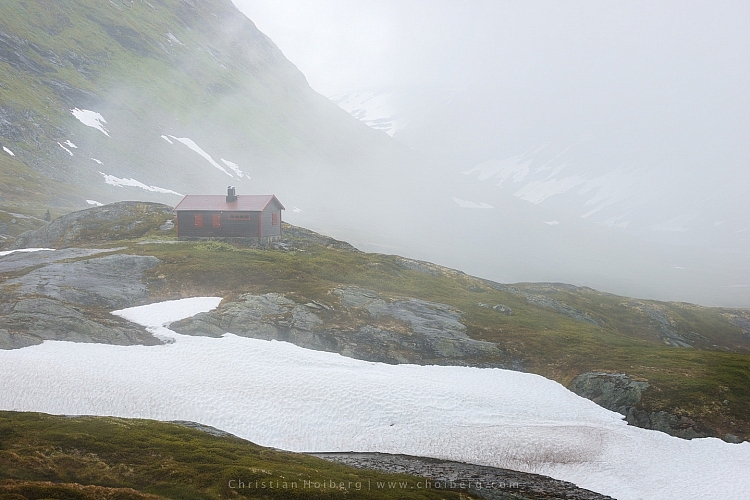
An example of when shooting during daytime works
Are you guilty of these four landscape photography mistakes? Have you made any other mistakes that had a negative impact on your photographs? Please share your thoughts in the comments below.
The post 4 Mistakes Beginning Landscape Photographers Make by Christian Hoiberg appeared first on Digital Photography School.