One of Lightroom’s most useful tools is tucked away at the top of the Develop panel, under a rather strange-looking icon that looks like a magic wand from Harry Potter. Clicking this Adjustment Brush icon, gives you access to many of the macro-scale alterations and edits available on some of the other Develop panels, but lets you control them on a micro level. It’s a fantastic tool for editing specific portions of an image, as opposed to the whole picture, but figuring out how to use it can be a bit overwhelming.
Here are my five favorite tips and tricks for using the Lightroom Adjustment Brush tool, and hopefully some of these will be useful to you as you explore how to use it for your own editing.
1. Use the A/B brush options to alternate between different types of brushes
My wife and I have done a great deal of painting in our house over the years. From hallways, to walkways, to bedrooms, we have spent more time and money on painting than I ever thought possible before we became homeowners. One of the most valuable lessons we have learned is that different types of painting jobs require different brushes. Sometimes you need a large roller, other times you need a small one. Sometimes you need a two-inch angled brush, and other times you need a small foam one. Each brush has its own purpose, and all are required to properly complete a painting task.
The same principle holds true in Lightroom, and you often need more than one brush to make the adjustments necessary on a given image. This problem is easily remedied by switching between the A and B brushes near the bottom of the Adjustment Brush panel.
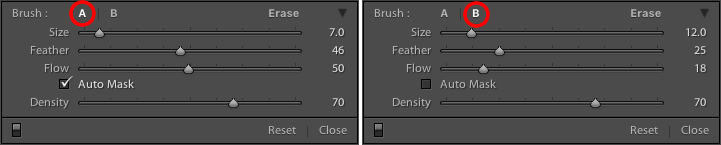
Brush A is highlighted by default when you click on the Adjustment Brush panel, which means that any size, feather, flow, mask, and density settings you use will be automatically applied to that brush. When you click on Brush B you can use an entirely different set of options, then cycle between the two brushes just by clicking A and B. In the example above, Brush A is small with a medium feather and flow rate. Brush B is larger with a much lower flow rate and no Auto Mask, which makes it better suited for large-scale edits, whereas Brush A would be better suited for fine-tuning specific parts of an image. Setting up two different brushes is a great way to speed up your editing workflow, since you won’t need to continually change the parameters of a single brush, and you can instantly switch between the brushes by pressing the forward slash (/) key.
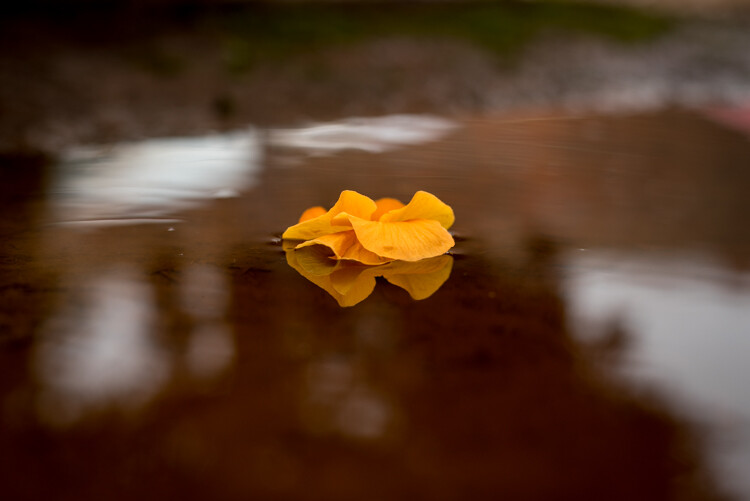
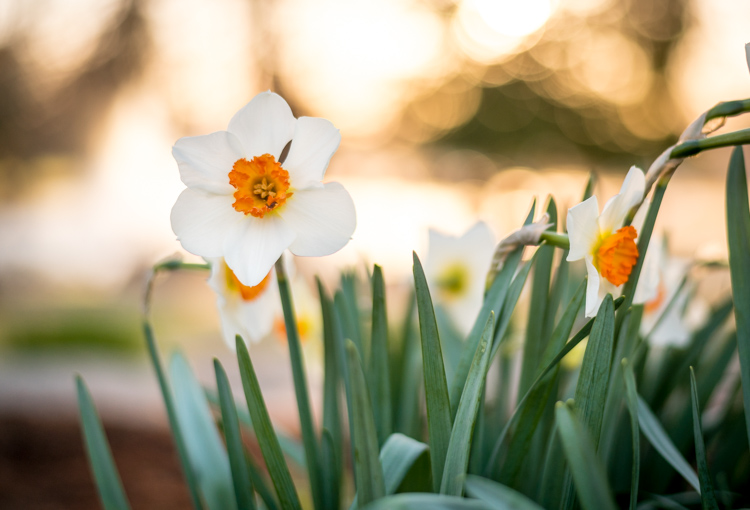
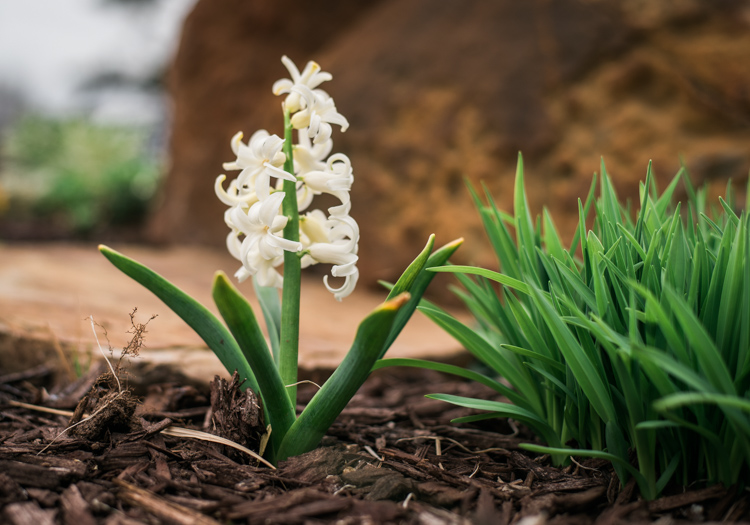
I used a large brush on the background and a smaller brush on the flower petals, and was able to switch between the two easily to get the edits I needed quickly.
2. Create custom brush effect presets
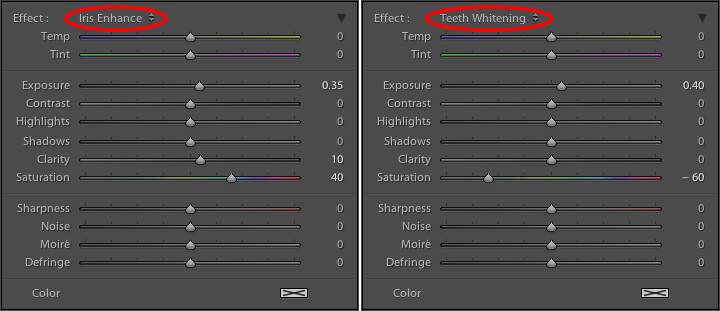
If the A/B brushes are similar to choosing different physical brushes at a hardware store, then the brush effect presets are like picking out different types of paint. Lightroom has several different presets that are available as default options, and they have names like “Highlights,” “Temp,” and “Teeth Whitening.” These presets are just default values that Lightroom thinks would work well to accomplish specific tasks like: adjusting exposure, adding contrast, or reducing noise. You can see how they work just by looking at the sliders, as you change from one preset to another.
These presets don’t inherently do anything special, they just adjust various sliders in different ways. You can create your own presets to do unique tasks as well.
The beauty of these presets is you are free to add new ones that suit your own workflow. You would never select from only a dozen colors when choosing how to paint a room in your house, and neither should you be forced to stay within the confines of the existing presets in Lightroom. To add your own presets, adjust the sliders how you want, click the name of the existing preset to pull down the list, and choose “Save Current Settings as New Preset.” Give your new collection of slider settings a name, and you can now select it whenever you want, right alongside the rest of the presets.
For example, I have found that on many of my portraits I need to brush in some sharpness while reducing the noise so I created a preset to do exactly that. I also have custom skin smoothing and teeth whitening presets that are a bit different from the default set Lightroom uses, and it’s very handy to switch over to these brushes whenever I need to, instead of configuring the sliders from scratch every single time.
3. Adding color to a brush
I started this article with an analogy comparing the Adjustment Brush tool in Lightroom to a literal paint brush, but what some people don’t realize is you actually can use the tool exactly like a paint brush to add color to your images. Near the bottom of the color panel is a rectangular box with a large X through it, and if you click on that you will see a color picker with an eyedropper tool that you can use to give your brush strokes a bit of color.
Once you apply a color, the Lightroom Adjustment Brush tool now functions just like the paintbrush in any standard painting application on your computer. It applies any effects you are already using such as exposure, clarity, or saturation while also painting in the color you specified. In the following picture I used this technique to add a subtle splash of color to the baby’s face, but you can also use it on much larger edits like changing the color of flowers or altering the eyes on a portrait.

4. Use Auto Mask to contain the brush to specific areas
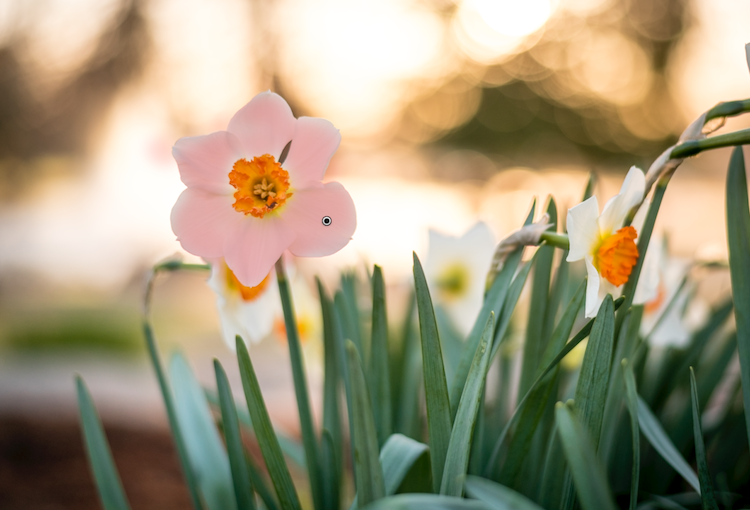
One of the most frustrating parts about the Adjustment Brush tool is that, unlike regular paintbrushes, it only comes in one shape: a circle, which can present a bit of a problem when editing photos with hard lines and angles. How do you confine your brush edits to just a specific area? The key to this lies in the Auto Mask feature which, when checked, tries to keep all the brush edits to places on the image that are similar to where you started painting. In the following picture I used some custom brush settings involving highlights and clarity and then clicked the Auto Mask function to keep these edits within the petals only, and not the surrounding areas.
An easy way to make sure the Auto Mask is doing what you want is to hover your mouse over the black dot that appears where you started brushing in your edits (hit the H key if you do not see it). You will then see a red overlay that shows precisely where your edits for that particular brush have been applied, and as you can see below they were confined to the precise area that I wanted, the flower petals. This type of precision is very difficult without the Auto Mask option, but with the click of a button Lightroom makes it very easy for you to do as your kindergarten teacher likely admonished years ago, color inside the lines.
5. Changing brush size, resetting settings, and fixing mistakes
There are so many useful elements to the brush tool that it’s kind of difficult to distill everything down to five points. As such, here are a few more tips and tricks that I have found quite handy and you might too.
- Use the scroll wheel on your mouse to quickly change the size of your brush. For fine-grain adjustments you can click the numbers in the brush parameters that indicate Size, Feather, Flow, and Density and increase or decrease them with the arrow keys on your keyboard. To go up and down in units of ten, hold the [shift] key while pressing arrow-up or arrow-down.
 After you have brushed in a particular set of edits, click “New” on the top-right of the Brush panel to create a new brush, but notice that all your sliders and adjustments remain unchanged. To reset all your parameters to their default values, hold down the alt key (option on a Mac) and you will see the Effect label at the top change to Reset. Click on that and everything will be set back to zero for you to start creating a fresh set of edits.
- Pencils have erasers, but fixing errors when painting with brushes and pigment is not so easy. Fortunately the Brush tool in Lightroom has a feature that makes it much more like its wood-and-graphite counterpart in the real world, and makes fixing mistakes as simple as pressing a button. No, I’m not talking about Edit > Undo. If you’re brushing away with some edits and realized that you made a mistake or two, press and hold the Alt key (option on a Mac) and your brush will instantly switch over to eraser mode. Now, just like using the rubber end of a pencil, clicking and brushing will remove any edits you have made to the photo with the current brush. If you have used several different brush edits within one photo, your edits will mercifully be confined to the whatever brush is currently selected, and you can also adjust parameters of the eraser like size, feather, and so on.
As I mentioned earlier there are enough tricks with the Adjustment Brush tool to fill several articles, but I’m going to stop here and instead ask you for your favorite tips and hidden features. Leave your thoughts in the comments section below and I’m sure I will learn a thing or two from your experiences as well!
The post 5 Tips for Using the Lightroom Adjustment Brush Tool by Simon Ringsmuth appeared first on Digital Photography School.