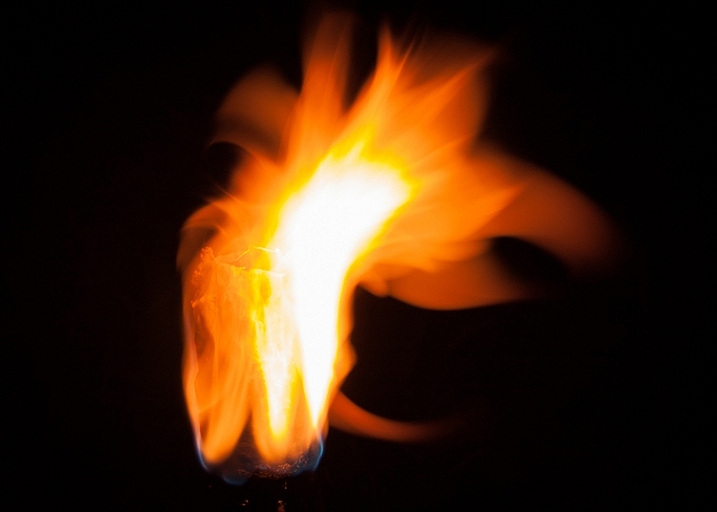
ISO 100, f/10, shutter speed 5.0 seconds
A long exposure photo can make flames look soft and feathery, capture spark trails, and be used to create a romantic or cozy mood. The tips in this article will help you get started with long exposure fire photography.
Long exposure fire photography: 5 tips for beginners
Remember to be careful as you practice your fire photography. Fire can be dangerous, and it’s easy to be careless when we’re thinking more about our photography than the fire. Maintaining a safe distance is important for you and your gear.
1. Use a slow shutter speed
To take a long exposure photo, the shutter in your camera needs to be open long enough to blur motion and light. Here are a couple of ways to ensure that the shutter stays open:
- Shutter Priority: you choose the shutter speed
- Aperture Priority: the camera chooses the shutter speed
Shutter Priority
Put your camera in Shutter Priority mode, choose your desired shutter speed, and let the camera do the rest.
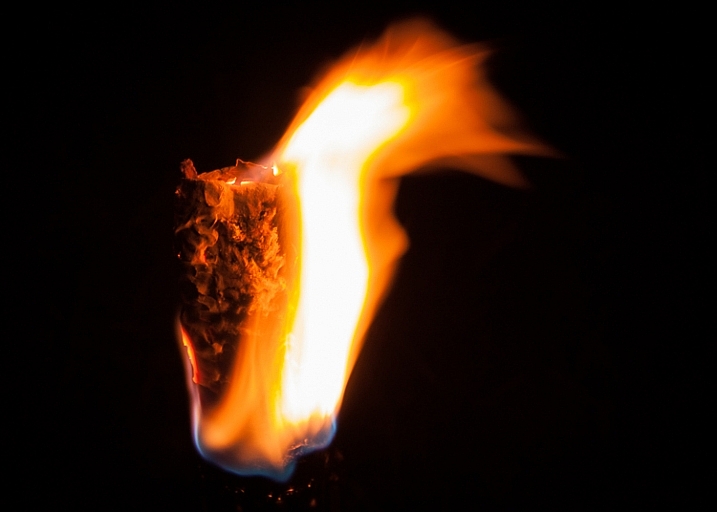
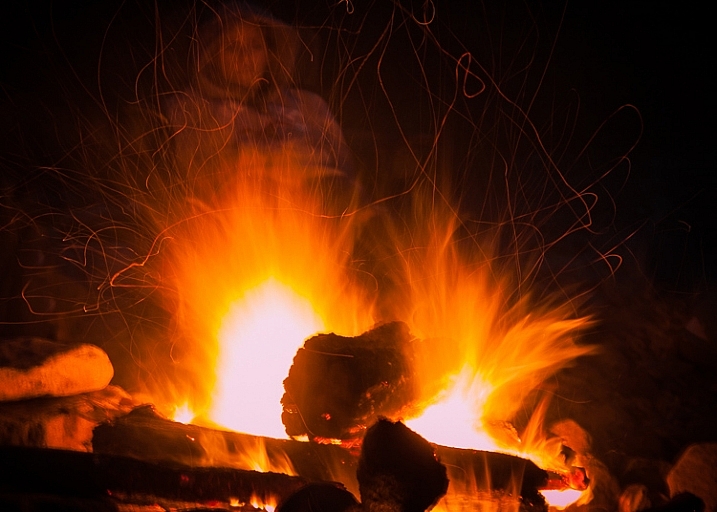
This will force your camera to let in light for the amount of time you’ve chosen. This means your camera will be choosing your ISO (if it’s set to auto) and your aperture. This will give you varied results depending on how much light is available. Using Shutter Priority in this way can be fun. When you choose a shutter speed of five or six seconds, you can capture interesting flame shapes, and lots of spark trails. The bonfire and torch photos in this article were captured in Shutter Priority mode.

ISO 100, f/11, shutter speed 6.0 seconds
Aperture Priority
You could also put your camera in Aperture Priority, choose a mid-range aperture (f/8 – f/11,) set a low ISO (100 – 200,) and let your camera choose the shutter speed. If you’re shooting at night (when it’s really dark) and the fire is your light source, your camera will choose a slow shutter speed. This should give you a photo with large depth of field, relatively free of grain (noise).
If this causes your shutter to be open for longer than you want, increase the ISO. This will start adding noise, which can be reduced during editing. The card game and match photos in this article were shot using Aperture Priority.
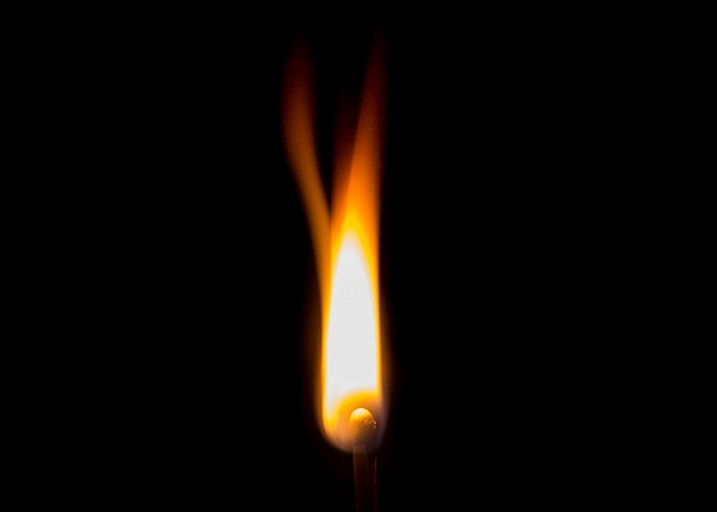
ISO 100, f/11, shutter speed one second
Those are a couple of suggestions to get you started. Long exposure fire photography is all about playing around and having fun. Try lots of different apertures and shutter speeds. If you’re like me, you’ll get excited as you review each shot, and see the interesting shapes you’ve captured.
2. Set your camera on a tripod
When using a long exposure, you’ll want to reduce camera shake which results in blurry photos. Camera shake occurs when the camera moves while the shutter is open. Slow shutter speeds (of more than one second) make it impossible to hand-hold your camera, and still get sharp images. Using a tripod will keep your camera steady.
3. Use a remote shutter release or set the self-timer
Your remote (or the camera’s self-timed shutter release) can also help you cut down on camera shake. When you press the shutter release manually the camera moves a little, this could cause blur in your photo. But when you use a remote shutter release (or set your camera’s self-timer) you don’t have to worry about that. This may seem like a small thing, but it can make a big difference to your image sharpness.
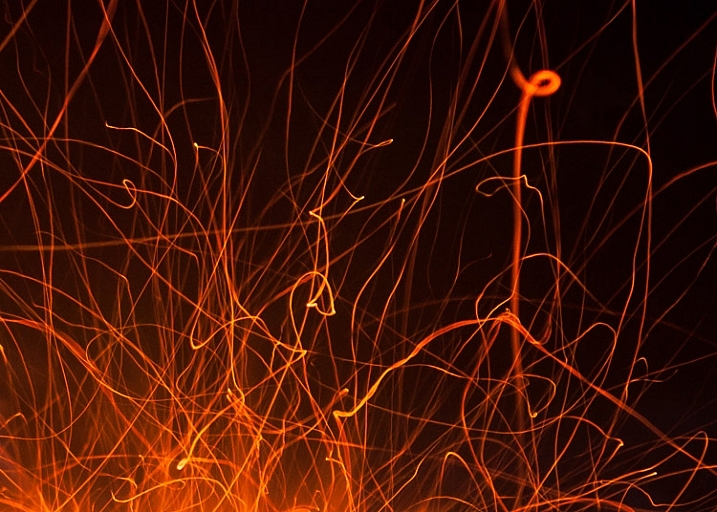
Spark trails. ISO 320, f/6.3, shutter speed 6.0 seconds
When capturing match flames the remote works best. It’s super frustrating trying to capture that flame burst while waiting for the camera’s self-timer.
4. Choose your subject
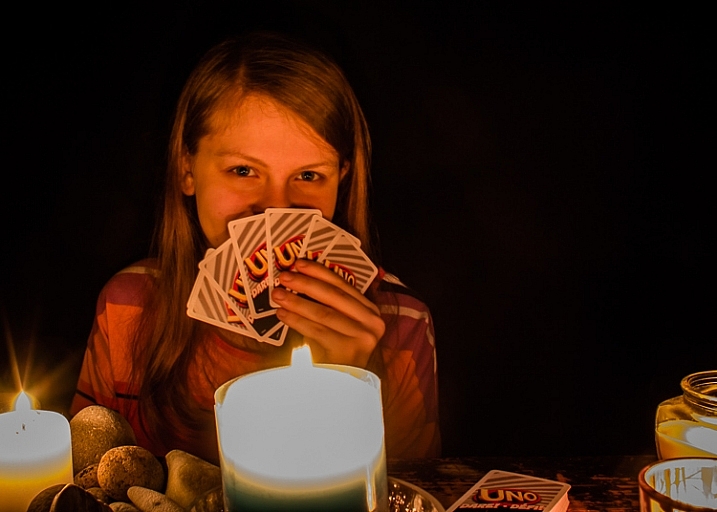
Do you want your main focus to be the fire itself? Or are you trying to capture more of the mood created by the fire? While capturing the mood, it can be tricky to focus on people. It’s not easy to sit still during a long exposure and any movement will create blur in your photo.
The following photos were shot in Aperture Priority mode, with an aperture of f/8. For the first photo, I set the ISO at 100, and my camera chose a shutter speed of 5 seconds. That was too long for my daughter to stay still, so the photo is blurry.

ISO 200, f/8, shutter speed 5.0 seconds (blurry)
For the second photo, I set the ISO to 400 which cut the shutter speed in half = 2.5 seconds. That was a little easier for her, and the photo is clearer.
ISO 400, f/8, shutter speed 2.5 seconds
5. Switch to manual focus
Sometimes auto focus doesn’t work well in the dark.
Here’s how to focus on something other than the fire: Shine your flashlight on the subject, and press the shutter release button halfway. When autofocus locks on, turn off the light and switch to manual focus. Without moving or adjusting anything on the camera, take your shot. Your camera will maintain the same focus point – as long as nothing is adjusted.
Note: you could also try back button focus.
Where will you practice?
Do you enjoy a cozy fire at your campsite, or having bonfires at the beach? Do you like candlelit dinners? Or what about backyard marshmallow roasts? All of these would be great places to practice long exposure fire photography.
ISO 160, f/5.6, shutter speed 6.0 seconds
Experimenting with long exposures around a campfire can be a little addictive. I’ll bet the more you practice, the more fun you’ll have.
Don’t forget your flashlight! You’ll need it to see your camera controls, for help with focusing, and to get safely back to your car.
ISO 100, f/16, shutter speed 5.0 seconds
Please share your tips and photos by commenting on this article.
The post Long Exposure Fire Photography – 5 Tips for Beginners by Dena Haines appeared first on Digital Photography School.