 Selective coloring is a publish-processing method the place you change a picture to black and white, however depart a part of it in colour. It has a dangerous popularity as a result of it may be used to create some really horrendous pictures the place the one factor on show is the photographer’s lack of capacity.
But the excellent news is that you should use selective coloring in a much more refined method to create some fascinating photographs. The secret is to maintain it delicate and to make use of it solely on appropriate photographs. I wish to make selective colour portraits, however in fact you’re free to experiment with different topics as nicely (however please, no flowers).
I favor to maintain my workflow inside Lightroom each time potential because it saves onerous drive area and makes your complete images workflow a lot easier. The first two methods under are for Lightroom, the third makes use of Silver Efex Pro 2, a free plug-in you possibly can obtain from Google.
M. Selective shade in Lightroom utilizing the Adjustment Brush
The first instance, under, exhibits what you are able to do in Lightroom. This is the portrait that I am going to work with for this system.
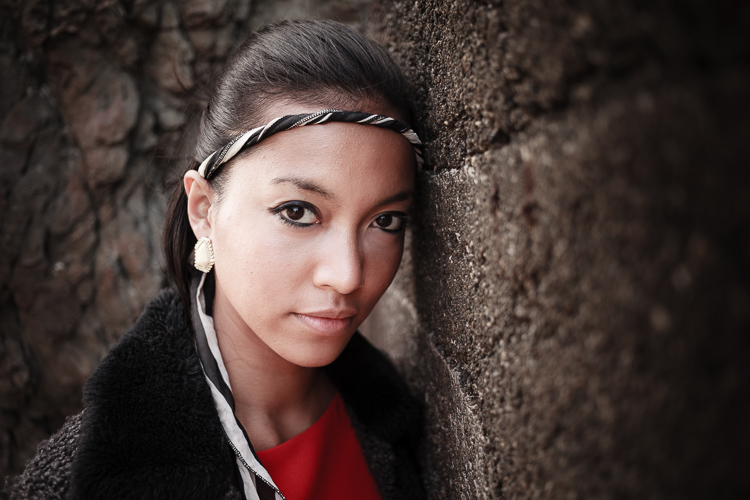
The easy background means it’s splendid to make use of for a selective shade portrait.
Start by going to the Develop module and activating the Adjustment Brush device. Paint within the background to create a masks (as proven under).
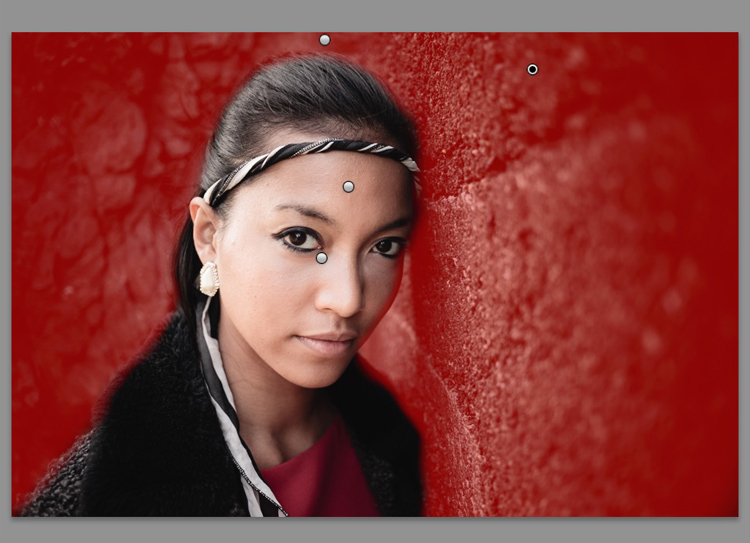
The masks is proven right here in purple.
It might assist to zoom in and use a smaller brush across the mannequin for a extra correct masks.
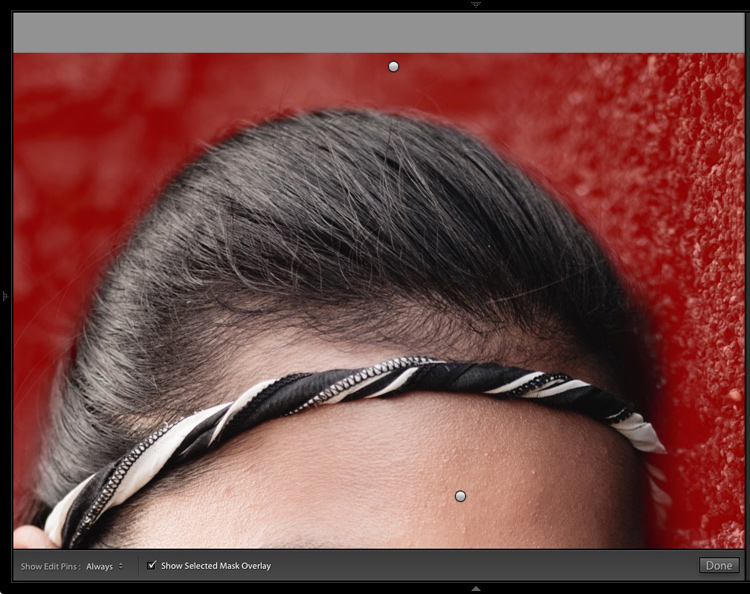
View zoomed in so you possibly can masks extra precisely across the mannequin.
Go to the Adjustment Brush sliders and set the saturation to zero.
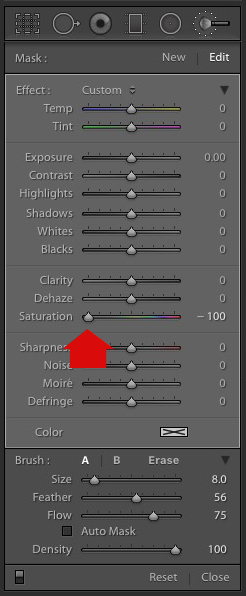
That removes all shade from the background, giving this impact. Don’t overlook you don’t have to maneuver Saturation all the best way to zero – you possibly can merely decrease it to scale back the colour depth of the background. Play round and see what works greatest in your picture.
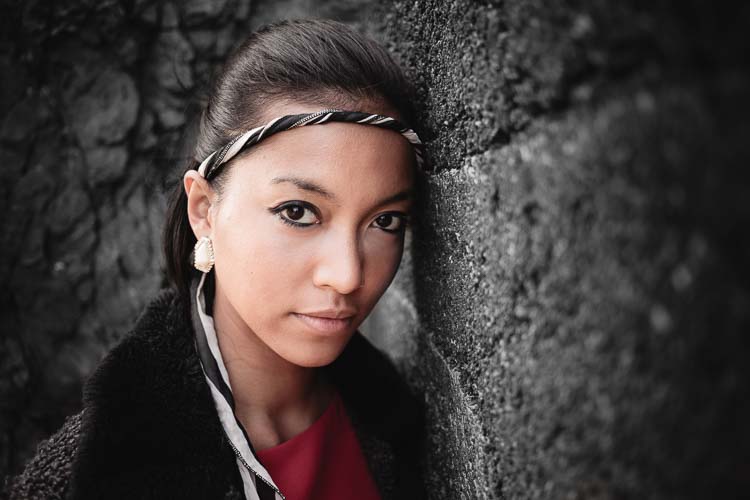
It’s necessary that you simply selected the right picture for this system to get the most effective impact. There are a number of causes it really works nicely with this portrait.
- The background is monochromatic. It wouldn’t work as properly with a colourful background.
- The rocks within the background have loads of texture, which seems to be good in black and white.
- Some of the mannequin’s garments are black or charcoal grey, so introducing this shade into the background matches with the general aesthetic of the picture.
P. Selective coloring in Lightroom utilizing the HSL
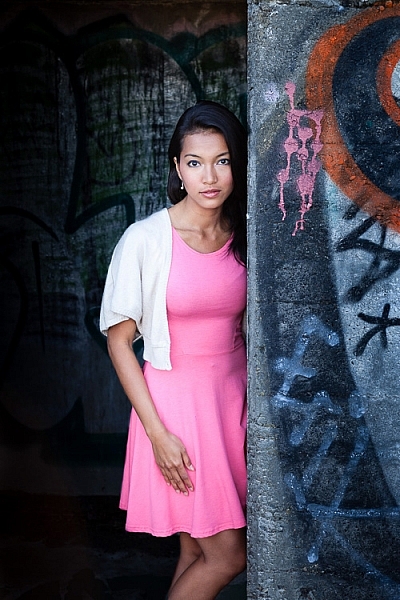
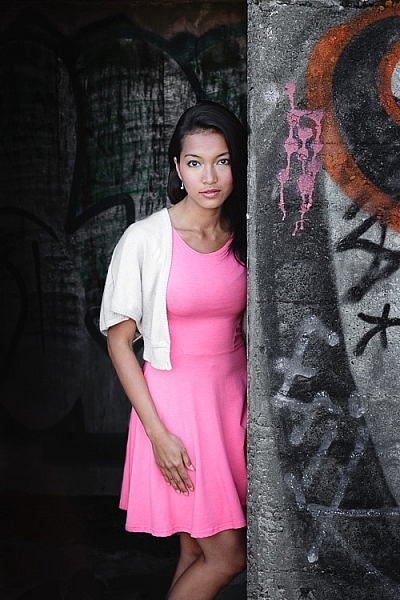
The subsequent portrait (under) has a extra colourful foreground. I’m not going to take away the colour utterly, however I want to make it extra monochromatic. That will assist the delicate colours within the mannequin’s gown and pores and skin to face out.
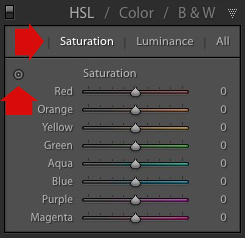
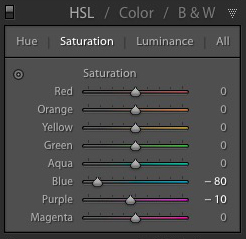
Go to the HSL / Color / B&W panel within the Develop module. Click the Saturation tab, then the Targeted Adjustment device (marked under) to activate it.
Move the cursor over a part of the picture that you simply need to desaturate. In this case, the foreground has a blue forged that I need to take away, so I selected this spot (marked by the small cross circled in purple under).
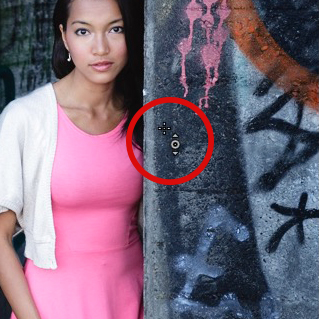
Click and maintain the button as you progress the mouse downward. Lightroom reads the pixels underneath the cross representing the Targeted Adjustment software and reduces the saturation of these colours throughout all the picture. The matching colour sliders within the HSL panel transfer to the left. When I did this, Lightroom set Blue to -eighty and Purple to -10.
This is the end result.
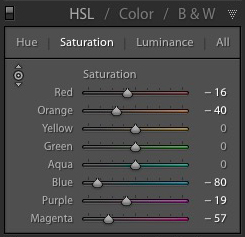
I took it additional by repeating the method. This time utilizing the Targeted Adjustment device on the pink and orange paintwork on the wall, resulted within the following saturation settings.
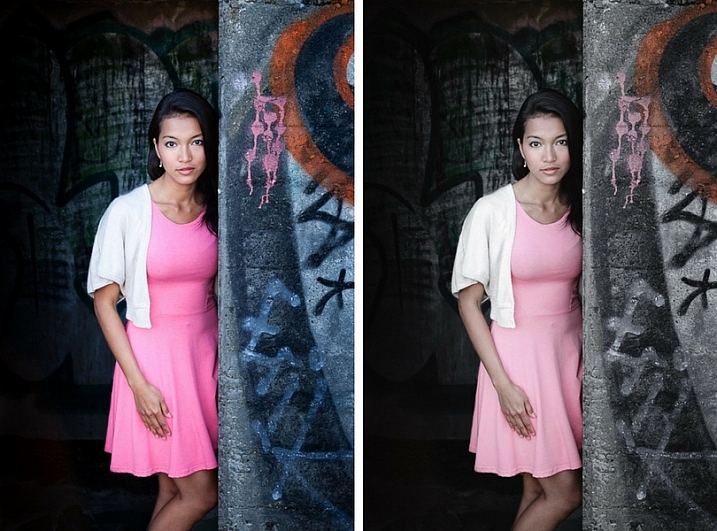
This is a earlier than and after of the ultimate portrait displaying these additional changes.
Notes:
One key factor to concentrate on is how the colours in your photograph are associated. In the photograph above decreasing the saturation of the pink paint affected the mannequin’s gown, which can also be pink.
Reducing the saturation of the orange paint additionally affected the mannequin’s pores and skin. In this case, it labored out okay, however you need to all the time zoom in and double verify, particularly when altering the colour settings of Red, Orange or Yellow hues, as this could have some unusual results on pores and skin tones.
A. Selective coloring utilizing Silver Efex Pro P
Silver Efex Pro 2 is one among my favourite black and white plug-ins. I’d like to point out you the best way to use it for making a selective shade portrait with a delicate impact that nearly seems to be like an previous fashion hand-tinted black and white print.
This is the portrait I’m going to make use of. It’s an excellent photograph to make use of as the colours are delicate.
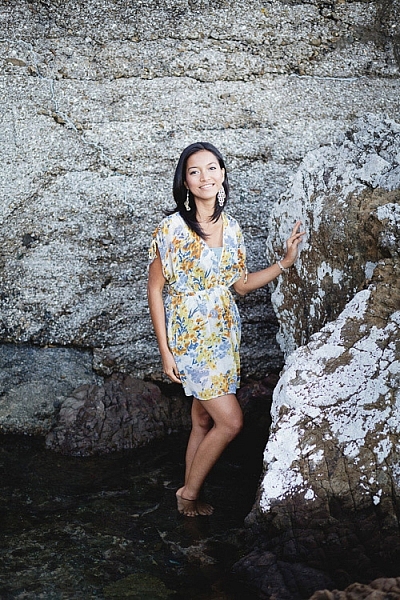
If you don’t have Silver Efex Pro P already, you possibly can obtain it free of charge from the official Nik Collection website.
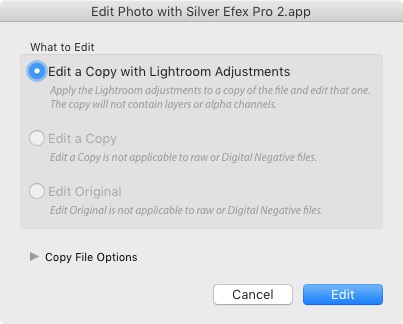
Once it’s put in go to Lightroom’s Library module and choose the photograph you need to edit. Go to File > Edit In > Silver Efex Pro P (you can too discover this feature by proper-clicking the photograph).
Select the choice that claims “Edit a Copy with Lightroom Adjustments” within the subsequent window (it should in all probability be the one one you possibly can choose) and click on Edit. Lightroom converts the Raw file to a TIFF file and opens it in Silver Efex Pro P.
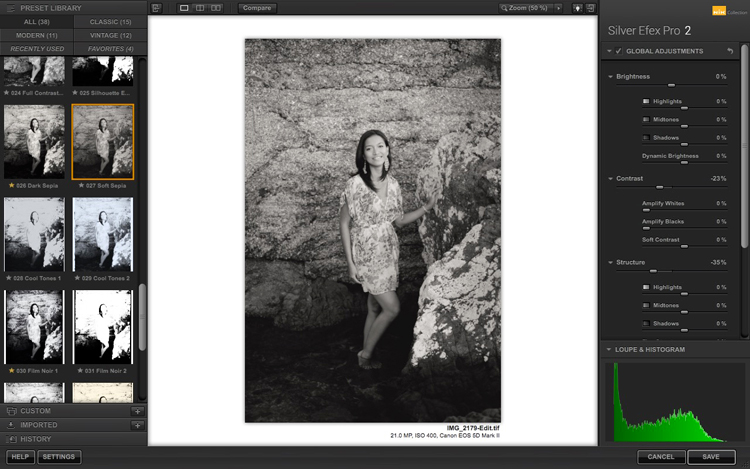
Your first process in Silver Efex Pro P is to determine whether or not you need to stick with the default impartial black and white conversion or use one of many constructed-in presets. I chosen the Soft Sepia preset (under), then made some changes to the tonal values till I was prepared to use selective coloring.
In Silver Efex Pro P you make native changes by going to the Selective Adjustments panel and including Control Points. This screenshot exhibits seven of the Control Points that I added to this photograph. Each one is depicted by a yellow dot.
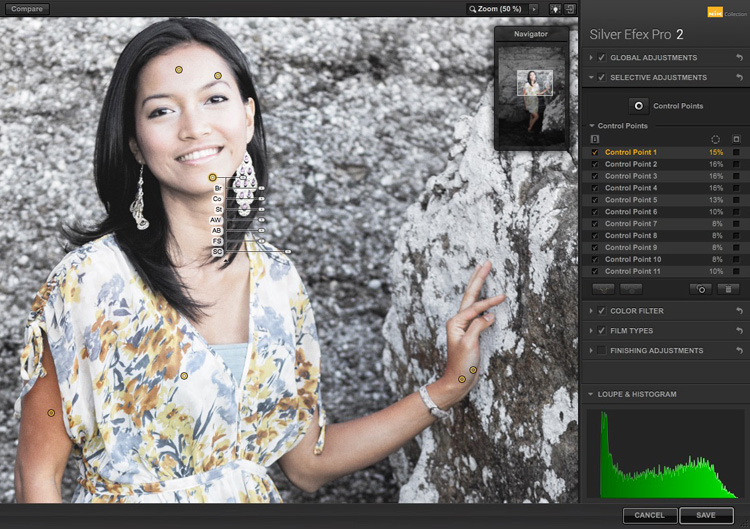
Using Control Points
Control Points work by analyzing the colour and brightness of the pixels beneath them, then making use of the chosen impact to the pixels inside the circle. In this photograph, I moved the Selective Coloring slider (SC) to the fitting to convey the colours again to the mannequin, however not the background.
You management the dimensions of the circle by shifting the highest slider. Silver Efex Pro P shows a circle to point out you the world affected by the Control Point.
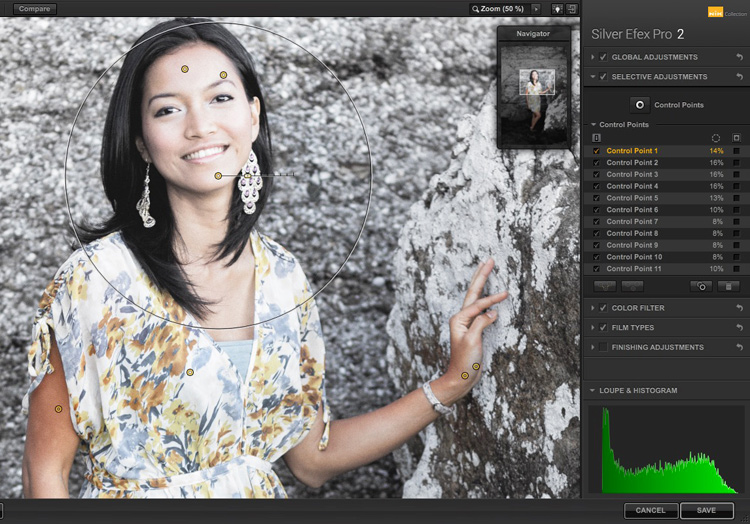
Add a number of Control Points with circles that cowl the mannequin however as little of the background as potential. When you’re completed, click on the Save button. Silver Efex Pro P closes, saving the brand new TIFF file in the identical folder as the unique file and including it to the identical Collection in Lightroom.
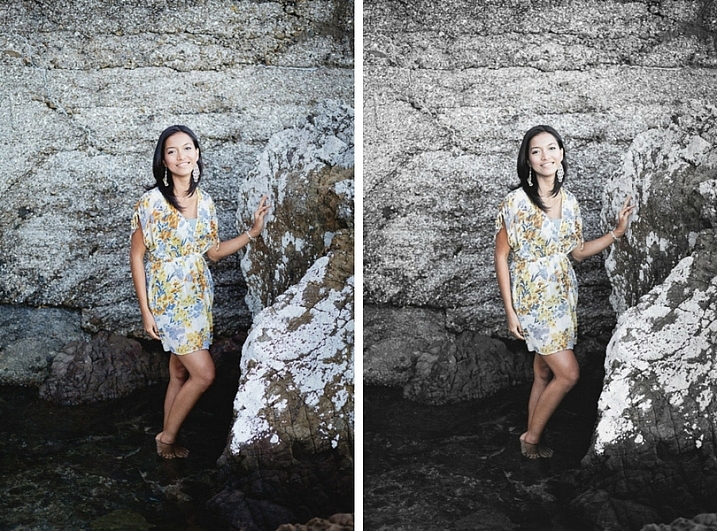
Here’s the earlier than and after with portrait after selective coloring in Silver Efex Pro P. Notice it’s very delicate.
Conclusion
Hopefully, this text has proven you find out how to use selective shade in a delicate and complicated means that strikes on from the garish examples you’ve gotten in all probability seen on-line. Do you’ve any questions on these methods? Let me know within the feedback under.
If you’d wish to study extra about Lightroom, then please take a look at my well-liked Mastering Lightroom ebooks.
The submit 3 Ways to Make Selective Color Portraits Using Lightroom and Silver Efex Pro 2 by Andrew S. Gibson appeared first on Digital Photography School.