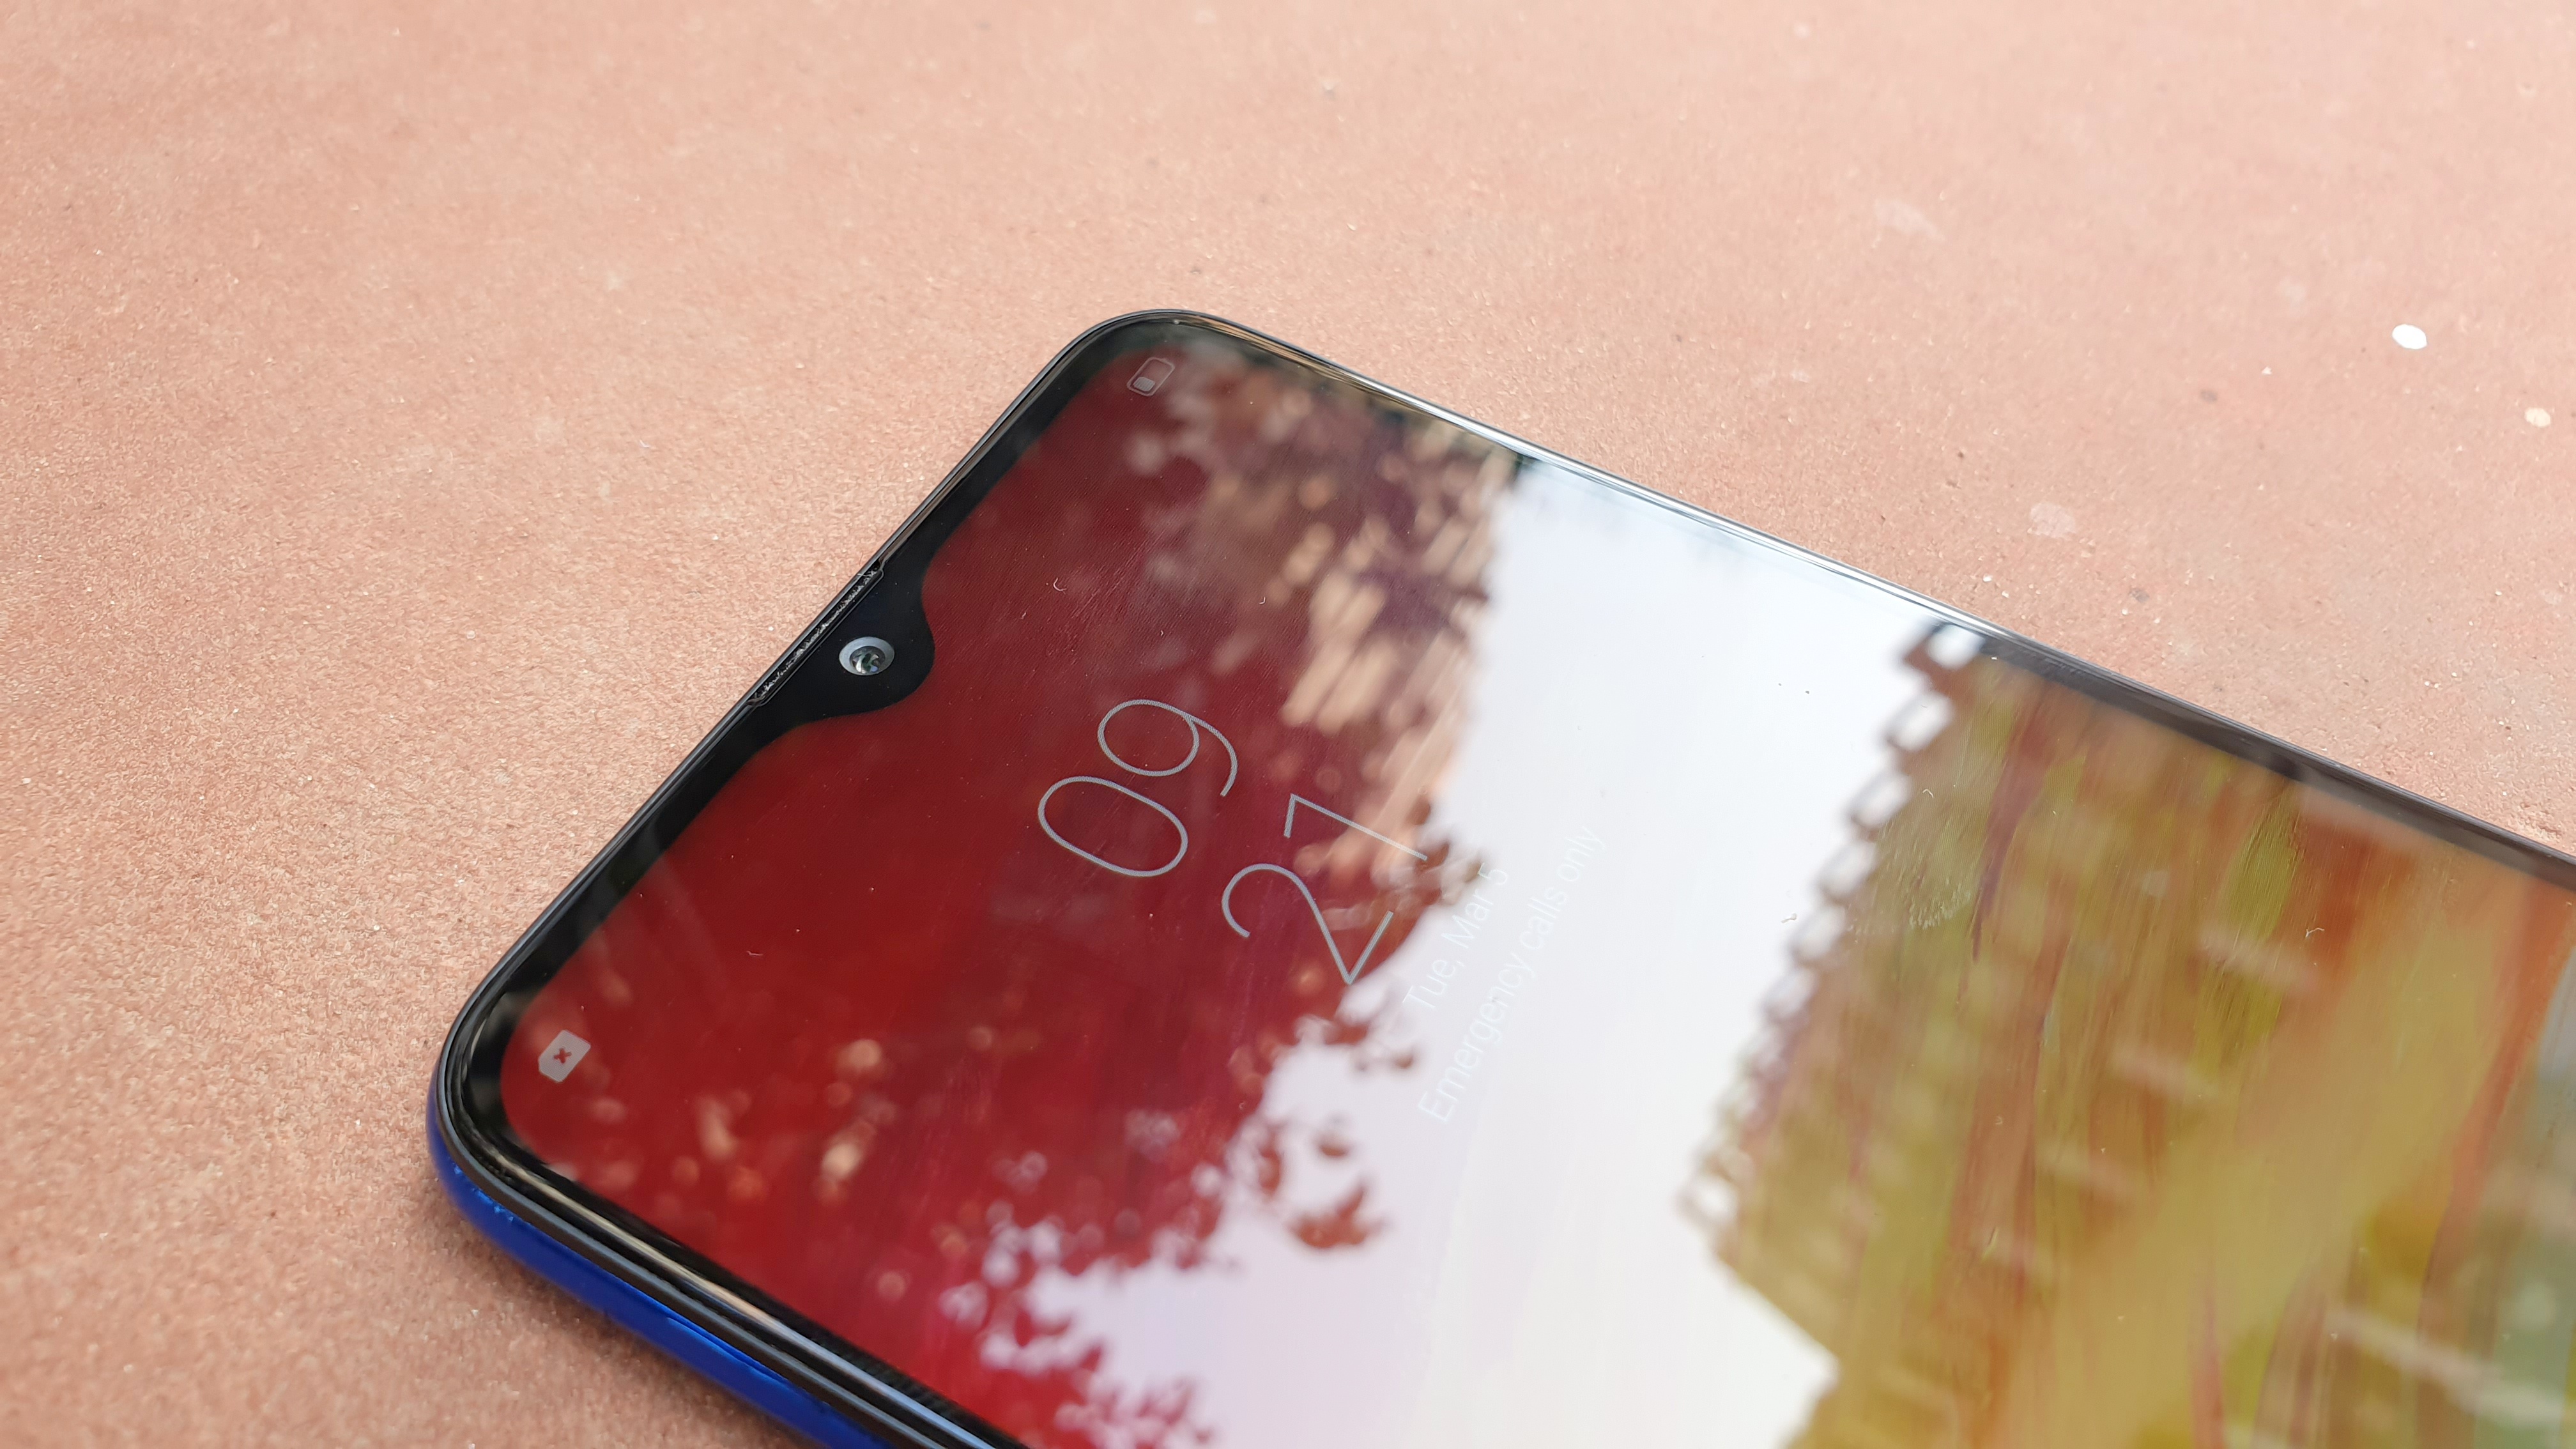
ZIP files are being used to bypass security gateways

Security researchers at Trustwave have discovered a new phishing campaign that utilized a specially crafted ZIP file, designed to bypass secure email gateways, to distribute the NanoCore RAT.

Users are targeted through a spam email pretending to be shipping information from an Export Operation Specialist of USCO Logistics. Attached to the email is a ZIP archive that has a file size which is greater than its uncompressed content.

In a new report, Trustwave explained why the size of the ZIP raised suspicions among its researchers, saying:

"The attachment “SHIPPING_MX00034900_PL_INV_pdf.zip“ makes this message stand out. The ZIP file had a file size significantly greater than that of its uncompressed content. Typically, the size of the ZIP file should be less than the uncompressed content or, in some cases, ZIP files will grow larger than the original files by a reasonable number of bytes."

Suspicious ZIP files

In addition to a special structure that contains the compressed data and information about the compressed files, each ZIP archive also contains a single End of Central Directory (EOCD) record that is used to indicate the end of the archive structure.

However, when Trustwave researchers examined the ZIP file attached to the spam email, they found that the ZIP archive contained two distinct archive structures that both had their own EOCD record. A ZIP archive should have only one EOCD record and this shows that the ZIP file created by the attackers was altered to contain two archive structures.

The first ZIP structure acts as a decoy and contains a harmless image file called order.jpg. The second ZIP structure on the other hand contained an executable file which contained the NanoCore Remote Access Trojan (RAT). Trustwave then determined that the attackers created this specially crafted ZIP archive in an effort to bypass secure email gateways.

When attempting to open the archive using several file extraction programs, the researchers discovered that the archive was treated differently on a program by program basis. While Windows built-in ZIP extractor said the file was invalid and wouldn't extract it, Trustwave discovered that certain versions of PowerArchiver, WinRar and 7-Zip were able to properly extract the NanoCore executable.

The technique used by the attackers could allow them to deliver malicious payloads that are able to bypass email scanners, but due to the way file extraction programs work, less users would be infected than they initially intended.

  • Protect your devices from the latest cyber threats with the best antivirus software

Via Bleeping Computer


TechRadar: Photography & video capture news

Posted in Photography | Tagged , , , , , | Leave a comment

The best 2-in-1 laptop 2019: find the best convertible laptop for your needs

The computer world has changed since the advent of the best 2-in-1 laptops. And because of them, we’ve changed how use our laptops. What was once two distinct form factors, the laptop and the tablet, can now be had in one device, eliminating the need for carrying around or using two devices as well as offering flexibility to how it’s used.

Now, you can put a full day of work in and then flip one of the best 2-in-1 laptops into multiple modes for some light entertainment. Maybe you prefer tent mode for some Netflix or tablet mode for some light gaming.

The versatility of these hybrid laptops doesn’t just stop with their various modes. Some of the best 2-in-1 laptops are powerhouses while others come in smaller, more manageable sizes. Even as hybrid laptops, some come packed with the best processors, and make our list of the best laptops available. Others, like the Surface Book 2, are fully convertible, transitioning into tablets when you remove the keyboard (connected to the screen only by magnetic force when in use). Quite a few also allow the use of a stylus, though they’re not often included in the original packaging and must be purchased separately.

Whatever you’re looking for in a hybrid laptop, you’ll find something in our collection of the best 2-in-1 laptops. We’ve tested our inclusions here and made sure that they are up to the task. And if you’re looking for a deal, keep tabs on Black Friday 2019 – who knows, maybe your ideal choice will go on sale.

The best best 2-in-1 laptop at a glance

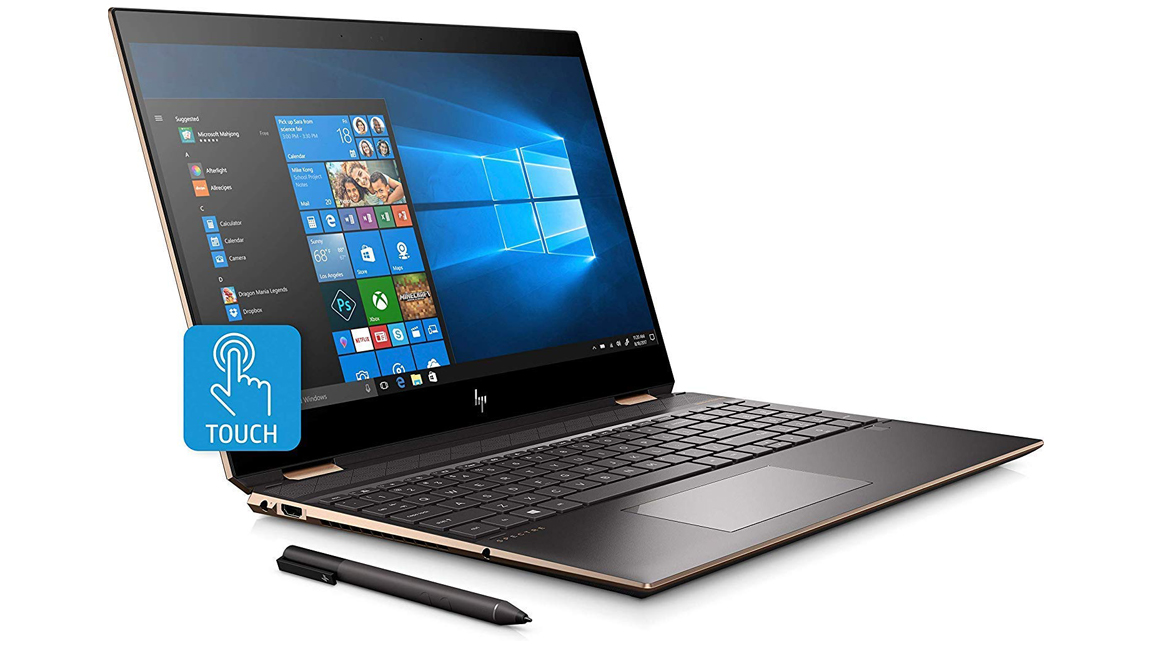
  1. HP Spectre x360 15T (2019)
  2. Google Pixelbook
  3. Asus Chromebook Flip
  4. HP Spectre x360
  5. Dell XPS 15 2-in-1
  6. Microsoft Surface Book 2 (13-inch)
  7. Lenovo Yoga C930
  8. Microsoft Surface Book 2 (15-inch)
  9. HP Envy x360 13 (2019)
  10. Acer Chromebook Spin 11

HP Spectre x360 15T (2019)

HP Spectre x360 15T (2019) packs an 8th-generation Intel Core i7 CPU, GTX 1050 Ti graphics and 8GB of RAM in its base configuration.

For years, HP’s Spectre line of Ultrabooks and 2-in-1 laptops has been about pairing elegance with performance. The 2019 HP Spectre x360 15 is no different. It deserves a top spot on our best 2 in 1 laptops list for packing an 8th-generation Intel Core i7 CPU, Nvidia GeForce GTX 1050 Ti graphics and 8GB of RAM in its base configuration. This 2-in-1 can tackle just about anything your everyday workload throws at it – and then some (such as a bit of light gaming, for example) – while looking like royalty. Keep in mind that the Spectre x360 is somewhat big and heavy for a 2-in-1, so you likely won’t be using it in tablet mode very often. Put it in tent mode instead, so you can catch some movies on its stunning 4K display.

Read the full review: HP Spectre x360 15T (2019)

Google Pixelbook

Google Pixelbook takes the Chrome OS platform and elevates it to levels never seen before.

It might seem strange that a Chromebook is on a list of the best 2 in 1 laptops, and rated so highly at that. But the Google Pixelbook combines the two forms perfectly, making it well-deserving of its spot. It’s a striking device that takes the Chrome OS platform and elevates it to levels never seen before when it first rolled out. The Google Pixelbook is filled with powerful components, as well as supporting full Android apps. As such, it tears down those walls that prevented Mac and Windows devotees from truly embracing the best Chromebooks.

Read the full review: Google Pixelbook

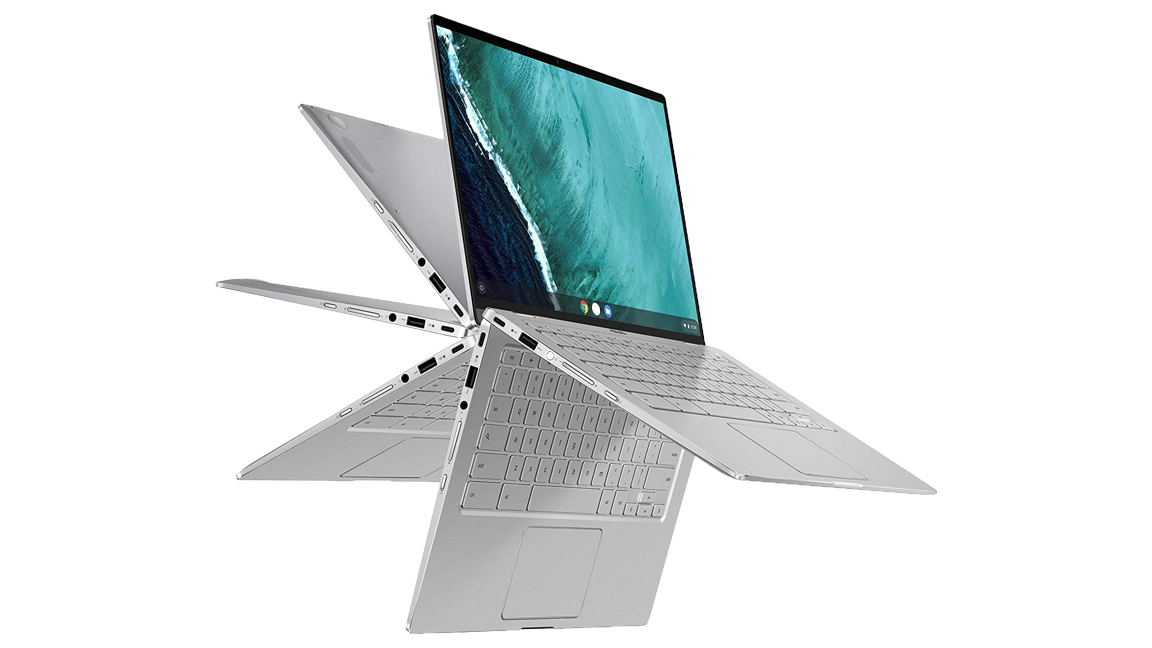
Asus Chromebook Flip

Budget-conscious buyers may prefer the Asus Chromebook Flip C302.

The Pixelbook is downright seductive, but budget-conscious buyers may prefer the Asus Chromebook Flip C302, a worthy pinch hitter. Having introduced a touchscreen hybrid design to Google’s cloud-based Chrome OS, the Asus Chromebook Flip is improved by its compatibility with Android apps. Just like the Pixelbook, you can use the Asus Chromebook Flip for Google Play apps, though after installing an out-of-the-box update. It’s unquestionably one of the best 2 in 1 laptops right now. And, if you're already a fan of Asus laptops, this one will make you a true convert.

Read the full review: Asus Chromebook Flip

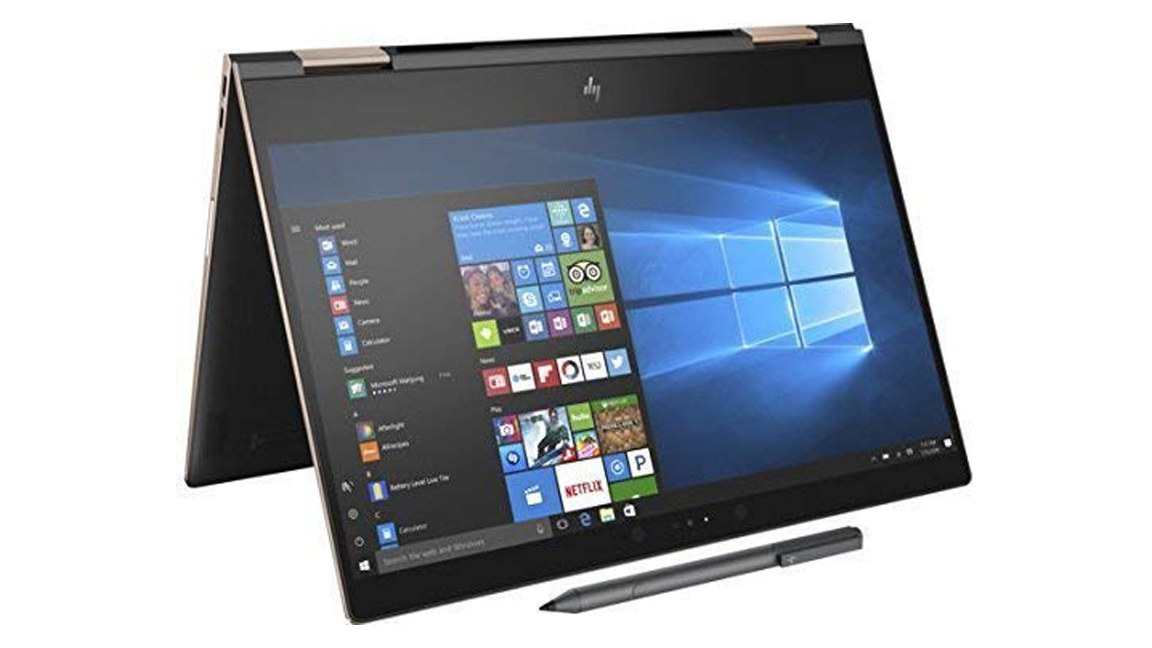
HP Spectre x360

HP Spectre x360 is one of the best laptops to date.

The HP Spectre x360 isn’t just one of the best 2 in 1 laptops out there at the moment; it’s also one of the best laptops to date. There are only a handful of manufacturers out there that marry powerful components with a dazzling design quite as well as HP does here. The gem cut chassis will draw plenty of jealous looks in the office, while the powerful hardware will breeze through all of your daily workload. That light and compact design – well, it’s so you’ll fall in love at first sight. And, when you’ve had enough showing off its prowess, you can flip it around into tablet mode to squeeze in some late-night gaming.

Read the full review: HP Spectre x360

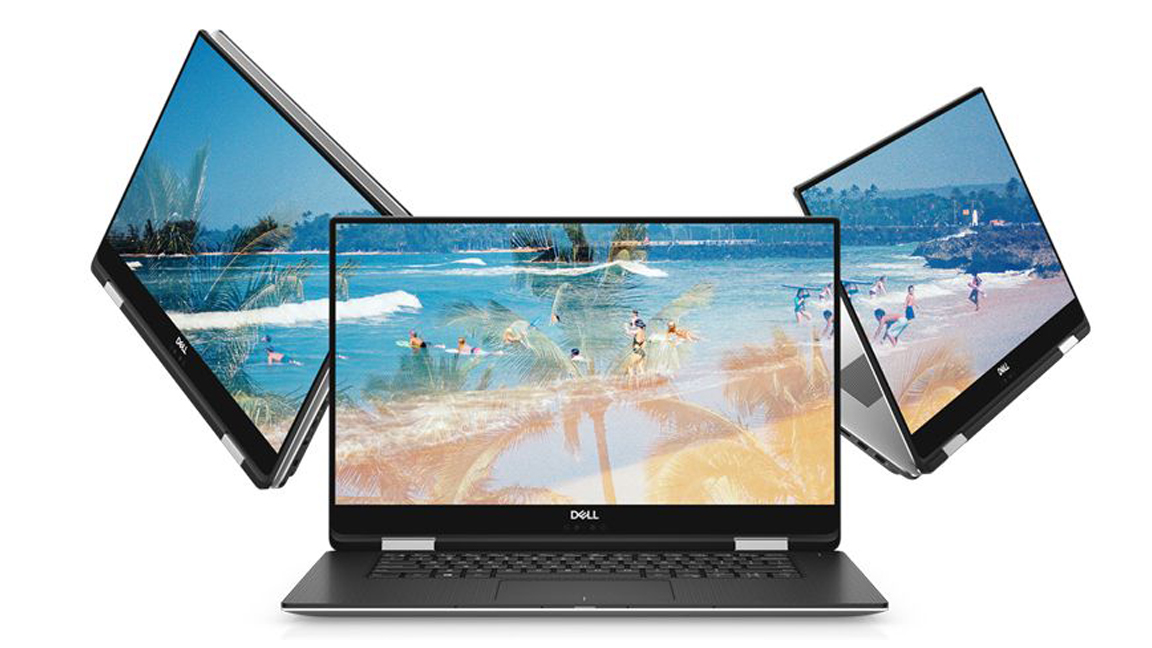
Dell XPS 15 2-in-1

Dell XPS 15 2-in-1 is possibly among the most coveted 2-in-1 laptops.

Are you in the market for one of the best 2 in 1 laptops which can provide solid performance and serious horsepower? Well, you’ll find it in the Dell XPS 15, which incidentally also gets our vote as one of the best Ultrabooks you can buy today. This 2-in-1 is possibly among the most coveted 2-in-1 laptops – with discrete class Radeon RX Vega graphics to boot. With it, you get a spectacular convertible that doesn’t sacrifice sheer power. So, while it comes with a price tag that’s a bit on the high end, it’s also completely worth breaking open the piggy bank.

Read the full review: Dell XPS 15 2-in-1 

Microsoft Surface Book 2 (13-inch)

Microsoft Surface Book 2 (13-inch) features cutting-edge 8th-generation processors as well as Nvidia 10-series graphics.

We had nothing but love for the first Surface Book so when we heard that there was going to be a 15-inch Surface Book 2, we could barely contain our excitement. In the end though, the Microsoft Surface Pro 2 didn’t end up being the best 2-in-1 laptop out there. However, it’s still a notable machine, even if it’s held back by a few compromises that were necessary to begin with. This 2-in-1 laptop features cutting-edge 8th-generation processors as well as Nvidia 10-series graphics for gamers and creatives alike. Combine that with its unique convertible solution, and the Surface Book 2 is an ace in our book.

Read the full review: Microsoft Surface Book 2 (13-inch)

Lenovo Yoga C930

Lenovo Yoga C930 is a strong contender for consumers light on cash.

Sleek, thin and with solid specs to boot, the new Lenovo Yoga C930 is definitely worthy of a spot in the best 2 in 1 laptops list. And, that’s without stating the fact that it now offers a 4K display model, so that high-end viewing experience and decent gaming might be had once users have gotten their day-to-day workload out of the way. This 2-in-1 is a strong contender for consumers light on cash, but if you do decide to go for gold, be ready to break the bank.

Read the full review: Lenovo Yoga C930

Microsoft Surface Book 2 (15-inch)

Microsoft Surface Book 2 (15-inch) boasts its long battery life and high-end specs.

It’s no secret that we’re fans of the Microsoft Surface Book 2 13-inch, seeing as how we just raved about it earlier in this list. But how about its 15-inch brother? Well, with its long battery life, high-end specs that will power through the demands of a day-to-day workload as well as a lot of entertainment, and of course, its unique design features, we’re apt to feel the same way. This model isn’t for the economical shoppers, however. Still, if you do have the money, its base model with 256GB storage is well worth the cost and is among the best 2 in 1 laptops money can buy.

Read the full review: Microsoft Surface Book 2 (15-inch)

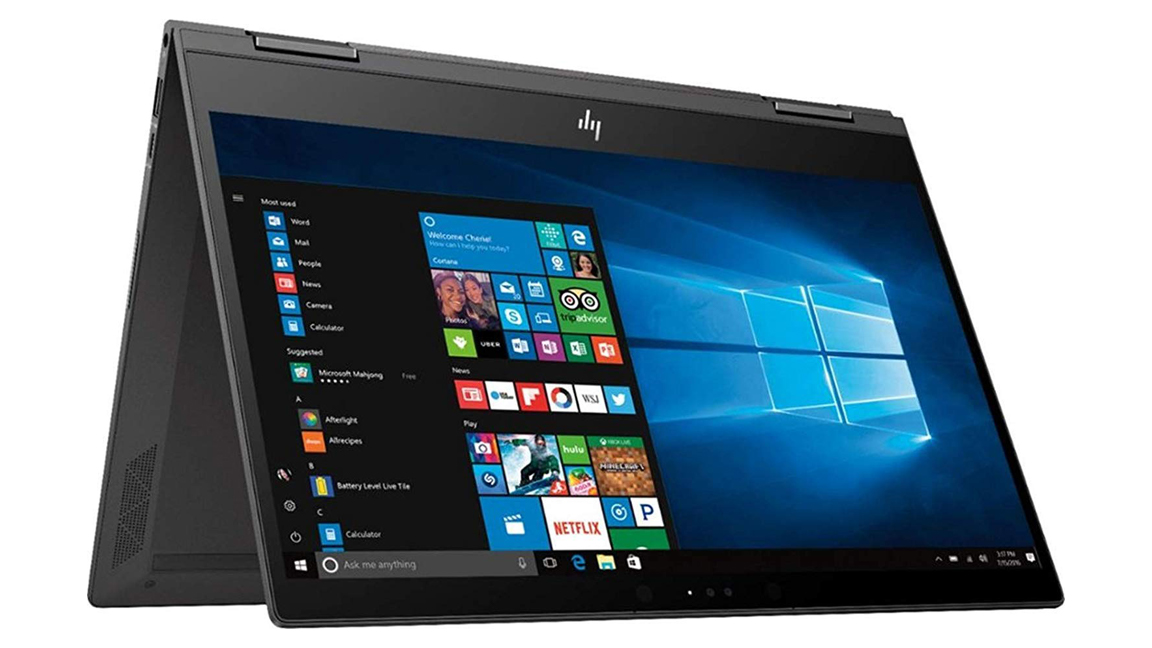
HP Envy x360 13 (2019)

HP Envy x360 (2019) offers a premium build and 9 hours of video playback, to start.

Thanks to its sleek, 13-inch design, this 2-in-1 is leaner that you might have expected, which works in your favor when engaging it in tablet mode. There are other compelling reasons why the HP Envy x360 (2019) is worth considering when you’re on the lookout for the best 2 in 1 laptops. This HP beauty offers a premium build, boasts 9 hours of video playback and delivers a performance that will get you through most of your schoolwork and project, at a very reasonable price.

Read the full review: HP Envy x360 (2019)

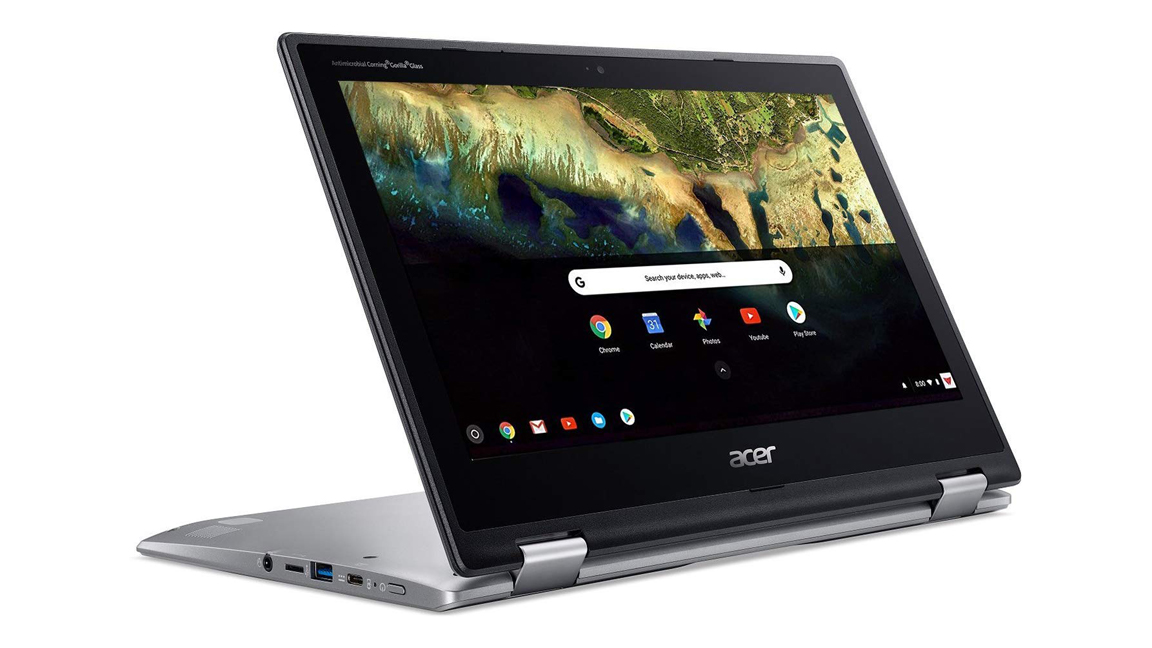
Acer Chromebook Spin 11

Acer Chromebook Spin 11 is one of the best Chromebooks to have hit the shelves to date.

Acer has a knack for designing reasonably priced laptops that are reliable enough for your typical productivity tasks and some viewing pleasures. They’ve proved that once again with their cut-rate contender, the Acer Chromebook Spin 11, declared by many as one of the best Chromebooks to have hit the shelves to date. Some compromises were made, justifiably considering its low price, including that middling battery life. But for budget buyers who are unlikely to tackle processor-intensive work, this one’s for the books.

Read the full review: Acer Chromebook Spin 11

Gabe Carey, Bill Thomas and Michelle Rae Uy have also contributed to this article

Images Credit: TechRadar


TechRadar: Cameras and camcorder reviews

Posted in Camera Reviews | Tagged , , , , , , | Leave a comment

Canon CA Sale — Save Up To $700.00 on EOS R and RP

Canon CA just announced an EOS R and EOS RP sale with savings up to $ 700.00. Notable is the $ 400.00 savings on the EOS RP with free lens mount adapter. (thanks David)

Canon, Nikon, and Sony News, Deals and What’s New at The-Digital-Picture.com

Posted in Photo Equipment | Tagged , , , | Leave a comment

Prime Lens vs Zoom Lens – Find Out Which is Best Suited to You

The post Prime Lens vs Zoom Lens – Find Out Which is Best Suited to You appeared first on Digital Photography School. It was authored by Simon Bond.

prime-lens-vs-zoom-lens

An important discussion in photography circles revolves around which lenses you use. The answer to this question will certainly rest on the type of photographer you are. The needs of a landscape photographer are very different to those of a portrait photographer. In this article, we’ll look at prime lens vs zoom lens, and you’ll be able to decide which is the right setup for you.

It’s possible you’ll go for a mixture of both lens types, or you might keep to just prime or just zoom. Read on and find out the pros and cons of both of these lens types.

Image: This photo was taken using a wide-angle zoom lens. Zooms lens are great for dynamic situation...

This photo was taken using a wide-angle zoom lens. Zooms lens are great for dynamic situations that may require a quick change in focal length.

What type of lenses are there?

There are many lenses on the photography market, it’s not all about zoom lens vs primes lens. The focal length of your lens can also have a defining impact on your photo as well. So in addition to zoom vs prime, you also have 5 subcategories to consider.

The below focal lengths reflect a full-frame camera. For crop-sensor cameras, you’ll need to apply the crop factor to these focal lengths. This crop factor can be between 1.2 to 2, depending on your camera. For example, if your camera has a crop factor of 1.5, then a 17mm full-frame lens is the equivalent of 25mm on the crop sensor (17 x 1.5).

  • Super wide-angle – 21mm or less.
  • Wide-angle – 21 to 35mm.
  • Standard – 35 to 70mm.
  • Standard telephoto – 70 to 135mm.
  • Telephoto – 135mm and above.

These categories are worth considering. If you choose to mix and match your zoom lens with your prime lens, then perhaps having zoom for the telephoto end of these focal lengths, and prime for the standard and a wide-angle lens is an option. As there is a limit to the number of lenses you’re going to carry if you’re on location, some tough decisions need to be made.

Ideally, you’ll carry two or three lenses with you, in addition to your camera body.

Image: Prime lens are of fixed focal length. Here you can see a 135mm, a 50mm and a 100mm lens. The...

Prime lens are of fixed focal length. Here you can see a 135mm, a 50mm and a 100mm lens. The 100mm is a macro lens.

What’s a prime lens

A prime lens is a lens with a fixed focal length that you can’t change. The most well-known prime lens is the 50mm, it’s probably the first prime lens most photographers will use. So why would you use a lens like this, when you can’t quickly change the focal length? There are several advantages.

  • Weight – These lenses are often a lot less heavy than zoom lenses.
  • Maximum aperture – With apertures that go down to f1 in some cases, they beat zoom lenses by a long way.
  • Composition – Having one focal length can be an advantage for composition, since it forces you to find compositions within the focal length you have available. This process will improve your photography skills.
Image: This photo was taken using the 135mm F2. It’s low light, and the background has been bl...

This photo was taken using the 135mm F2. It’s low light, and the background has been blurred by the high aperture.

When to use a prime lens

Prime lenses are considered best for portrait photography but don’t discount them for landscape photography as well. The 14mm prime lenses can be exceptional when it comes to landscapes. Plus, that large aperture means they’ll outperform their zoom lens counterparts when it comes to niche fields like astrophotography where you want to photograph the milkyway.

So here is a selection of situations you’d choose a prime lens.

  • Portrait photography – This works well for both studio and environmental portrait work. You can control where your model stands, and therefore the fixed focal length is less of an issue. The large aperture then allows you to blur out the background for a pleasing photo.
  • Street photography – The most well-known street photography lens is the 50mm. That’s because it combines a focal length that similar to what you see with your eye and a nice large aperture for low-light street photography. There are other nice focal lengths for street photography like the 35mm, or even the 135mm.
  • Low light – Once it gets dark, you have the option of using a tripod, but what if you’re subject is moving and you want them to be sharp? This is where a fast prime lens will work the best. Think of a night time festival, and the best lens is going to be a prime lens.
  • To produce bokeh – While zoom lens can still produce bokeh, especially at f2.8, the best bokeh will be produced with a prime lens using a large aperture.
Image: A zoom lens can have it’s focal length changed. Here you can see a 28-105mm lens and a...

A zoom lens can have it’s focal length changed. Here you can see a 28-105mm lens and a 70-300mm lens.

What’s a zoom lens?

Okay, next up in the prime lens vs zoom lens debate is, of course, the zoom lens. These lenses have a variable focal length, which in the majority of cases can be manually adjusted.

The ability to quickly change focal lengths can be vital for certain situations that are constantly changing. Think of wedding, event or sports photography. In fact, many landscape and portrait photographers choose zoom lenses because they don’t want to keep changing lens in order to change focal length.

So what’s the drawback to this, and what are the advantages?

  • Quick change – The ability to quickly change the focal length to suit the photo that’s suddenly before you can be make or break when it comes to getting the photo.
  • Weight – The downside is that zoom lenses weigh more than prime lenses, though to some there is the other argument. You would need multiple primes lenses to cover the focal range a zoom lens offers, and the combined weight of these may well exceed the one zoom lens.
  • Aperture – There is no disguising the fact zoom lenses don’t offer as large an aperture. The most expensive zoom lens will go to f2.8, but with that aperture comes even more weight to carry.
Image: A zoom burst photo is something only a zoom lens can achieve.

A zoom burst photo is something only a zoom lens can achieve.

When would you use a zoom lens?

A zoom lens is a versatile lens that can be used in many situations, owing to its ability to change the focal length.

There are some situations where it’s particularly good though, and you’ll see those listed below. It should be noted that those zoom lenses with an aperture of f2.8, will also work very well for portrait photography – it’s just these lenses are heavy.

  • Event photography – Functions or weddings often have photographers recording those events. Having a lens that allows you to change focal length is essential for these.
  • Sports photography – Sports photography also needs a lens that can have its focal length changed. It also needs to be fast, so using an f2.8 zoom lens is important here.
  • Travel photographyTravel photography is the definition of needing to be a jack of all trades. You need to capture landscapes, food, street, and event-style photos when there is a festival. As you’re traveling, you also have limited space in your bag. A zoom lens with differing focal lengths that’s not too heavy is ideal here, so think of a zoom lens with an aperture of f4.
  • Zoom burstThis is a technique that specifically requires a zoom lens. In order to implement this technique, you need to change the focal length of your lens during an exposure.

Prime lens vs zoom lens

So you have a choice between the lighter primes lenses with their large apertures or the more versatile zoom lenses that allow you to change the focal length but are often much heavier to carry.

Which is the correct choice for you?

A lot of photographers will feel f2.8 is a large enough aperture for them and go for three zoom lenses that cover wide-angle, standard, and telephoto focal lengths. However, that’s going to be a very heavy bag to carry. And, add in a tripod, and you might need to make friends with a chiropractor before long.

Image: This photo shows bokeh created using a prime lens.

This photo shows bokeh created using a prime lens.

Which lens goes in your bag?

Primes lens vs zoom lens have their pluses and minuses, but for some photographers, there will be clear winners. Take a look at this list of photographer types, and the lenses typically used by these photographers.

  • Wedding photographer – The workhorse lens for you will be the 24-70mm zoom lens with an aperture of f2.8. Those focal lengths will cover almost everything you need to photograph. A wide-angle zoom is also worth carrying. Occasionally there is time for a portrait session during the wedding day, so packing one prime lens for this, perhaps the 85mm f1.4, is a good idea.
  • Street photographer – The 50mm f1.8 is a great lens, however, if you have more money, get the f1.4 or f1.2. As an alternative, the 135mm f2 also works very well.
  • Travel photographer – A wide-angle zoom for many situations, and because you’re traveling, use an f4 so it’s lighter weight. A decent prime lens like the 50mm, because, like the street photographer, you’ll want to capture those people scenes. Then a telephoto zoom for day’s you’re photographing a festival and you need the extra reach. Or perhaps there is a landscape that needs to be compressed.
  • Landscape photographer – A wide-angle lens is a must, however, this could be a zoom or a prime. If you like photographing the Milkyway, you need an aperture of at least f2.8. However, if you get a wide-angle prime lens, you can get even larger apertures, and this will help your astrophotography. There are plenty of landscape photos that need extra reach though, and only work with compression, so getting a telephoto zoom is a great move.

What lens do you like the most?

The debate over prime lens vs zoom lens won’t be settled in this article. It’s too complex for that, and it really depends on what type of photography you do. We’d love to hear your opinions at digital photography school. What type of photographer are you, and what lens preference do you have? As always we’d love you to share your thoughts and photographs in the comments section of this article. Thanks for reading.


The post Prime Lens vs Zoom Lens – Find Out Which is Best Suited to You appeared first on Digital Photography School. It was authored by Simon Bond.


Digital Photography School

Posted in Digital Photography | Tagged , , , , , | Leave a comment

Tips on Capturing Architectural Photography

Photography is enjoyable and can be lucrative. There are a number of specialized fields within the industry, one of which is architectural photography. As a specialized field, architectural photography has a small but competitive group of photographers all competing to get ahead, and photographers need to be focused.

photography tips for architectural shots

Photo by Maria Eklind; ISO 400, f/5.6, 1/125-second exposure.

Architectural photography requires skill, the determination to succeed, and attention to detail. Unlike portrait photography and landscape photography, architectural photography involves the ability to capture the character and essence of an inanimate object as though it had a personality.

Understanding certain aspects of architecture will enable the photographer to produce high quality photographs with a sense of depth and character. It is also recommended to spend some time scouting the location at different times of day to appreciate the play of light on the subject of the photographs as well as the flow of traffic around the building that may affect the shoot.

Understanding composition is a fundamental skill required for architectural photography to be able to incorporate enough of the building under study to get the perfect picture. Capturing a random corner of a building incorrectly will simply result in a strange photograph of some random corner of a building. However, capturing the corner of the building with the archways accentuated by the afternoon light shows more to the viewer and gets the point across.

It’s also critical for photographers to understand the way certain building materials photograph under certain circumstances. Certain colors and textures can bounce light off them while others absorb light, and understanding these effects will allow you to capture the shot at a time of day that compliments each of these colors and textures to create the perfect photograph.

If the architecture requires photographs to be taken indoors, the ability to bounce a flash or to diffuse it is vital. It’s important to know whether to bounce the flash off a surface or to diffuse it to soften the effect.

Architectural photography is always undertaken on site, and this requires the photographer to be prepared. Being prepared involves a number of things that are often underestimated, such as having enough fully charged batteries and enough empty memory cards. You do not want to find yourself midway though a photo shoot, with the perfect light at that specific time of day and run out of battery power.

how to capture architectural photography

Photo by Daniel Mennerich

Another often neglected key preparation is the weather. Having scouted a building for the correct time of day for the lighting to be perfect, it will be disappointing to find that once you start taking photos, the clouds move over and your shot is lost.

Architectural photography is a growing industry and it’s imperative that photographers stay up to date on the latest technological advances in photographic equipment, latest developments and features in architecture, and tricks of the industry to ensure they remain at the top of the game. In an ever expanding industry, the competition is always on the search to gain an edge over the competition. We would like to thank you for the interest in this subject, if you have any questions concerning this type of photography please see our resource box below for our contact information.

Article Written by EJ Domingue
Photos 2 Geaux for Architectural Photography
Gueydan, LA. 70542

Go to full article: Tips on Capturing Architectural Photography

What are your thoughts on this article? Join the discussion on Facebook

PictureCorrect subscribers can also learn more today with our #1 bestseller: The Photography Tutorial eBook

The post Tips on Capturing Architectural Photography appeared first on PictureCorrect.

PictureCorrect

Posted in Photo Techniques | Tagged , , , | Leave a comment

OPPO Reno 3 leaks sporting 90Hz refresh rate screen and Snapdragon 735 chip

Oppo Reno 3 has been spotted on a post on Weibo. The company recently launched its Oppo Reno2 range in India with its iconic shark-fin pop-up camera. Now, this is an interesting development considering the rumors about Oppo Reno S surfaced just a few weeks back and was reported by 91Mobiles.

According to the leaked specifications sheet, the Oppo Reno 3 could feature a 90Hz refresh rate display powered by yet unannounced Snapdragon 735 chipset. Qualcomm is expected to announce this chip by the end of the year, so it definitely falls in line with the Reno 3 rumored launch.

Oppo Reno 3 leaked specifications, features and pricing

The Reno 3 is expected to feature a 6.5-inch Full HD+ (2400 x 1080 pixels) resolution AMOLED screen with a 90Hz refresh rate. Qualcomm Snapdragon 735 processor powers it with 8GB RAM and 128GB/256GB storage variants. There's an in-display fingerprint sensor which we expect to be of the optical kind.

Oppo Reno 3 is speculated to feature a quad-camera setup on the back. It includes a 60MP primary camera with an 8MP ultra-wide lens, a 13MP telephoto camera, and a 2MP depth sensor. While the design of the phone is unknown, Oppo could continue using the shark-fin pop-up front camera design, which has not come to represent the Reno series. There's a 32MP selfie camera on the front, according to the leaked specs.

The phone could have a 4,500mAh battery that supports the 30W VOOC 4.0 fast-charging standard. It is also expected to support 5G networks.

Oppo Reno 3 is expected to be priced starting at CNY 3,299 for the 128GB variant and CNY 3,599 for the 256GB version.


TechRadar: Photography & video capture news

Posted in Photography | Tagged , , , , , , , , , | Leave a comment

Leica SL2 full-frame mirrorless camera steps it up a notch with 187MP images

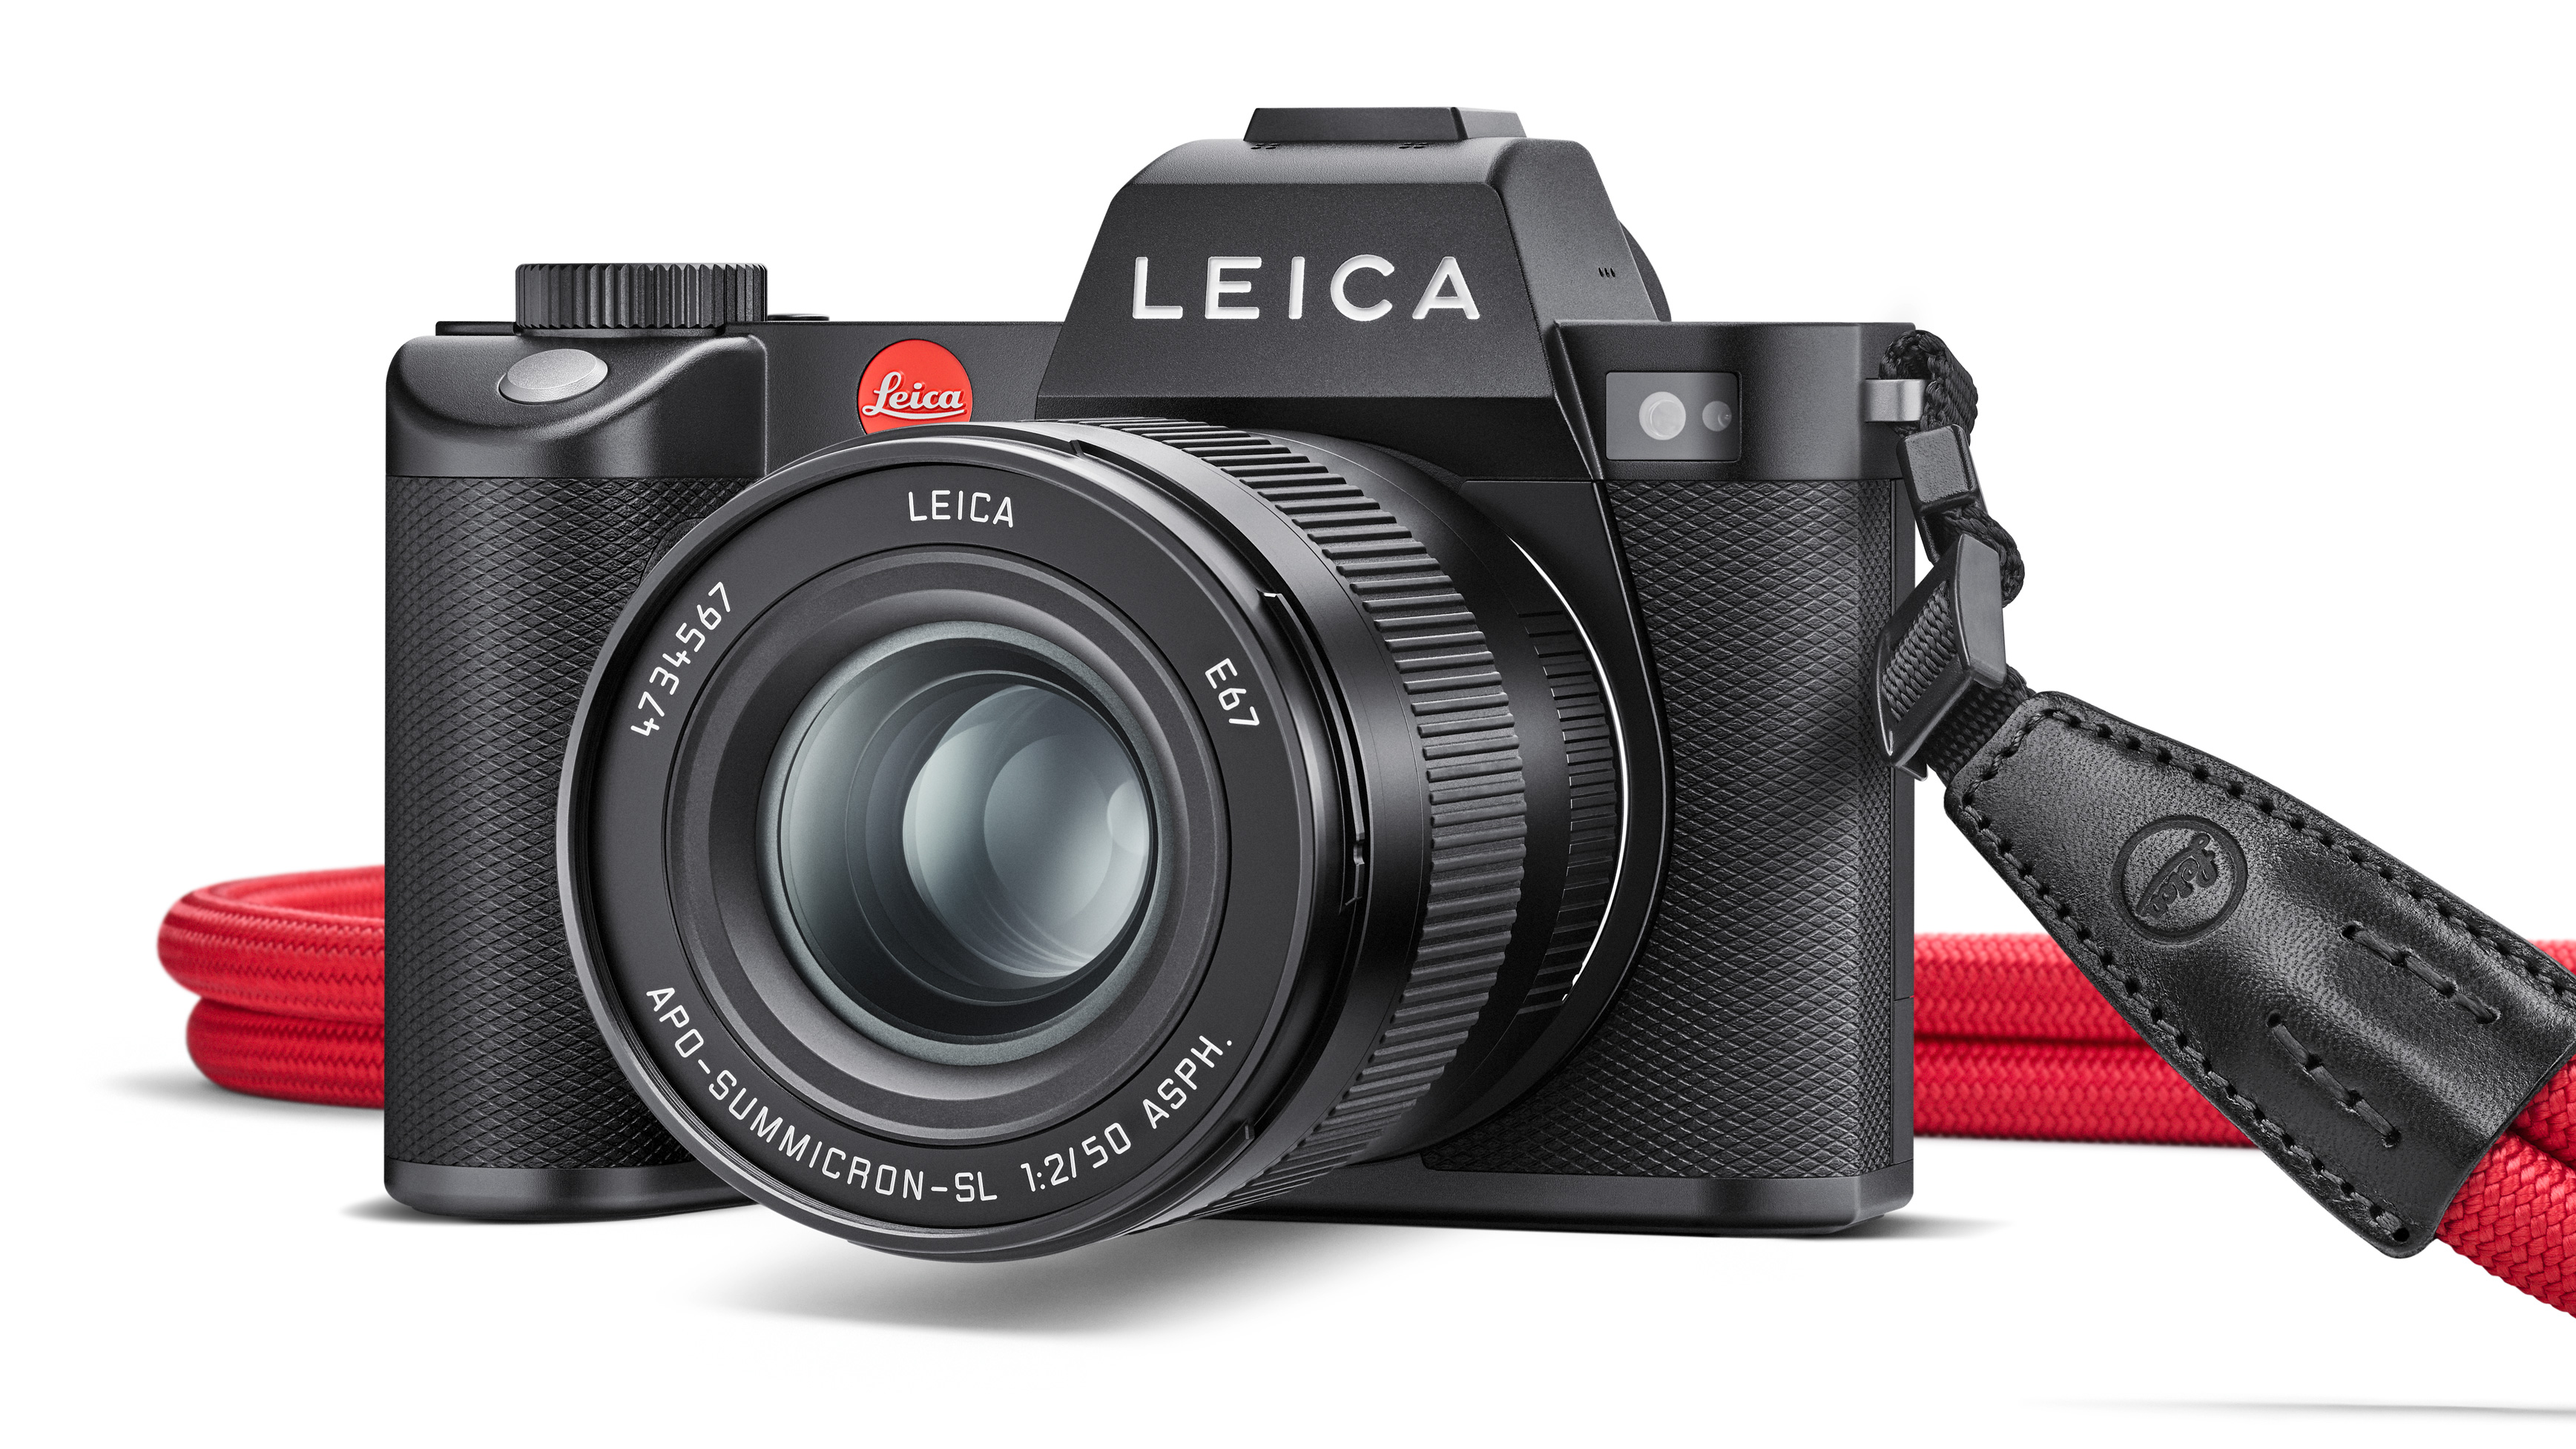
Leica has debuted the second edition of its SL full-frame mirrorless camera, taking about four years to perfect the new SL2. That time, it seems, was well spent, with Leica pretty much overhauling the original SL to bring us a snapper with a tougher, redesigned body, a higher resolution sensor, a shiny new rear touchscreen and an upgraded electronic viewfinder (EVF).

Built around the same 47MP full-frame CMOS sensor that debuted in the Leica Q2 (a major step up from the 24 million effective pixels in the SL), the SL2 boasts a magnesium chassis with aluminum for the top and bottom plates, where earlier the entire camera was made from two blocks of aluminum. The new camera comes with an IP54 dust- and water-resistance rating, and features an updated button layout that resembles the control setup on the Leica Q2 and the CL compacts.

The sensor has an ISO range of 50 to 50000, with the promise of "enormous dynamic range" that, Leica says, will deliver an "unparalleled level of detail rendition and image quality".

Competition is brewing

There are numerous similarities between the Leica SL2 and the Panasonic Lumix S1R, and it's not just the 47MP sensor – that, though, shouldn't come as a surprise as both companies belong to the L-mount Alliance.

Like the S1R, the SL2 arrives with five-axis image stabilization built in, sharing the same 5.5EV (exposure value) shake compensation. Even the EVF on both cameras has the same 5.76 million dot resolution.

There's a 225-area contrast autofocus system with 'depth mapping' available on board the SL2, which sounds rather similar to the 225-area Depth From Defocus AF system in the Panasonic. There’s even an eight-image multishot mode on the SL2 that produces 187MP composites, just like the High Resolution Mode on the Lumix S1R.

What's different, though, is the imaging engine: the SL2 uses Leica's very own Maestro III processor that gives the new camera a maximum burst speed of 10fps with a mechanical shutter and 20fps with an electronic shutter. Buffer depth is also very respectable, with over hundred JPEGs or 78 DNGs (Adobe's Digital Negative Raw file format) being saved to card.

Video specs will be familiar to Panasonic Lumix S users, with the Leica capable of 4K recording at up 60fps and 1080p at up to 180fps.

With so much shared DNA, it's safe to say the SL2 will perform just as well as the Lumix S1R.

Climbing the L mount

Unlike the Panasonic Lumix S series cameras, Leica's offerings are expensive, and the lenses aren't cheap either. Thanks to the L-mount Alliance, though, Leica fans can use the L-mount glass being made by Panasonic and Sigma, giving users a lot more choice and flexibility.

That said, Leica's older M, S and R lenses can also be used with the SL2 along with a lens adaptor.

The Leica SL2 is already available for pre-order and will begin shipping on November 21 with a price tag of $ 5,995 / £5,300 / AU$ 9,900 for the body alone. You might be forgiven for thinking that's expensive, but then we've come to expect that from Leica.


TechRadar: Cameras and camcorder reviews

Posted in Camera Reviews | Tagged , , , , , , , | Leave a comment

How to Achieve the Perfect White Balance in Lightroom

The post How to Achieve the Perfect White Balance in Lightroom appeared first on Digital Photography School. It was authored by Simon Ringsmuth.

perfect-white-balance-in-lightroom

Achieving the perfect white balance in your pictures can seem like a futile gesture. Don Quixote tilting at windmills is as nothing compared to finding the harmony that exists somewhere between 2,000 and 10,000 Kelvin! Photographers have wasted away before it, entranced by what they have seen, or been driven mad by their desire to get their pictures looking pixel-perfect with the ideal white balance that seems ever just out of reach. Fret not! With a few tips on adjusting white balance in Lightroom, you’ll be turning out beautiful photos in no time.

perfect-white-balance-in-lightroom

Understanding white balance can be a little tricky, but basically, what you are doing is giving your camera or computer a reference point to calculate all the colors in an image. It’s similar to explaining the size of something like a box or a bowl. Unless you have precise measurements, you need to compare it to a common object, so people have a frame of reference.

Image: White balance is like a banana: it’s a reference point.

White balance is like a banana: it’s a reference point.

Digital cameras use white balance as a way of knowing how all the colors in an image should appear. It’s true north on the color compass, so to speak, and helps inform the values for every other color in the image. By using white balance as the foundation for color calculation, your camera will then adjust what everything else is supposed to look like.

Since colors change under different lighting conditions, white balance is often the key to getting your pictures to look just how you want them.

Image: Temp: 5250K, +39 Tint

Temp: 5250K, +39 Tint

The image above has a crisp, bright appearance that seems fitting after a midsummer rain shower. This is mostly due to setting the white balance to mimic the tones of natural daylight.

Image: Temp: 7274K, Tint +26

Temp: 7274K, Tint +26

A change in the Temperature and Tint resulted in an image that seems as though it was shot in the early morning, or perhaps in a warmer climate. This one feels more comforting, while the top photo might be more true-to-life.

All cameras have an Auto white balance setting, which tries to interpret color based on an analysis of the perceived lighting conditions at the time a shot is taken. However, that doesn’t mean it’s the correct white balance. It’s just one particular value that your camera thinks might be appropriate given the algorithms it has been programmed with by the manufacturer.

The nice thing about white balance is that, like almost everything artistic, it’s entirely subjective. You can make your white balance be whatever you want! It’s a tool to make your pictures look not how someone else thinks they are supposed to look, but how you want them to look. Realizing this helped me immensely over the years, and refocused my editing process altogether. No longer do I look for the correct white balance, but instead, I try to find an accurate white balance given how I want my pictures to appear.

How to Achieve the Perfect White Balance in Lightroom

Shoot in RAW

You can use myriad tools to set your white balance at the time you shoot your pictures. Most cameras have presets like Sunny, Cloudy, Fluorescent, etc., to make sure your white balance is properly calibrated for your given shooting conditions.

However, the option that gives you the most creative freedom isn’t any of these at all. It’s the Photo Quality setting, and the first step to achieving white balance nirvana is to shoot in RAW. This lets you fine-tune the white balance ex post facto so you can edit and tweak in Lightroom rather than worrying about getting it right when you click the shutter.

perfect-white-balance-in-lightroom

Adjust the sliders in Lightroom left or right to change the color temperature and tint. Click the eyedropper to select a neutral color for setting the white balance. Use the Select Menu in the top-right to access various white balance presets.

Post-processing is where the real fun begins because when you shoot in RAW, you can edit your picture however you want. If you want your pictures to look warmer, you can adjust the white balance sliders accordingly. If you prefer a cooler look, you can do that too. The point is there is no correct value for white balance on any given picture – the end result is what matters. What that looks like can be entirely up to you.

Setting white balance in Lightroom

Changing white balance in Lightroom is fairly simple, but there are various options you can use to make the process easier and more customizable.

I like to start with the Eyedropper Tool, which lets you specify white balance by clicking on an area of your photo that is almost white. You’ll get the best results if you click on a slightly gray area. As you hover the eyedropper around your picture, you will see a preview of the results in the top-left corner.

Image: When selecting a target neutral color, look for a portion of your image that is slightly gray...

When selecting a target neutral color, look for a portion of your image that is slightly gray and not pure white. This is just a starting point though and should not be thought of as the final word on white balance.

Finally, you can specify your own white balance just by dragging the Temperature and Tint sliders left and right. You can streamline your editing process by copying and pasting the values into other pictures or use the sync feature to instantly apply them to an entire batch.

Finally, the way to set white balance is by using the preset options in the drop-down menu. These options are just preset values for the Temperature and Tint sliders similar to the white balance in any digital camera.

perfect-white-balance-in-lightroom

Creative customization

The mechanics of changing white balance are one thing, but the effect of changing white balance is another matter entirely. Say it with me: there is no such thing as correct white balance. Instead, your goal should be to create an accurate white balance – one that reflects your artistic intentions in terms of color, mood, and emotion.

Consider the following picture as an example. I shot this file in RAW and this is the result using Auto White Balance.

perfect-white-balance-in-lightroom

Temp: 4650K, Tint: +30

It looks fine, and there’s nothing wrong with the picture, but look what happens with a few clicks of the Temp and Tint sliders. I raised the Temperature and lowered the Tint, and the result is an entirely different image.

Image: Temp: 6758K, Tint: -9

Temp: 6758K, Tint: -9

This version feels much warmer and more intimate than the original, almost like rain has fallen on a parched plant. To change the image again, we can adjust the sliders for different values.

perfect-white-balance-in-lightroom

Temp: 3448K, Tint: +38

In the final version, the viewer is left wondering if those are drops of water or ice. The picture feels cold and distant and evokes an entirely different emotion than the second version.

Which image is the right one?

They all are, and for different reasons.

The point is to know what effect white balance has on your pictures and understand how to change it to get your images to look how you want them to look.

I use this technique all the time when shooting portraits. I used to fret and worry about finding the best white balance for each of my pictures when, in truth, I was putting the white balance cart before the emotional horse. Instead, I now ask myself what I want my clients to feel when they look at their pictures and then adjust white balance (along with other settings) accordingly.

The image below has been processed using Auto white balance.

Image: Temp: 6000K, Tint: +1

Temp: 6000K, Tint: +1

Much like the previous example with water drops on leaves, the results here aren’t bad. It’s a perfectly serviceable image that the client would probably be happy to have in their home. However, a few clicks on the white balance sliders can have a dramatic impact.

Image: Temp: 8285, Tint: +5

Temp: 8285, Tint: +5

This picture has a warmer tone and feels more comfortable. One might argue that the top picture is more true-to-life, while another person could prefer the saturated tones of the lower. The options for adjusting white balance, as with anything in photography, are endless. However, the point is to create an image that is pleasing to you.

Take a break

You might look at any of the examples in this article and immediately prefer one particular white balance setting over another. This happens to me during much of my editing sessions, as well. I find myself drawn to one version of a picture while entirely disregarding another. I find, walking away from my computer to reset my eyes is the best option.

After a brief respite from editing, I often find my initial editing preferences dashed to pieces. It helps me see my photos with a set of fresh eyes, especially after removing myself from technology even for just a few minutes. I often find that photos take on an entirely different appearance when coming back to them from a break. I will usually try new things with white balance that I didn’t think of initially.

Image: Temp: 5500K, Tint: +11

Temp: 5500K, Tint: +11

In the photo above, I went back and forth from warm to cool and back again before settling on a middle-ground approach that I preferred. If I had gone with my original instinct, I don’t think I would have liked the final result. Shooting in RAW, as well as trying different white balance options and finally taking a break from editing altogether, helped me arrive at what I felt was the best result.

How to Achieve the Perfect White Balance in Lightroom: Conclusion

Ultimately, the subjective nature of something as fundamental as white balance can seem a little scary. If there is no correct value, how can you even know where to start? There’s nothing wrong with using Auto, but I encourage you to experiment and try new settings you might not have thought of.

Just because your phone or your computer tells you that your picture should have a certain white balance doesn’t mean that’s the correct value. There is no correct value with creative editing! Tweaking and customizing the white balance is a great way to have creative control over your images to make them look the way you want.

Do you experiment with your white balance in Lightroom? Share with us your thoughts in the comments!

The post How to Achieve the Perfect White Balance in Lightroom appeared first on Digital Photography School. It was authored by Simon Ringsmuth.


Digital Photography School
Posted in Digital Photography | Tagged , , , , | Leave a comment

Canon EOS 90D and EOS M6 Mark II Noise Test Results

Noise test results have been added to the Canon EOS 90D and the EOS M6 Mark II reviews.
 
You are going to notice that the results from these two cameras appear remarkably similar. They are using the same imaging sensor and the same DIGIC processor and are expected to have identical image quality. As this is a very time consuming test, including carefully capturing 180 images and prepping a crop from each, I opted to fully test only one of the cameras (the 90D) and show the same results for the M6 II.
 
A full narrative of the results is coming soon. In the meantime, create your own comparisons including a look at dynamic range using the +/- exposure variations.
 
The Canon EOS 90D is in stock at B&H | Adorama | Amazon USA | WEX
 
Rent the Canon EOS 90D from Lensrentals.
 
The Canon EOS M6 Mark II is in stock at B&H | Adorama | Amazon USA | WEX
 
Rent the Canon EOS M6 Mark II from Lensrentals.

Canon, Nikon, and Sony News, Deals and What’s New at The-Digital-Picture.com

Posted in Photo Equipment | Tagged , , , , | Leave a comment

Best gaming mouse 2019: the best gaming mice we’ve tested

You shouldn’t game without the best gaming mouse on the market. In fact, to squeeze the optimal performance from the best gaming PCs, you’ll want to pay close attention to all the gaming mice available so that you can reach your full gaming potential, whether it’s competing in e-sports or digging into the newest first person shooter.

Look at more than just the price tag though, as it’s not always the best indicator of a quality peripheral. The SteelSeries Sensei 310, for instance, is an excellent mouse that looks good and has solid performance at a very reasonable price, making getting the best gaming mouse for you one of the easiest ways to max out your rig.

In 2019, this piece of hardware is as important as it’s ever been and you should definitely grab a mouse with excellent performance and that can take a beating. And while it’s easy to just pick the one with the highest price tag, why not look for one that also gives you excellent value – a characteristic for more than a few of our choices for the best gaming mouse on this list. And while you’re at it, don’t forget to grab the best gaming mouse pad, especially if you’re looking for RGB lighting or wireless charging capabilities.

Yes, there’s a whole horde of gaming mice to choose from more companies than ever before. It can be overwhelming deciding what the best gaming mouse for you is but that’s why we’ve put this list together. These picks have all been put through the ringer here at TechRadar so you can rest assured that these choices for best gaming mouse have been diligently tested and reviewed.

Also, take a look at our exclusive price comparison tool to decide where to get the best deal for your choice of best gaming mouse. Also, since the holiday season is upon us, keep abreast of upcoming excellent Black Friday 2019 deals. We’ll share any deals you should keep an eye out for here at TechRadar as the shopping season approaches.

Best gaming mice 2019 at a glance:

  1. SteelSeries Rival 710
  2. Razer Viper
  3. Corsair Harpoon Wireless
  4. Logitech G502 Hero
  5. Roccat Kain 120 AIMO
  6. Cooler Master MasterMouse MM520
  7. Razer Naga Trinity
  8. HyperX Pulsefire Surge RGB
  9. Corsair Ironclaw RGB
  10. Gigabyte Aorus M5

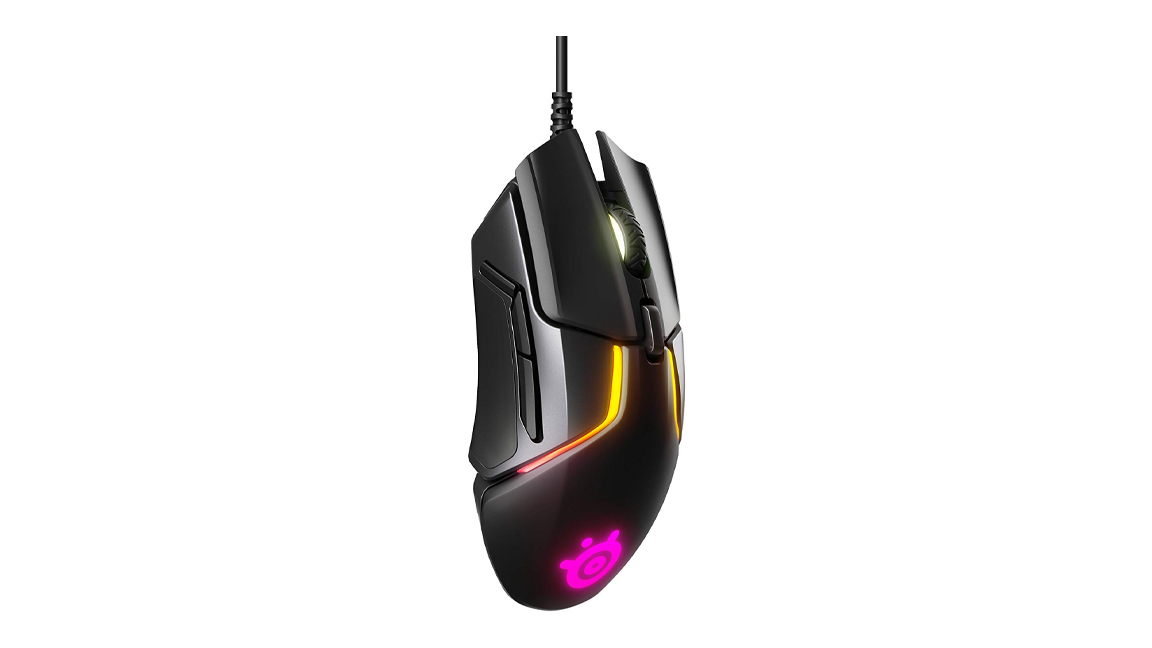
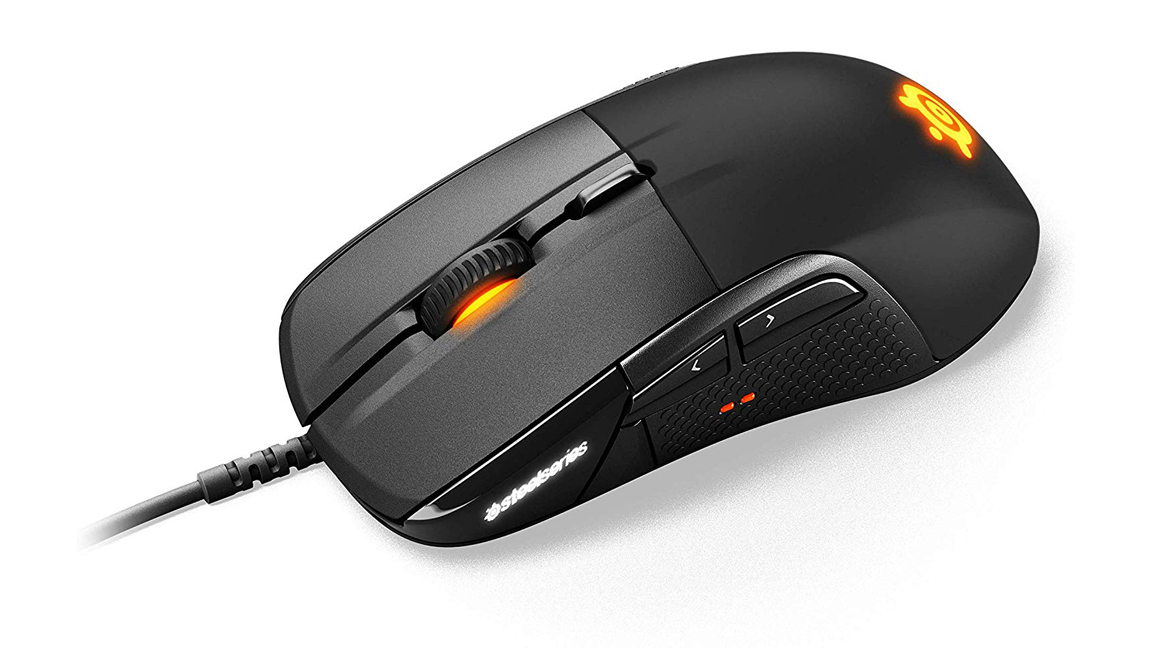
SteelSeries Rival 710

The features, balance and performance are all present in equal measure in the SteelSeries Rival 710.

When it comes to the best gaming mouse, features, balance and performance are all present in equal measure in the SteelSeries Rival 710, securing it a top spot on our list. This behemoth of a gaming mouse – at least, in terms of power – is a bit expensive, but when you weigh that price against the customizable OLED display, haptic feedback (great for you MOBA players) and excellent build quality, the SteelSeries Rival 710 is still a very solid purchase. The kicker? Everything is modular, even down to the sensor, so you never have to feel like you’re missing out on the latest tech.

Read the full review: SteelSeries Rival 710 

Razer Viper

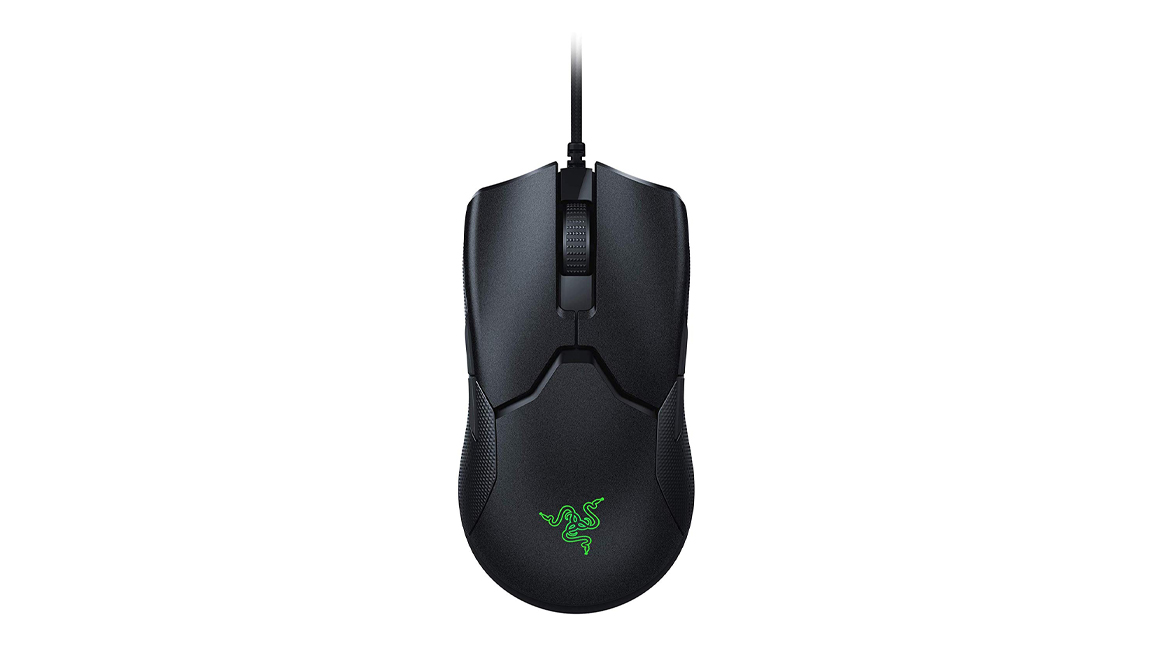
The Razer Viper is our new favorite esports gaming mouse.

There are a couple reasons why Razer Viper is our new favorite esports gaming mouse. Along with its lightweight ambidextrous design, true 16,000 DPI and Razer Chroma lighting, this powerful little mouse also features 1000 Hz Ultrapolling, Optical Mouse Switches rated for 70 million clicks and 8 independently programmable Hyperesponse buttons. If you want a gaming mouse to give you that extra competitive edge, you’ve found it here.

Read the full review: Razer Viper

Corsair Harpoon RGB Wireless

The Corsair Harpoon RGB Wireless is the poster child for this ideal price-and-performance match.

The best gaming mouse is always going to be the one that brings excellent performance at a reasonable price. And, the Corsair Harpoon RGB Wireless is the poster child for this ideal price-and-performance match. You’ll have a wireless mouse that has RGB lighting, touts a long battery life and doesn’t at all suck, for less than $ 50. The ergonomics unfortunately favor right-handed users, but at this price and with this impressive performance, there’s not much else to complain about.

Read the full review: Corsair Harpoon RGB Wireless

Logitech G502 Hero

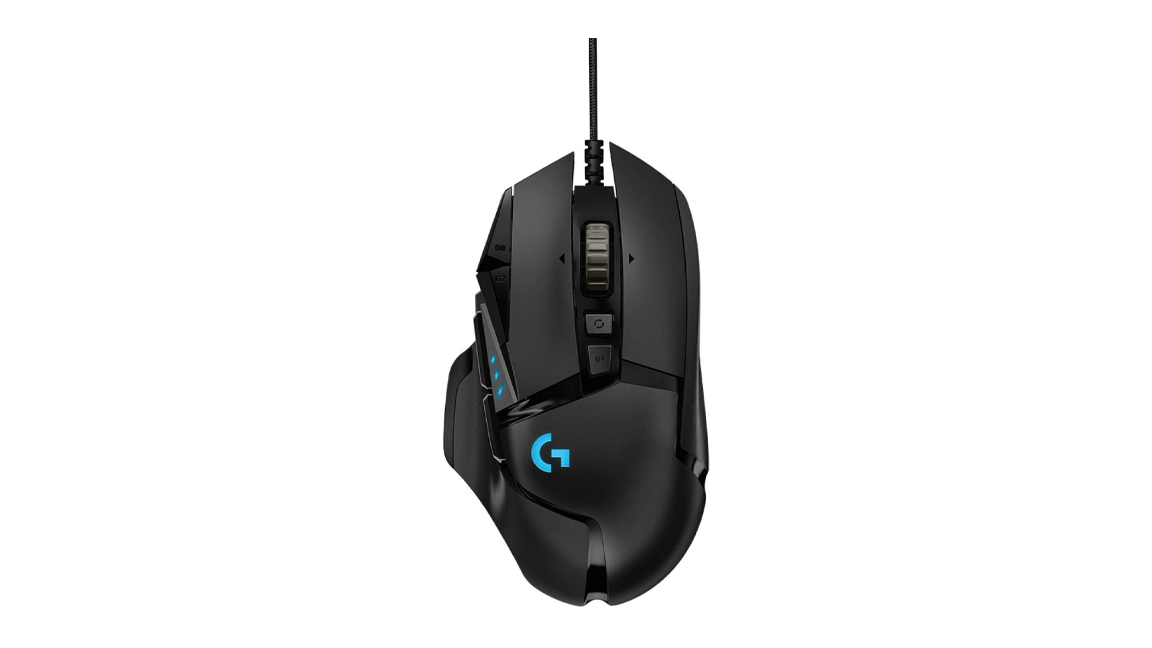
The Logitech G502 Hero breathes that “gaming life.”

Aesthetically, you generally have two main choices when you’re in the market for the best gaming mouse: a high-performing mouse that looks like it would fit in the office, or a mouse that lives and breathes that “gaming life.” The Logitech G502 fits squarely in the latter category, with its robotic design. But, if that doesn’t intimidate you, then you get adjustable weights, a jaw-dropping 16,000 DPI sensor and superb performance as well. It’s not ideal for users with bigger hands, but other than that, this one has definitely earned its spot in the best gaming mouse list.

Read the full review: Logitech G502 Hero 

Roccat Kain 120 AIMO

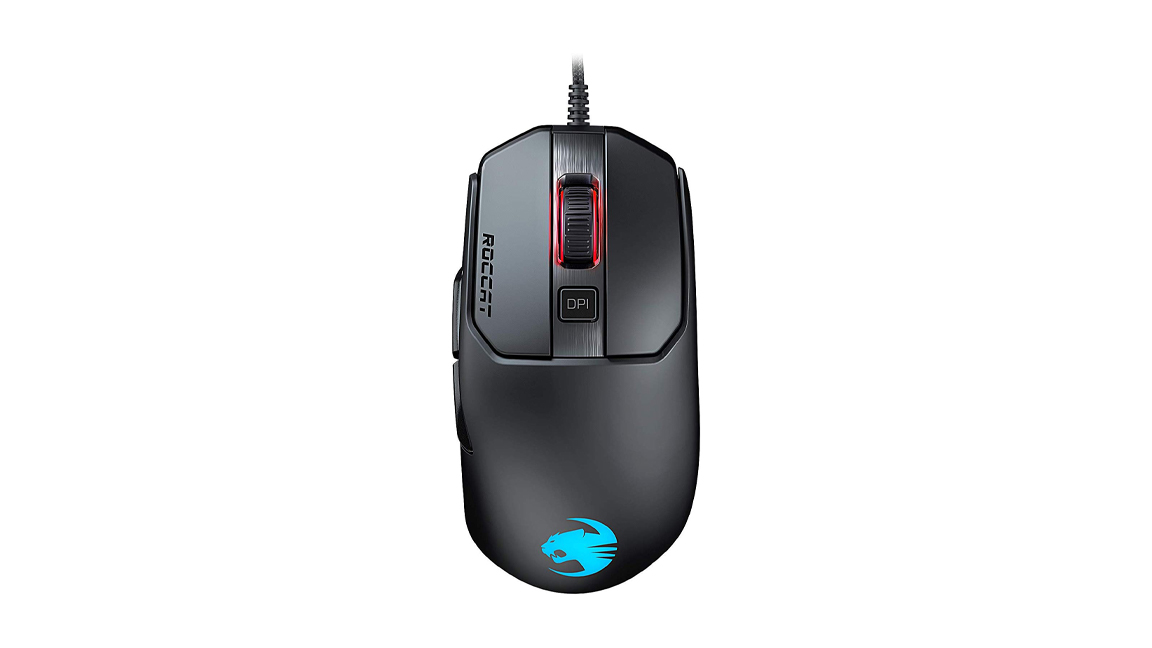
The Roccat Kain 120 AIMO is an affordable mid-range gaming mouse.

If you’re in the market for an affordable mid-range gaming mouse, then the Roccat Kain 120 AIMO may just be the best gaming mouse for you. To start, it’s got a great design and solid build, as well as a decent number of customization options that let you personalize it according to your gaming style and needs. Of course, it’s exceptional to use as well, satisfying, responsive, and very reliable. This new offering from Roccat will without a doubt give you that gaming edge.

Read the full review: Roccat Kain 120 AIMO

Cooler Master MasterMouse MM520

The Cooler Master MasterMouse MM520 is an ideal addition to your gaming rig.

If you’re searching for the best gaming mouse that’s both economical and functional, then the Cooler Master MasterMouse MM520 is an ideal addition to your gaming rig. It won’t win any beauty contests, but packing quality Omron switches and a relatively sensitive sensor capable of up to 12,000 DPI makes it a good purchase. Those make it easy to ignore the unappealing design – particularly if you use a claw grip.

Read the full review: Cooler Master MasterMouse MM520 

Razer Naga Trinity

The Razer Naga Trinity has always been fan favorites in the MMO community.

Have you been getting into the World of Warcraft: Classic lately? Then you’ll want to look into the Razer Naga Trinity. Razer’s Naga mice have always been fan favorites in the MMO community, and the manufacturer has taken things to the next level with Naga Trinity. With it, you’re getting three easily swappable side plates, allowing you to configure your mouse however you see fit. Add the insane 16,000 DPI sensor and Razer Chroma RGB lighting to the mix, and you’ll be topping the DPS meters in no time. Is there any doubt that the Razer Naga Trinity belongs on the list of the best gaming mouse?

Read the full review: Razer Naga Trinity 

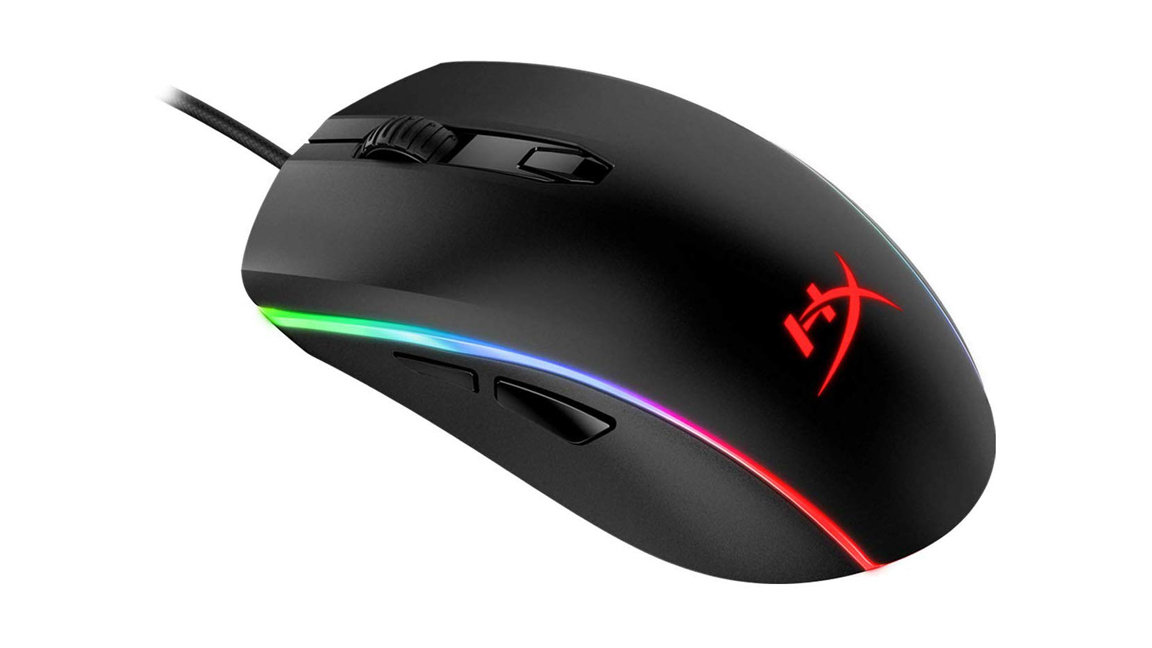
HyperX Pulsefire Surge RGB

The HyperX Pulsefire Surge boasts extremely reliable Omron switches and entrancing RGB lighting.

If you catch yourself rolling your eyes at some of the gaming mice out there in 2019 that sport ridiculous, over-the-top designs, then you should take a look at the HyperX Pulsefire Surge RGB. Boasting extremely reliable Omron switches and entrancing RGB lighting – not to mention, an impressive 16,000 DPI sensor – you’re scoring the best gaming mouse for an outstanding price. Plus, it’ll fit right into any office, at least once you turn down the lighting effects to show off its more accessible design.

Read the full review: HyperX Pulsefire Surge RGB 

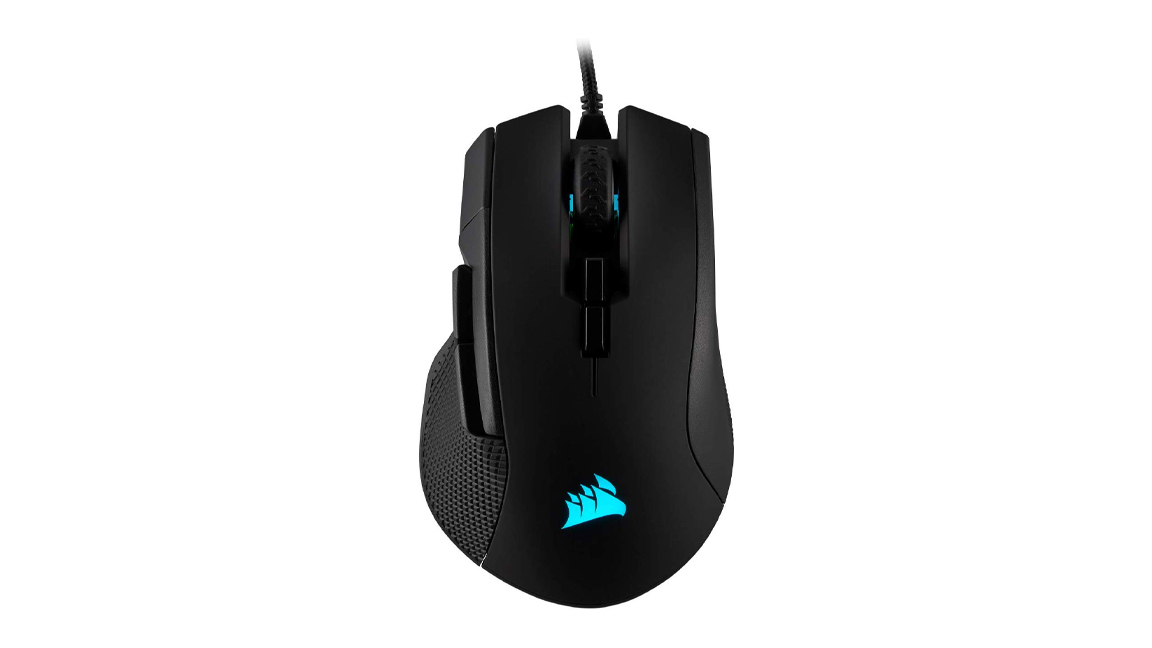
Corsair Ironclaw RGB

The Corsair IronClaw RGB is an eye-catching mouse for big-hand users.

Most of the best gaming mice on the market are either too small or too light, or even a bit of both, leaving gamers with big hands with few options. To make matters worse, some of the big mice out there come loaded with gratuitous buttons and weird shapes that make them more like asylum-seekers from an alien robot planet. The Corsair Ironclaw is just the opposite. It’s an eye-catching mouse for big-hand users, with a design that won’t make you want to squirrel it away in your desk drawer every time company comes around. It’s quite tough as well, so it can handle quite a bit of heavy use, making it the best gaming mouse for you.

Read the full review: Corsair Ironclaw RGB

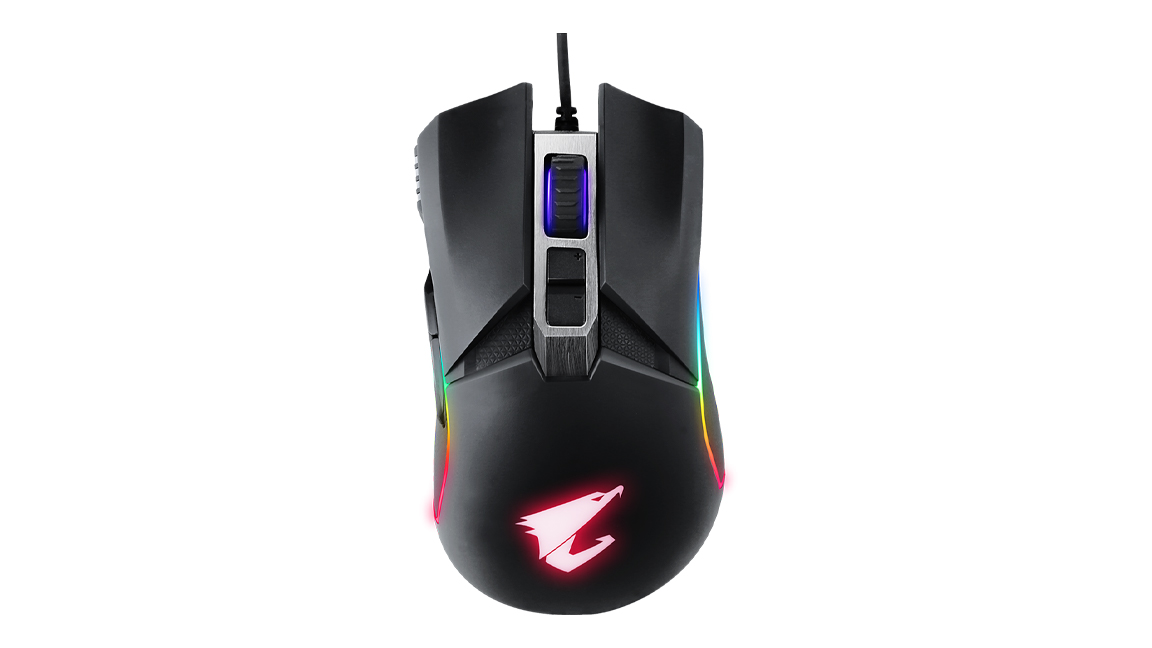
Gigabyte Aorus M5

The Gigabyte Aorus M5 is very customizable, and boasts great ergonomics and fun RGB lighting.

When you take stock of all its amazing features, it might shock you to learn that the Gigabyte Aorus M5 is only $ 69. This stunner is among the best gaming mouse of great value that we’ve tested this year. It’s also very customizable, not to mention boasts great ergonomics and fun RGB lighting. As far as features that will give you the gaming advantage, it boasts an adjustable weight distribution system, on-the-fly DPI adjustments and Omron switches tested for 50 million clicks, to start. If you’re looking for a mouse that gives you more bang for your buck, this is it.

Read the full review: Gigabyte Aorus M5

How to choose the best gaming mouse

While you’ll definitely find the best gaming mouse of your gaming dreams, doing so might take some time and effort. That’s expected; there’s a ton of complicated technical jargon that goes into the best gaming mice – terms like polling rates and DPI ratings that a regular buyer may not be familiar with. For the record, you’ll want a higher number of both, even though these two terms mean very different things.

For newcomers to the world of PC gaming, when you come across the term DPI, that is shorthand for ‘dots per inch.’ The higher the number, the wider the range wherein you can specify how sensitive your mouse is. If you don’t have a lot of desk space available, but you still want accuracy and precision, then opt for the best gaming mouse with a higher DPI rating that can toggle to a lower DPI, in case you get a bigger desk.

Meanwhile, a high polling rate means you’re getting faster response times. The polling rate is measured in hertz, and it usually ranges from around 125 to 1,000Hz. The latter means that your mouse’s position is reported to your computer 1,000 times per second.

Other key gaming mouse factors you’ll want to keep in mind are ergonomics – particularly if you’re left-handed – and RGB lighting.

Gabe Carey and Michelle Rae Uy have also contributed to this article

Welcome to TechRadar's PC Gaming Week 2019. We're celebrating the most powerful gaming platform on Earth with in-depth articles, exclusive interviews and essential buying guides that showcase everything PC gaming has to offer. Visit our PC Gaming Week 2019 page to see all our coverage in one place.


TechRadar: Photography & video capture news

Posted in Photography | Tagged , , , , , , | Leave a comment

11 Tips for Photographing Bears in Alaska

The post 11 Tips for Photographing Bears in Alaska appeared first on Digital Photography School. It was authored by André Costantini.

tips-for-photographing-bears-in-alaska

Alaska is the only state in the country that’s home to three types of bears: the polar bear, the black bear, and the brown bear. It’s why photographers converge annually on the Last Frontier, hoping to document ursine activity in the bears’ natural habitats, in such locations as the Anan Wildlife Observatory, Katmai National Park, and Admiralty Island, home to one of the world’s highest density of brown bears. Read on for tips on photographing bears in Alaska while these magnificent creatures eat, play, and interact.

photographing-bears-in-alaska

1. Pack light

To gain entry into sections of certain viewing areas that offer access to bear viewing, you’ll often have to take a seaplane. That means there may be weight restrictions, so limit your gear to one or two DSLRs or Mirrorless bodies with a couple of compact lenses. Add extra batteries, memory cards, any filters you like to use, and rain covers in case of inclement weather.

2. Make sure at least one of those lenses is a versatile zoom

You obviously want to stay a safe distance from the animals you’re photographing. The Tamron SP 150-600mm VC G2 lens is one such lens that offers such flexibility, with an extra-long reach. If you use that lens on a crop sensor camera, you’ll achieve even more effective magnification. Bird photographers often use a similar combination for that very reason.

11 Tips for Photographing Bears in Alaska

3. Plan your trip for optimal bear-watching opportunities

The best times of the year for bear watching in Alaska are June through September. If you want the chance to photograph them catching salmon in the rivers, July and August are your best bets. That’s the peak of the salmon runs (when the salmon is sparse, bears will eat things like clams and grass instead).

4. Head out early, stay out a little later

Although you’ll likely be able to spot bears at any time of day, they tend to be out foraging for food early in the day and later in the evening. Those times of day also happen to coincide with the best natural lighting.

That said, Alaska, during the summer months, enjoys nearly 24-hour daylight. Between May and July, for example, some areas never get completely dark, even between sunset and sunrise. So, don’t expect traditional lighting conditions.

11 Tips for Photographing Bears in Alaska

5. Respect the venue’s safety rules

Every park or preserve that features bears has basic guidelines to protect both the bears and the visitors. You’ll likely be required to stay a certain number of feet away from the bears. This means if the bears approach you and block your path, you’ll be subject to what’s known as a “bear jam.” You’ll effectively be stuck there until the bears decide to move. That’s okay – that gives you plenty of time to take more pictures.

11 Tips for Photographing Bears in Alaska

6. Don’t feel you have to shoot in silence

In fact, the opposite is the case. While you don’t want to make super-loud noises that startle the bears, you do want to make enough of it, so the bears know you’re there at all times. It can be more alarming for the bears if you’re trying to be stealthy and then suddenly emerge. Some people will wear a bell attached to their knapsack, or just talk very loudly.

7. Get on the bears’ eye level

There’s something more intimate about a portrait in which you feel like you’re looking eye-to-eye with your subject. Crouch or kneel on the ground or viewing platform to get as close to that angle of view as you can.

If you’re out in a small boat, you’re practically at water level already, so if bears are frolicking nearby, you’re set.

photographing-bears-in-alaska

8. Get a handle on your focusing

If the bears are on the move, shoot in AI Servo mode or AF-F (Nikon), Continuous Focus (Canon), Continuous AF (Sony), so that your focus continually adjusts as you’re tracking moving subjects.

9. Capture the bears interacting with each other

Part of what you want to accomplish when photographing wildlife is to tell their story. Highlighting a sow cuddling with her cubs or siblings tussling in the grass is a way to showcase their relationships and create emotive photos.

11 Tips for Photographing Bears in Alaska

10. Be patient

Wildlife is unpredictable, and there’s no real way to tell when a real money shot, like a bear catching a salmon in the river, will emerge. But when bears are engaged in an activity, they’ll actually stay in the same place for a significant amount of time.

So, if you stick around, hunker down, and just keep taking pictures. You’ll be more likely to produce a bunch of keepers.

photographing-bears-in-alaska

11. Prepare for the unexpected

Even if you time your visit for when the bears are expected to be active and the salmon flowing, it’s Mother Nature – things don’t always work out as planned.

The activity level is somewhat consistent, but it does vary from year to year. If you get there and the bears are a bust, it’s disappointing, but go to Plan B.

Photograph the amazing Alaska Peninsula landscapes, or keep an eye out for the region’s diverse bird population. Look to the dozens of other mammals in the area, including red foxes, porcupines, beavers, and otters instead.


I hope you find these 11 tips for photographing bears in Alaska tips helpful. If you have any other tips or bear photos you’d like to share, please do so in the comments section!

Disclaimer: Tamron is a paid dPS partner.


The post 11 Tips for Photographing Bears in Alaska appeared first on Digital Photography School. It was authored by André Costantini.


Digital Photography School
Posted in Digital Photography | Tagged , , , | Leave a comment
Best cheap phones 2019: top budget mobiles in India

Buying a budget smartphone under Rs 20,000 in India has never been so easy and yet so difficult. So easy because there are a plethora of options available in the market, and so difficult because of the same reason. While there is ample choice available, choosing the best smartphone under Rs 20,000 can become a daunting task if you get lost.

Nevertheless, choice is always a great thing. While Motorola truly started the budget smartphone revolution in India, Xiaomi has carried and still continues to carry that torch since it debuted in India. Now, rivals like Vivo, Oppo, Realme and even Samsung are putting up a fight against Xiaomi, so we as consumers are spoilt for choice.

The best selling brands in country, including Xiaomi, Oppo, Vivo and Samsung, all have their strategy for this year aimed towards launching as many budget phones are possible.

Here is a list of the best phones that you can get under ₹20,000 in India.

The Realme 5 Pro is the latest kid on the black and it truly represents Realme's aim of taking on established smartphone makers in India. Featuring a mid-range Snapdragon chipset and offering a quad-camera setup in the budget segment, Realme 5 Pro could be your next smartphone.

If you want a smartphone that offers great value for money and if you don't want to use MIUI again (we've all been a Xiaomi user at some point of time), the Realme 5 Pro is worth considering.

Read the full review: Realme 5 Pro review

Xiaomi Redmi Note 8 Pro

The budget segment is Xiaomi's home turf, and the Redmi Note 8 Pro is its best offering in this space. As the tradition has been, the Note 8 Pro scores great in aspects such as performance, camera and battery life.

It is powered by the new MediaTek Helio G90T chipset along with up to 8GB of RAM, making it one of the best phones for gaming in this segment. It is also one of the few to offer a quad-camera, with a 64MP primary camera, an ultrawide lens, a macro shooter as well as a depth sensor.

At 4,500 mAh, this is the biggest battery ever on a Redmi Note device, and that is paired with an 18W fast charger in the box. The Note 8 Pro is one of the best all-rounders you can get for the price.

Read our hands-on: Xiaomi Redmi Note 8 Pro review

Poco F1

The Poco F1, the only launch so far from Xiaomi’s first sub-brand Poco is a feature packed mid-range device. It is the cheapest Snapdragon 845 powered device in India and with the recent price cuts, it offers even more value for your money. While the device’s design is something that the company has compromised on, the Poco F1 is durable with a sturdy plastic build.

If you prefer performance over looks, the Poco F1 is the device for you. It is priced starting at Rs 17,999 in India.

Read the full review: POCO F1 Review

Xiaomi surprised everyone by pricing the Redmi Note 8 at under Rs 10,000 for the base variant, making it one of the best value smartphones.

Powered by the Snapdragon 665, performance should be up to the mark. It brings the same quad-camera setup from the Note 8 Pro, with a 48MP primary camera, an ultrawide shooter, a dedicated macro camera and a depth sensor.

The 4,000 mAh battery with fast charging should be sufficient for most users.

Samsung has more or less made itself relevant again in the highly competitive budget segment with the launch of the Galaxy M series earlier this year. The Galaxy M30s takes this forward with a refreshed design and updated hardware.

The biggest takeaway from the Galaxy M30s is its massive 6,000mAh battery that should easily last you an entire day's worth of usage. For some users, it should be possible to extend the Galaxy M30s' battery life to two days of usage.

Coupled with the vibrant Super AMOLED display, ample storage and a triple camera setup on the back, Samsung might have another winner in the M30s.

Samsung Galaxy M30s review

Oppo A9 2020

The Oppo A9 2020 is a refreshed version of the Oppo A9 launched earlier this year. It offers a tweaked design with updated specifications and imaging capabilities.

The primary highlight of the Oppo A9 2020 is its quad camera setup on the back. But beyond that, the A9 2020 also offers ample storage and a massive battery. If you are someone who is on the move constantly and do not want to stream a lot of content, the A9 2020 could be what you need. The ample storage allows you to save plenty of content for offline consumption, and the big 5,000mAh battery means it should last you long enough.

Samsung Galaxy A50s

The Samsung Galaxy A50s has a lot going for it. The device features a glossy finish and sports an attractive display, a triple camera setup that includes a good daylight camera, and decent battery life with fast charging support all make it a phone that’s worth considering when you go out to buy a new smartphone.

While the Galaxy A50 performs well in daylight, its low-light images are not up to the mark. If you are a heavy gamer, you might want to skip this device and look at the other devices mentioned in this list.

The device is available starting at Rs 22,999 in Black, Blue and White color options.

Read the full review: Samsung Galaxy A50s

Realme X

The Realme XT is the best smartphone the company sells in India, and is quite possibly one of the best in the segment too.

It was the first smartphone with a 64MP quad-camera, starting a trend that is now becoming mainstream. In our review, we also mentioned that the Realme XT has one of the best performance on a budget smartphone, for regular use as well as gaming.

Read the full review: Realme XT review

Blowing some serious heat, Realme has launched another worthy contender in the budget segment with the Realme 5. Aimed at buyers who are looking for a smartphone that delivers great bang for their buck, the Realme 5 is powered by a decently powered Snapdragon chipset.

The Realme 5 is powered by a massive battery and this, in combination with the HD resolution display should mean the phone should easily last for a couple of days with normal usage.

Read the full review: Realme 5 review

Xiaomi's smartphones have been a hit in the budget segment and that trend has continued for years. However, not everyone is a fan of MIUI and Xiaomi has acknowledged that with the launch of its Android One series of smartphones.

The Mi A3 is the latest in this line of smartphones. It runs on clean, stock Android and should get updates faster than other phones. It also offers a decent camera experience, an in-display fingerprint sensor and a big battery at very aggressive prices, making it a great option if you want all these features.

Read our review: Xiaomi Mi A3


TechRadar: Cameras and camcorder reviews

Posted in Camera Reviews | Tagged , , , , , , | Leave a comment