Photography vs. Snapshots

Access to knowledge sources and cameras has never been easier. Starting out with photography is just a few clicks and taps away, and camera gear is becoming increasingly accessible with smartphone cameras stepping up their game. But, is that enough to become a good photographer? Photographer Adam Karnacz discusses why you need to stop taking snapshots and start doing proper photography:

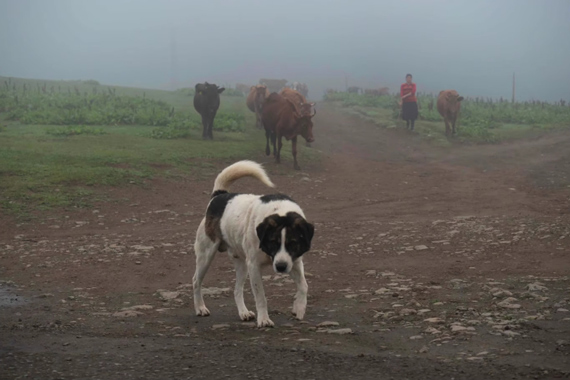
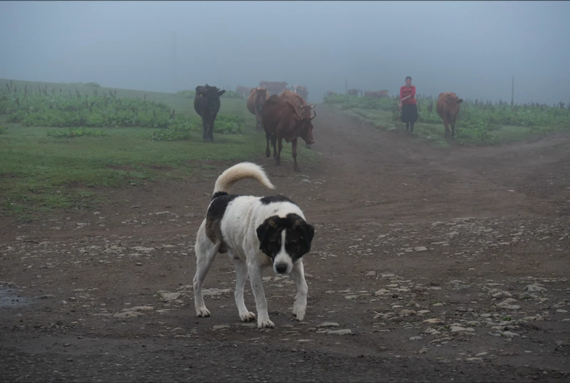
Access to a proper camera doesn’t automatically make you a photographer. In fact, most photographs that get shared on social media are merely snapshots. They’re mostly selfies, tourist photos, or photo of pets. They lack any kind of artistic value. Such images are usually taken for documentation purposes only.

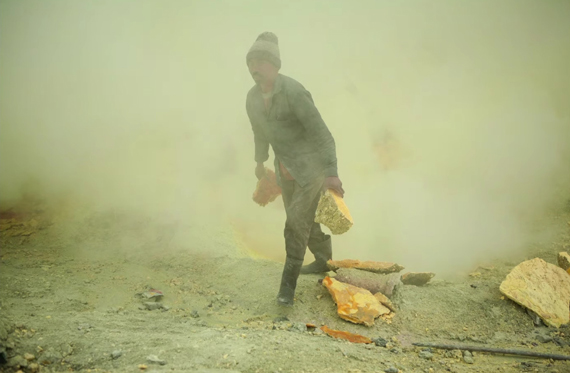
For a snapshot to be a photograph, the person taking it has to put in some extra effort. They need to plan out how to make the image better, what elements to place in the image, and what elements to get rid of. They need the image to narrate a story. Only when you start putting in a genuine effort to make your images better will you be able to stop taking mere snapshots and start creating actual photography.

Start Thinking About Your Composition and Perspective

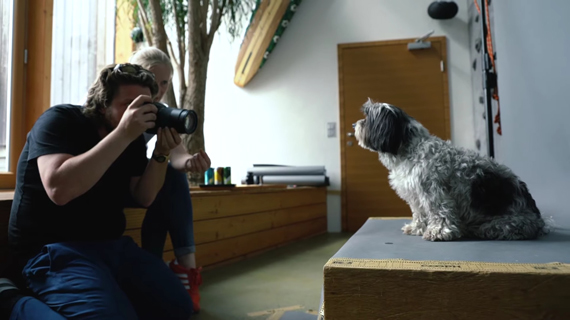
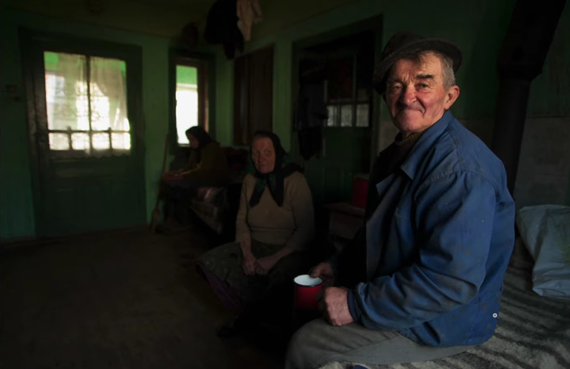
Be wary about where you place your subject and how you present them. If you’re photographing someone who’s short (like a child or a pet), get down on their level. Shoot from their perspective.

image of baby photographed at eye level

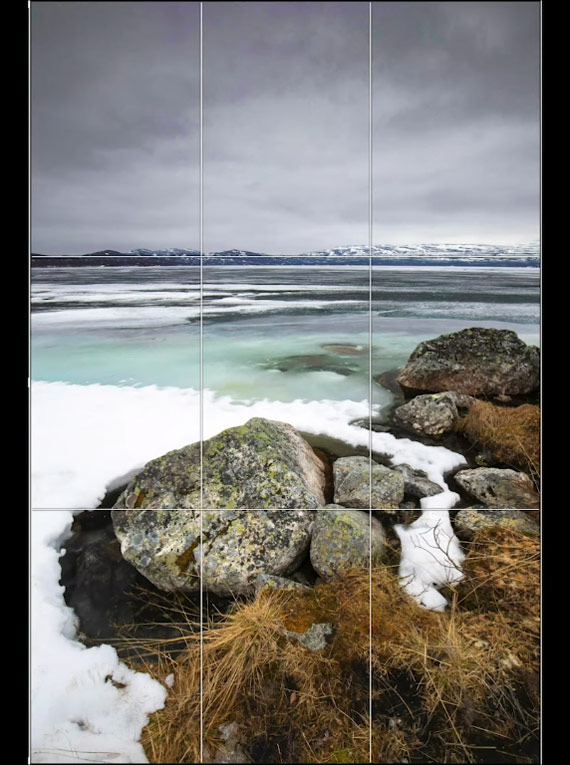
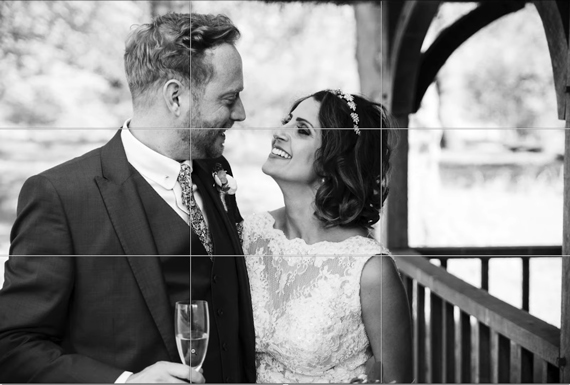
In addition, understand the various concepts of composition that will help you create effective photographs. The rule of thirds is a good composition guide to get started with. Place the important subject along the lines or at the point of intersection of the rule of thirds grid. This will give greater importance to the subjects. Do your best to adhere to this guide in-camera. But you can also crop the image in post for compliance.

rule of thirds in landscape photography

rule of thirds in wedding photography

The Golden Spiral is another interesting composition guide that many artists have followed for a long period of time. The spiral has a mathematical origin (Fibonacci sequence), and its application can be traced back to nature. The idea is to place the point of interest on the core of the spiral.

golden spiral in portrait photography

Pay Attention to the Background

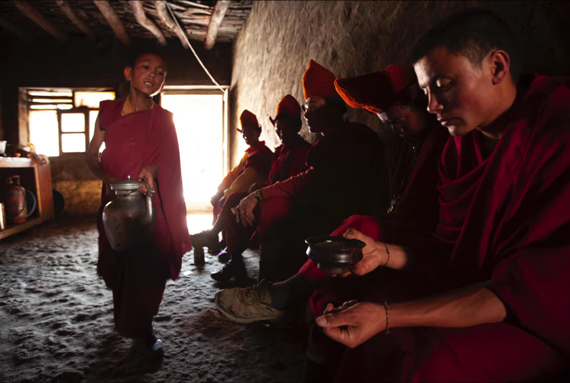
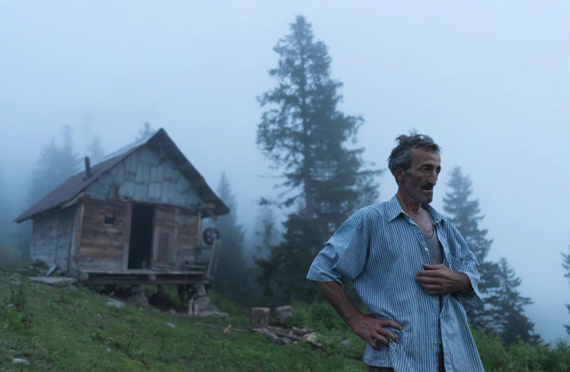
When composing your shot, also remember to keep an eye out for the background. A busy background with things poking out from behind the subject is distracting. This is especially true when you’re photographing in the woods and with wildlife photography.

distracting background in bird photography

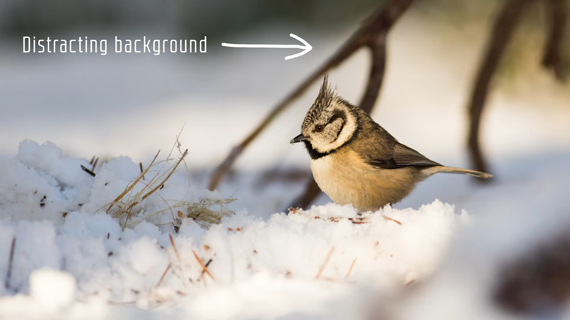
Good contrast between the subject and the background will put more emphasis on the subject.

contrasting background with pronounced subject

Playing around with bokeh is another way to overcome background distractions. By using a shallower depth of field, you can put greater emphasis on the subject and blur out the background.

make background less distracting with bokeh

Be Conscious of Cropping

When composing landscape photos, patrol your edges to ensure that no unwanted rocks, branches, etc. creep into your shot.

Similarly, when taking portraits of people, be careful of where you crop. Avoid cutting off limbs in your frame. For instance, cutting off feet, fingers, or toes looks unnatural. If you do need to crop out limbs, do it in the middle of the limb rather than at the joints.

“Don’t cut people off at the elbows, or the shoulders, or the waist, or the knees because it just feels unnatural.”
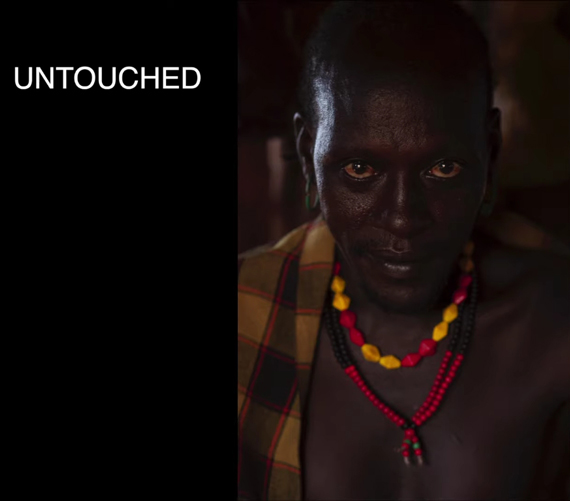
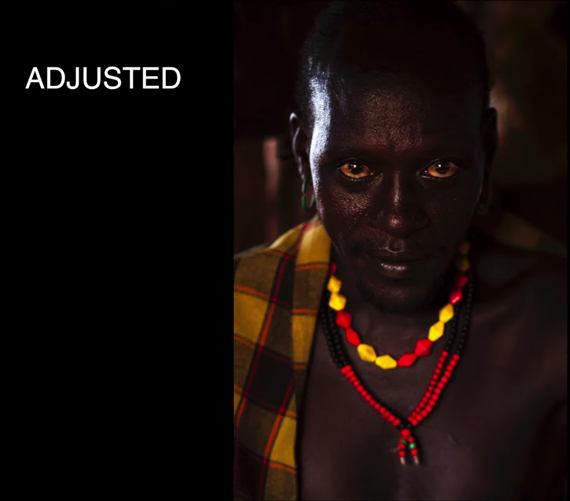
Post-Processing

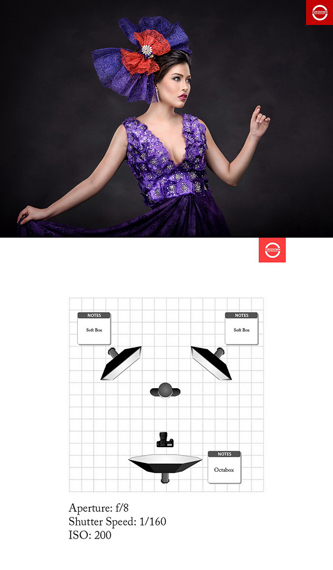
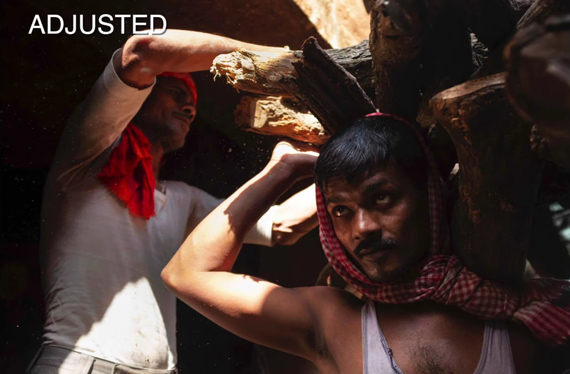
Post-processing is an important part of the photography process. Raw images that come out of the camera lack vibrance, sharpness, and punch. Invest some of your time in learning how to post-process your images. Having a consistent post-processing workflow allows you to create your own signature look.

The next time you pick up your camera, decide whether you simply want to take a snapshot or make a photograph. Make use of these insightful tips, and they’ll help you grow in your photography career.

For further training, deal ending soon: The Photography Super Bundle 2019

Go to full article: Photography vs. Snapshots

What are your thoughts on this article? Join the discussion on Facebook

PictureCorrect subscribers can also learn more today with our #1 bestseller: The Photography Tutorial eBook

The post Photography vs. Snapshots appeared first on PictureCorrect.

PictureCorrect

Posted in Photo Techniques | Tagged , | Leave a comment

Animal Portrait Photo Tips

No matter how good you may be at photographing humans, the story becomes altogether different when photographing animals. It’s not easy communicating with our furry friends, and they also happen to have very narrow attention spans. To help you take perfect animal portraits, photographer Vincent Lagrange with COOPH shares his method:

Build a Good Relationship With the Animal

It’s essential that the animal you’re photographing trusts you. Play with the animal for a bit and make yourself familiar to them. It’s necessary that the animal feels comfortable with you pointing a camera at them.

playing with animal when photographing

Create a Soft Light Setting

“I never use flash just to keep animals relaxed. Otherwise, I’m like hypnotizing them and I don’t want that.”

Animals get distracted way too easily. It’s a bad idea to pop a flash time and again when photographing them. You’ll either distract, excite, or frighten the animal. Lagrange prefers working with soft, natural light. If you’re working indoors, work near doors and windows that work great as a light source.

photographing animals in natural light

Communication

Communicating with animals can be difficult but not impossible. Use a quiet environment. This helps as the animal will be distracted less, and also because they’ll hear you better. Also, mimic their sound to grab their attention.

“Have patience and only if necessary use food.”

While food can be a good way to keep the animal interested in you, also keep in mind that too much food will make them lazy. Instead of giving them treats right from the beginning, use food only if it becomes really difficult to get your shot.

animal photography

Approach

“The most important thing is, if an animal says no, you don’t say yes, and you just leave him.”

Don’t force the animals if they’re uncomfortable or if they’re not willing to be photographed. Don’t treat animals like objects. Instead, let them rest for a while, get familiar with them, and try again later.

dog photography

Troubleshooting

There can be moments when it may seem that photographing a certain animal is impossible. The key to success is to be patient and to keep on trying. Like Lagrange shares, he had to bring in a Spanish tree dog to his studio five times before he was able to actually take his photo. But when he got the photograph on the fifth try, it came out really amazing.

spanish tree dog

Equipment

Lagrange uses his Leica S medium format camera for larger portraits and the Leica M when he’s out on the street. And to keep the working environment as silent as possible, he doesn’t prefer to photograph continuous bursts.

Have you ever tried photographing animal portraits?

Go to full article: Animal Portrait Photo Tips

What are your thoughts on this article? Join the discussion on Facebook

PictureCorrect subscribers can also learn more today with our #1 bestseller: The Photography Tutorial eBook

The post Animal Portrait Photo Tips appeared first on PictureCorrect.

PictureCorrect

Posted in Photo Techniques | Tagged , , , | Leave a comment

Interesting Photo of the Day: Sunflowers and Lightning

We all know that photography requires patience. The extent of patience is subjective. For some, it might be a few minutes, and for others, it can be a few hours, days, or months. Photographer Ryan Wright persisted for 8 long years to get an image of lightning with sunflowers:

sunflowers in a storm

“Splendid Summer Severe Storm at Sunset with Sunflowers” by Ryan Wright (Via Reddit. Click image to see full size.)

Wright took the image in Denver, Colorado at f/8, ISO 50, and 1/8 second. He actually got lucky with the shot, as he caught the lightning in his frame while he was bracketing a shot to combine the sky and the foreground. And the final result is absolutely brilliant.

“For 8 years, I have been wanting to get a shot like this, lightning with the sunflowers. There are a lot of problems in that scenario, especially considering that these sunflowers have such a short time when they are in bloom.”

Go to full article: Interesting Photo of the Day: Sunflowers and Lightning

What are your thoughts on this article? Join the discussion on Facebook

PictureCorrect subscribers can also learn more today with our #1 bestseller: The Photography Tutorial eBook

The post Interesting Photo of the Day: Sunflowers and Lightning appeared first on PictureCorrect.

PictureCorrect

Posted in Photo Techniques | Tagged , , , | Leave a comment

How to Use a Hair Light in Portrait Photography

Today’s portrait photography photo tip begins our discussion of specialty lights — specifically, the hair light. We will explore what it is, how to use it, and some precautions.

portrait with hair light

“Diana b&w” captured by Viktor Dobai

So far, in our study of portrait photography lighting, we’ve learned that the majority of the time, we will use a three-light setup: the main light, the fill light, and the separation light. This will do for the vast majority of our portraits. In fact, many professional photographers go their entire career never using more than the basic three.

three-light photo setup

“Lighting for Portaits” captured by Sidious Sid

But, at times, there is a need for additional lighting. That said…

Caution: It’s easy to get into the “more is better” mindset. Fight to avoid it! Just because you have more lights doesn’t mean you should use them! Every light you add to the mix exponentially adds to the possibility of messing up your portrait.

On the other hand, when properly used, specialty lights can add a lot to a photo.

A hair light is just what it says it is — a light that is used to light the hair.

How to Position a Hair Light

A hair light is positioned above and behind the subject. It can either be off to the side or directly behind your model, depending on your creative outlook.

side hair light

“Pashmina Style” captured by Maurizio, Francesco Mazzola

As it shines down, it will create light on both the hair and upper shoulders (the hair light is frequently confused with and used as a separation light, because a hair light does actually separate the subject from the backdrop).

Often, photographers will use a hair light to do double duty — particularly in a situation where a model has dark hair and is in front of a dark backdrop.

hair light with dark background

“Alyssa Low, Interaction Designer” captured by Aurimas

There are a couple of cautions you need to take when using a hair light.

Exposure Value

First, exposure value. This is where the vast majority of photographers mess up on the hair light. They make it too bright. This is particularly a problem with blondes.

A hair light is meant to light up the hair, not blow it out. If your light is too bright, you just end up with a massive highlight and no individual hair detail. That’s not what you want.

portrait lighting for blonde hair

“Stranger Portrait No. 28” captured by Chris Zerbes

What you want is to be able to see the hair — not just a blob of light.

Set your light to be about the same exposure value as (or a bit less than) the key light. Various hair colors absorb more or less light, so you can’t just use the same settings for everyone. You have to adjust.

It’s these little tweaks that will make all the difference. And it’s where shooting digital photography really shines! All you have to do is take a quick shot, review it, and keep adjusting the lights until you get what you want.

hair lighting

“Aimee’s Famous Pose” captured by Adam D.

Back in the olden days of film, we had to get everything set up and then take a shot with Polaroid film to see if all the lights were correct. If we didn’t have a Polaroid camera (or a Polaroid film back for our camera), we just set everything up and prayed.

Lens Flare

Our next potential problem with the hair light is that since it is behind and above the subject, the light is pointed at the camera. The potential exists that stray light will make it to the camera and cause lens flare.

Lens flare will ruin the shot. Be sure to watch for it. To avoid the problem, just tape a piece of cardboard over the front edge of the light to block any extraneous light. You want to focus all the light onto the subject.

To block the light, professionals often use a “snoot” or “barn doors” on the light. These are just fancy photo gadgets that do the same thing as the cardboard. I recommend you not buy them until you have a distinct need. The cardboard is cheaper and can do the job.

Consider using a hair light in your portrait photography. This photo tip can easily set you apart from the run-of-the-mill photographers and possibly start bringing in the photo contest prizes!

About the Author:
Dan Eitreim writes for ontargetphototraining.com. He has been a professional photographer in Southern California for over 20 years. His philosophy is that learning photography is easy if you know a few tried and true strategies.

Go to full article: How to Use a Hair Light in Portrait Photography

What are your thoughts on this article? Join the discussion on Facebook

PictureCorrect subscribers can also learn more today with our #1 bestseller: The Photography Tutorial eBook

The post How to Use a Hair Light in Portrait Photography appeared first on PictureCorrect.

PictureCorrect

Posted in Photo Techniques | Tagged , , , | Leave a comment

3 Steps to Change the Way You Post-Process Travel Photos

Post-processing is an essential part of the photographic process. While the process was limited to fewer people in the analog days, the scenario has changed completely with digital photography. But not everyone understands the essence of the art of post-processing. Some do it just because others do it; some do it to achieve the look that’s “trending.” In this video, photographer Mitchell Kanashkevich shares three simple and practical steps that will change the way you post-process your photos:

1. Check the Technicalities

Before moving on with the heavy editing work, it’s essential that you build a solid base to work with. This is where you check and fix the basic technicalities in your image. This step can involve things like correcting distortions, straightening the horizon, and balancing the exposure.  You’re making the image visually appealing without the creative adjustments.

before basic adjustments

after basic adjustments

However, there are certain situations where the limitations of the camera kick in. The most obvious case is that of dynamic range. Since cameras cannot capture the details in the shadows and the highlights at once, you may have to live with overexposed areas in the photograph.

blown out highlights

If you really feel that recovering the highlight details is important to you, that can lead to crushed shadow details. Depending on the situation, that can work.

silhouette image

2. Post-Process for Feel, Mood, Ambience

Start by asking yourself these two questions:

  • How did I feel at the scene?
  • How do I want the viewer to feel?

Next, ask yourself the following questions. The answers will help you decide what and how much of the adjustments you should be making.

Cool or Warm White Balance?

One convenient but often overlooked factor that helps set mood is white balance. The auto white balance in modern-day cameras does a good work of choosing the correct white balance. But in some cases, even a slight adjustment of the color temperature can have a great impact on the final image.

auto white balance

cool white balance

A slight adjustment in white balance changes the mood in the image.

“I want to make everything as close as possible to how I remember the scene.”

You can use cool color temperatures when photographing foggy, rainy, or stormy weather. For vibrant sunsets, go with a warmer white balance setting. And for indoor natural lighting, seek to create a neutral look.

neutral white balance

Contrasty/Punchy or Soft?

Then there’s the question of whether your image should appear contrasty or soft. If your image already has a wide range of tones straight out of the camera, you don’t need to add more contrast.

image with good tonal range

If you’re not happy with the way the image has come out and you feel the need to make it more dynamic, try adding some contrast.

image before contrast adjustment

image after contrast adjustment

And don’t be afraid of decreasing contrast either if the image demands a softer look.

image with contrast lowered

Dark or Bright?

If your images appear dark, it’s not always necessary that you brighten them up. If you want to create a sense of mystery, see how you can use darkness to your advantage. In the following case, the people seem like they’re appearing from the dark. Increasing exposure would have killed the mystery.

mystery created by darkness

But in cases when you want to convey a bleached feeling, increasing exposure will do the trick. When brightening the image, make sure that things don’t appear obviously too bright.

bleached landscape

3. Identify the Story and Post-Process for It

The concept is quite simple. Make the more important elements in your photo stand out more. And if something is distracting or irrelevant to the image, make it less obvious. This may call for special local adjustments. Use local adjustment tools in Lightroom like the brush adjustment tool, gradient tool, and the radial filter tool to make very specific adjustments.

portrait before adjustment

portrait after adjustment

“Achieving a dramatic difference is not the point. The point is to communicate the story effectively even if that means that you’re being subtle.”

This three-step guide has important pointers to help you create images that communicate your feelings. Remember, the key is not to follow the trend, but to create a representation of what you felt or want viewers to feel.

For further training: Understanding Post-Processing Video Course

Go to full article: 3 Steps to Change the Way You Post-Process Travel Photos

What are your thoughts on this article? Join the discussion on Facebook

PictureCorrect subscribers can also learn more today with our #1 bestseller: The Photography Tutorial eBook

The post 3 Steps to Change the Way You Post-Process Travel Photos appeared first on PictureCorrect.

PictureCorrect

Posted in Photo Techniques | Tagged , , , , | Leave a comment

Interesting Photo of the Day: First Light in Grand Teton National Park

Nature is at her best in the early morning. Everything feels so fresh. john_petrucci_ took the following image during sunrise in Schwabacher Landing, WY. It shows how the effort of getting up early for landscape photography pays off:

landscape during sunrise

“First Light in Schwabacher Landing, WY, USA” by john_petrucci_ (Via Reddit. Click image to see full size.)

The early sunlight has added a touch of magic by selectively lighting the areas in the landscape. The partially lit mountains with a relatively darker sky give an idea of how low the sun really was when the photo was taken.

“Tried to capture the sunrise at the magnificent Grand Tetons. I also tried to include the reflection in the water. Image was edited in Lightroom.”

The reflection of the sky and the mountains on the lake provides a sense of symmetry makes the images so visually appealing.

Wouldn’t you love to spend a morning in a beautiful place like this?

Go to full article: Interesting Photo of the Day: First Light in Grand Teton National Park

What are your thoughts on this article? Join the discussion on Facebook

PictureCorrect subscribers can also learn more today with our #1 bestseller: The Photography Tutorial eBook

The post Interesting Photo of the Day: First Light in Grand Teton National Park appeared first on PictureCorrect.

PictureCorrect

Posted in Photo Techniques | Tagged , , , , , , , | Leave a comment

How to Create a Blurry Background

You can create a blurry background in your portrait photography with a very simple process.

When you are photographing people, a soft focus background can help rid your photo of any potential distractions. This effect is called a shallow depth of field.

tips for getting a blurry background in your photos

Photo by Thomas Hawk; ISO 200, f/2.0, 1/8000-second exposure.

With a shallow depth of field, just the face or person is in focus, and the background is progressively blurry. In a longer depth of field, your subject and everything in the background is sharply in focus.

Here are the four ingredients to consider when creating a dramatically shallow depth of field:

1. Wide Aperture

One of the first lessons in manipulating exposure is that the size of your aperture controls your depth of field. The larger the opening for each shot, the smaller the amount of your photo will be in focus. Choose lower numbers, like f/2 to f/4, to get the most dramatic effect. Remember that aperture f-stop numbers work in reverse; the lower numbers represent the larger openings.

2. Distance to Your Subject

Getting close to your subject is a great composition principle anyway, but it is even more important when you want to knock out your background. If you are 10 feet from your subject, it is much easier to create a shallow depth of field than if you are 50 feet from your subject.

3. Amount of Zoom

When you zoom in, you compress the elements of your photo, so everything behind your subject becomes more dramatic. A wide angle lens might not create a shallow depth of field, but if you zoom in a telephoto lens to 100 mm to 200 mm, the results become far more dramatic.

4. Size of Your Sensor

Your sensor size will impact the final quality of your image in many ways. Making your background blurry is just one of them.

ways to achieve a blurry background in pictures

Photo by Adam Cohn; ISO 640, f/2.2, 1/640-second exposure.

Don’t try to get a shallow depth of field with a camera phone. The sensor is so tiny, you won’t see much effect. With a compact camera (point and shoot), it is possible to manipulate depth of field, but difficult. With a DSLR, you can start to see really dramatic effects because the sensor is much larger.

Blurring out your background is one of many composition techniques you can use to create great portrait photography. With four easy ingredients, you could be on your way to making outstanding pictures.

About the Author:
Lynford Morton (www.shutterbuglife.com) spends weekends at Washington, DC’s favorite locations—making new friends and sharing his love of photography with eager new photographers.

Go to full article: How to Create a Blurry Background

What are your thoughts on this article? Join the discussion on Facebook

PictureCorrect subscribers can also learn more today with our #1 bestseller: The Photography Tutorial eBook

The post How to Create a Blurry Background appeared first on PictureCorrect.

PictureCorrect

Posted in Photo Techniques | Tagged , , | Leave a comment

Pokémon Sword and Shield leak reveals every new Pokémon – and which ones are missing

Pokémon Sword and Shield are less than two weeks from release, but it seems someone has leaked both games' full Pokédex roster. 

Resetera user Atheerios posted several spoilers and leaks about the new games, including a list of every Pokémon we can expect to see in them, including lists of every eighth generation Pokémon, several Galarian forms and evolutions and new Gigantamax forms. Plus, a lot more has been revealed.

Pokéleak

We're not going to post any spoilers here, because it's up to you if you want to go find them for yourself, but the lists highlight which classic Pokémon are returning – and which aren't.

What we will tell you is that there's a total of 81 new species and 13 Galarian forms of existing characters – making for a total of 94 new Pokémon and an overall total of 400 Pokemon.

There have also been quite considerable cuts, which has seen a lot of fan favorites not making the final roster. This isn't a huge surprise considering there's now eight generations of Pokémon to fit into the games.

Nintendo hasn't confirmed if these leaked lists are true, but all signs point to that being the case. We'll just have to wait until Pokemon Sword and Shield officially release on November 15.


TechRadar: Photography & video capture news

Posted in Photography | Tagged , , , , , , , | Leave a comment

KSI vs Logan Paul 2 live stream: how to watch the rematch online from anywhere

After the epic draw they fought out in the the boxing ring last year, KSI and Logan Paul are stepping back into the squared circle to see who truly deserves to be crowned the YouTube king of boxing. Don't want to miss any of the action? Read on to find out how to watch a KSI vs Logan Paul live stream – no matter where in the world you are.

Last year, 18,000 devoted fans came to watch as America fought Great Britain in one of the biggest events ever organised by YouTubers. Streamed by hundreds of thousands of fans, it was a fight as well watched as the top UFC and boxing fights in history – but are you ready for round two?

After an epic six rounds in their first head-to-head match, a draw was called leaving fans on both sides wanting a re-match. Since then both Paul and KSI have been in training, improving their fighting styles and stamina and it looks like this year, anyone watching a KSI vs Logan Paul live stream could see a knockout go down.

KSI is at a height, weight and reach disadvantage going into this fight but is the more experienced fighter of the two, leaving Paul wobbling a good few times in their first fight. Since then, he's been the bookies favorite for round 2, but it honestly feels like anything could happen.

Ready to stream KSI vs Logan Paul live online? We've included everything you'll need to know about broadcasters down below so you can be ahead of the game on the night.

Live stream KSI vs Logan Paul from outside your country 

In North America or Canada? DAZN has you sorted and it's Sky Sports for the fans in the UK. Scroll down a bit further to find out the exact details of how to stream from your country. And for those in Australia, below you'll find some bad news and a bit of a work around.

But if you're abroad this weekend then you'll need another way to watch and avoid possible geo-blocking. That's where using a VPN comes in.

How to live stream KSI vs Logan Paul in the US

How to watch KSI vs Logan Paul from the UK

How to watch a KSI vs Logan Paul live stream in Canada for FREE

How to live stream the fight in Australia 


TechRadar: Photography & video capture news

Posted in Photography | Tagged , , , , , , , , | Leave a comment

The Google Pixelbook Go gets even more useful with virtual desktops

Google has at last released Chrome OS 78 to Chromebooks, scheduled to land this week on the wide range of Chromebook laptops in the wild today, bringing some major new features.

Those new features bring Chromebooks – like Google’s brand-new, Editor’s Choice award-winning Pixelbook Go – much more in line with the more established macOS Catalina and Windows 10 operating systems (OS). For instance, the marquee change here is the introduction of virtual desktops to Chrome OS.

This allows users to hide away open apps into virtualized versions of their own desktops, creating discrete environments according to whatever they wish, whether that be projects or entertainment tasks. And, it appears to work much in the same way that it does on those competing OSes.

Send numbers to your phone, and print more easily

Google has also implemented a new feature that will allow you to more easily make phone calls while browsing the web. That is, so long as you have an Android phone connected to the same Google account as your Chromebook.

When this feature is set up, you’ll have the option to take phone numbers that appear in Google search results and on web pages and send them to your Android phone with a right-click. No longer will you have to copy the number down or dial it into your phone while looking at the Chromebook display. It will, at the very least, be a minor time saver.

Finally, Google has both reduced the number of steps required to set up printers with your Chromebook. First, pressing Ctrl + P on your keyboard brings up a new printer menu to sets that compatible printer up with a single click. Then, you can now easily set up a default printer through the Chrome OS settings pane.

Bonus: you can now also share feedback about Chrome OS directly to Google more easily. There’s a new button for the function placed directly beside the “Power off,” “Sign out” and “Lock” functions when you press and hold the power button for one second named “Feedback”.

Google’s latest Chromebook, and every Chromebook before it, just got a whole lot more useful and that much closer in functionality to its rivals.


TechRadar: Photography & video capture news

Posted in Photography | Tagged , , , , , , , | Leave a comment

The best cheap monitor sales and deals for Black Friday 2019

Improve your computing experience and make reading, browsing, and viewing that much easier with a monitor. Finding a cheap monitor, though, can be a difficult task, and that's why we rounded up the best monitor sales and deals that you can find online. This includes monitors for gaming, displays with 4K resolution, massive screens, and more.

Because you can use pretty much any device with an external display these days, we think you should use a monitor for everything from your iPad to your more powerful Surface Book 2. Otherwise, you’re depriving of yourself of some much-needed screen real estate – and, with these best cheap monitor deals, you don’t even need to spend much to jump in on the action.

Monitors aren’t as clunky as they once were either. In fact, many of them have wielded bezel-less designs and high refresh rates for years, while your smartphones are only now beginning to adopt these features. For the best monitor deals on the market, keep reading down.

The best Black Friday monitor deals and prices

There are still several discounts that you can shop below, but there's no harm in looking forward to discounts during Black Friday 2019. To help you find the top sales, we've put together a guide on how to find the best Black Friday deals. We'll also tell you everything else you need to know about the November sale event such as the date, what prices you can expect, and what will be this year's top-selling items.

The best cheap monitor deals

The Dell UltraSharp U2414H is the cream of the crop of standard, 24-inch displays. It offers a sharp, Full HD (1,920 x 1,080) picture with vibrant, but accurate colors and deep contrast. Best of all, Dell personally calibrates every U2414H unit, so you won't have to screw with the gamma, contrast or a multitude of other settings just for a decent picture.

If you're looking for a little more sharpness in your computing life, a QHD monitor is the way to go, and the Omen 32-inch QHD screen from HP offers the best frequent deals we've found so far. With 2,560 x 1,440 rich pixels, this Omen display can make everything from movies, games and even websites look that much better. The display also comes packed with AMD's FreeSync technology to reduce gaming frame rate drops, though you'll need an AMD graphics card to use the feature.

We're officially entering the 4K age, and finally we're beginning to see some sizable deals on the Ultra HD monitors we've been wanting for so long. The 27-inch ViewSonic XG2700-4K is arguably one of the best 4K monitors around with a 3,840 x 2,160 resolution. Its SuperClear IPS panel tech is no slouch either, with the ability to produce rich colors while outputting a gamer-grade 144hz refresh rate and 5ms response time.

Gaming is a pricey hobby, but there are plenty of ways to penny pinch with mid-range components, budget accessories and, of course, excellent deals on displays. The Asus VG245H is one of the most budget gaming monitors we've ever tested. It's no 1,440p panel, but you do get a 75hz refresh rate, blue-light filter and, thanks to its TN panel, response times as quick as 1 millisecond.

Read the full review: Asus MG248Q

21:9 monitors are deal for movie buffs; however, their price tags can be scary. Fortunately, the LG 29UM68 is a steal of a deal. Though it's technically just a Full HD monitor with its 2,560 x 1,080 pixel count, you'll likely be too busy immersed in its visual wingspan to care. This IPS panel produces 99% of the sRGB color gamut. Plus, that 21:9 aspect ratio is just too wide to pass up if you're tired of seeing letter-boxed movies on traditional, 16:9 screens.

Gabe Carey has also contributed to this article


TechRadar: Photography & video capture news

Posted in Photography | Tagged , , , , , , , | Leave a comment

Azure Arc lets Microsoft cloud run on AWS and Google Cloud

At its annual Ignite conference, Microsoft previewed Azure Arc which allows users to utilize Azure's management tools and data services on virtually any platform, including those of its competitors such as AWS and Google Cloud.

The new service extends Azure's management capabilities to Linux and Windows servers as well as to Kubernetes clusters on any infrastructure across on-premises, multi-cloud and edge.

Using Azure Arc, developers can now build containerized apps using their tools of choice and IT teams can ensure that these apps are deployed, configured and managed uniformly using GitOps-based configuration management.

Microsoft has also made it easier to implement cloud security across environments using Azure Arc with centralized role-based access control and security policies.

Azure Arc

In a blog post announcing Azure Arc, corporate vice president of Microsoft Azure, Julia White explained how the new service can help speed up deployment while also providing customers with a complete view of all their Azure data services across on-premises and clouds, saying:

“With Azure Arc, customers can now realize the benefits of cloud innovation, including always up-to-date data capabilities, deployment in seconds (rather than hours), and dynamic scalability on any infrastructure. Customers now have the flexibility to deploy Azure SQL Database and Azure Database for PostgreSQL Hyperscale where they need it, on any Kubernetes cluster. From the Azure portal, customers get a unified and consistent view of all their Azure data services running across on-premises and clouds and can apply consistent policy, security and governance of data across environments. Customers can get limitless scale by seamlessly spinning up additional Kubernetes clusters in Azure Kubernetes Service (AKS) if they run out of capacity on-premises.”

Just as Google did with its open platform Anthos, Azure Arc uses Kubernetes to enable customers to build out their hybrid cloud deployments across platforms.

As of now, Azure SQL Database and Azure Database for PostgreSQL Hyperscale are the only two Azure services users will be able to bring to other infrastructure providers though Microsoft will likely extend this to other Azure services over time.

Via TechCrunch


TechRadar: Photography & video capture news

Posted in Photography | Tagged , , , , | Leave a comment