Did you realize that you can make high-quality black and white image conversions in Luminar 3?
Maybe you were under the impression that Luminar only catered to color images, but today we’re going to look at how you can use the Black & White Filter to create bespoke monochrome images.
For best results, you should be shooting color RAW files on your camera, but if you can’t shoot RAW format, get as high a quality JPEG as you can. The reason most photographers don’t shoot with the built-in black and white image mode on their cameras is that it simply produces muddy, dull looking monotones.
Converting your color images after shooting gives you much more control over the final result, and you can create some amazing looks—all of which can be saved to Luminar 3’s Custom Looks library, so you can apply the same look to other images in just one click.
Here’s the image we’re going to convert:

First off, we’ll use the B&W Conversion Filter, which you can find on the right-hand side of the screen, by clicking the Add Filter button. A menu with different categories of filters will appear:
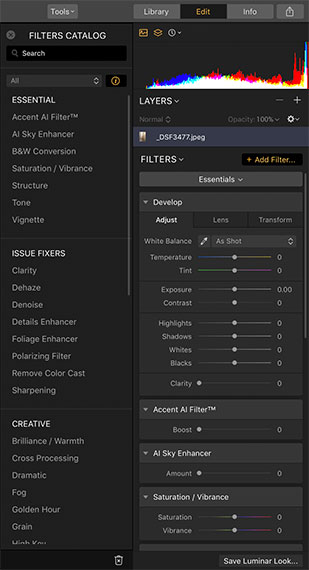
Click on B&W Conversion, and your photo will change to monochrome, and a new adjustments menu will appear on the right-hand side:
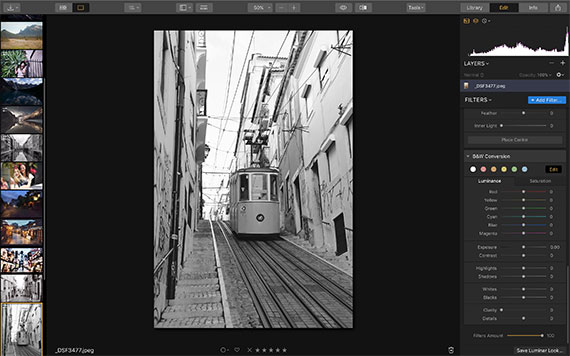
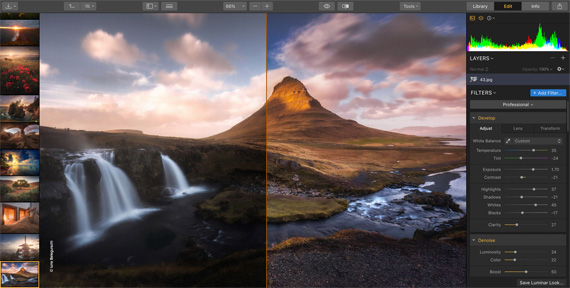
This conversion is only the start, not the final product. We’ll use the sliders in the menu to adjust contrast, highlights, shadows, clarity, details, and also change the mix of the black and white by using the color sliders (sounds confusing, but it really isn’t!).
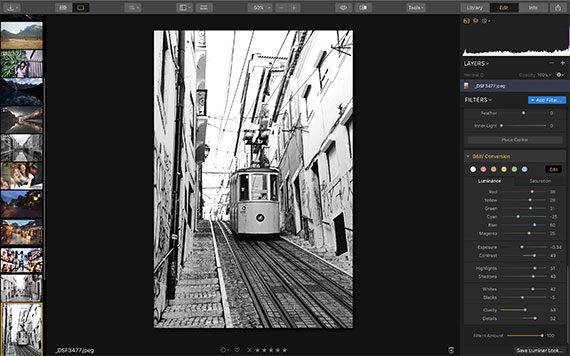
I wanted to give this image more contrast and punch and up the detail for a grittier look. I simply played around with the sliders until I found a look I liked:
Every black and white image needs a different treatment, but you can save all the adjustments you made here in the Custom Looks library so you can apply them to other images in the future without having to try and remember exactly what settings you had the sliders at!
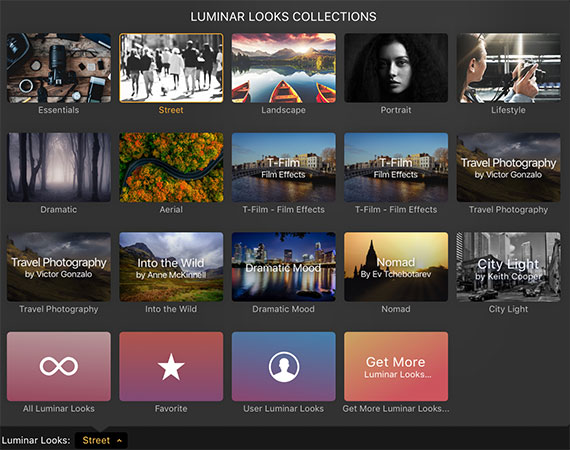
Luminar Looks
This is another way to do a black and white conversion in Luminar 3. Load your image, and click the icon that looks like three little squares on the top menu bar:
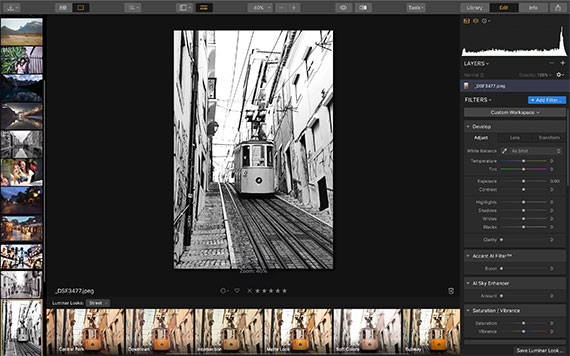
This will open the Luminar Looks library, where you will find many image styles to choose from. It will open in a film strip across the bottom of the screen, and if you click on the drop-down menu at the top of the film strip, you’ll find the collections of Looks arranged by categories:
Most of them have at least one black and white Look, which can serve as a starting point for your own further edits. I chose “Downtown” from the Street collection, and it gives the image a fantastically old-school look:
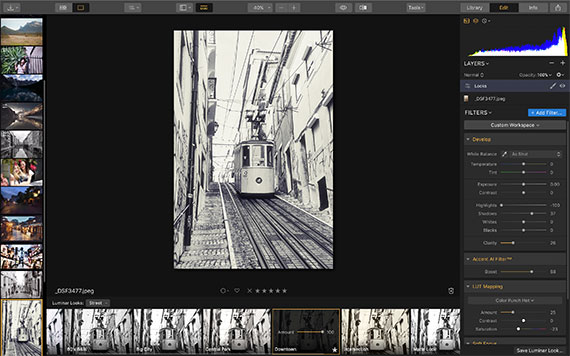
On the menu at the right, you can again adjust all aspects of your black and white image, and you can choose the correct level of film grain or add a vignette if you like. Again, you can save this as a Custom Look once you’ve done your fine-tuning.
It’s as simple and quick as that!
Final Thoughts
I hope this article has given you something to think about, and hopefully, I’ve inspired you to start experimenting with your own black and white conversions.
How to Get Luminar for a Discount Today:
The new version of Luminar is currently on sale to celebrate the update if you want to try it out.
New: Luminar 3 with Accent AI
P.S. you can get $ 10 off if you use the coupon code picturecorrect at checkout.
Deal ending soon: Luminar 3 with Accent AI Spring Offer
Go to full article: Black and White Conversion Tutorial in Luminar
What are your thoughts on this article? Join the discussion on Facebook
PictureCorrect subscribers can also learn more today with our #1 bestseller: The Photography Tutorial eBook
The post Black and White Conversion Tutorial in Luminar appeared first on PictureCorrect.