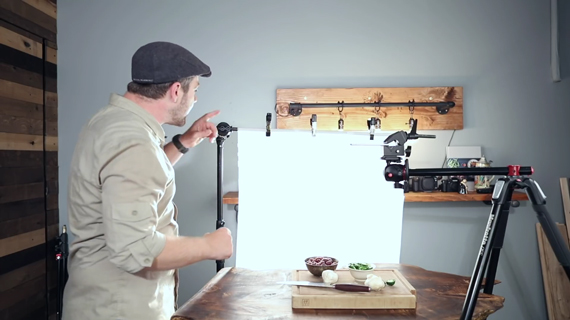
Whether it be portrait, product, landscape, or even food photography, lighting makes a whole lot of difference. And since artificial lighting can be easily manipulated, photographers love to use it. But it’s the budget factor that stops a lot of us from using strobes. Food and travel photographer Skyler Burt demonstrates how you can shoot food photography using a budget lighting setup:
Photography gear tends to be expensive. But that doesn’t mean you can’t use any other type of lighting for your photography work. To demonstrate how you can use readily available light for food photography, Burt uses the following tools:
- HDX 500W halogen work light ($ 20)
- A-clamps ($ 2 each)
- parchment paper ($ 3.50)
Light Power and Aperture
Although Burt had the option of buying a cheaper light rated at 250W, he chose to go with the 500W version so that he could get more light. The extra light allows him an aperture of around f/5.6 or f/8 to get more of the scene in focus.
White Balance
The halogen light doesn’t give off a pure white light. When using this type of light, you’ll need to adjust the white balance in your camera or make the adjustment during post-processing if you shoot RAW.
Diffusion
A 500W light shining directly on food produces harsh highlights and shadows. You’ll need to make the light softer. If you have a diffuser around, you can use that. But if you’re really tight on a budget, you can use some parchment paper or a white sheet to soften up the highlights and the shadows. You can see that it makes a big difference.
Parchment Paper Diffuser
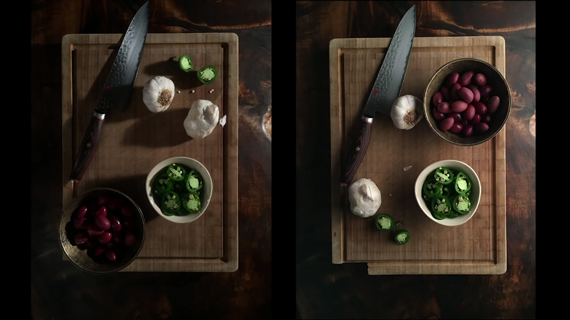
Notice the harsh highlights and shadows on the left compared to the soft light and shadows on the right after using a diffuser
Ambient Lighting
When working with artificial lighting, you’ll want to turn off all other light sources and draw the curtains. This will ensure that no other color temperatures or light direction will interfere with your scene.
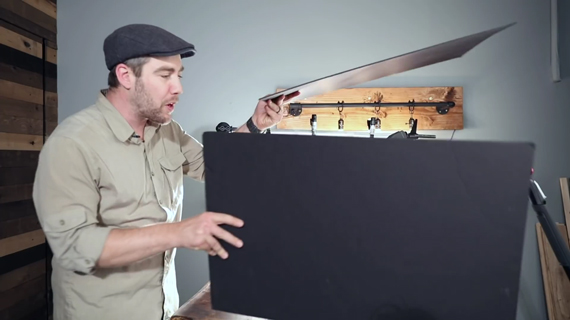
Reflected Light
Once you’ve cut off all other light sources, it is also necessary to ensure that the light reflected from the walls and ceilings do not affect your photo. It can cause a color cast and loss of contrast. You can use cheap black foam core to form a box and block off the stray light.
To compare how the budget setup delivers compared to his professional setup, Burt also took an image using his professional camera and lighting setup. He didn’t notice much of a difference except for the crisp details, largely due to the high end lens he used. However, if you are on a budget or just starting out, the budget setup will work just fine.
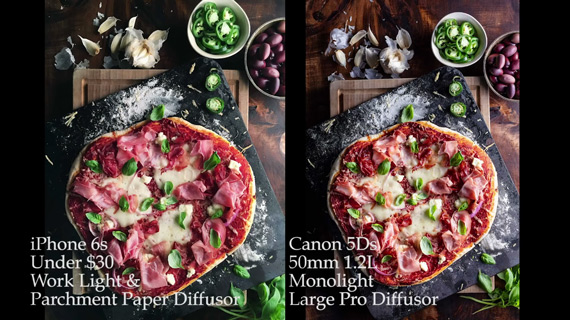
Do you see much of a difference? Don’t let a limited budget stop you from venturing into food photography.
Go to full article: Food Photography Lighting on a Budget
What are your thoughts on this article? Join the discussion on Facebook
PictureCorrect subscribers can also learn more today with our #1 bestseller: The Photography Tutorial eBook
The post Food Photography Lighting on a Budget appeared first on PictureCorrect.