If you’re looking to get the most out of your new DSLR camera, you’re going to want to get out of the automatic Program mode (which is fully automatic) and begin learning how to take photos either in Shutter Priority mode, Aperture Priority mode or, ultimately, full Manual mode.
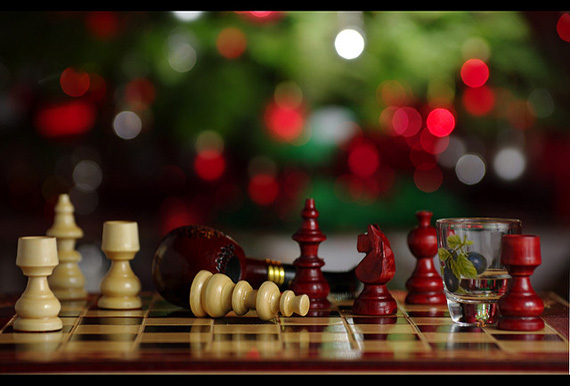
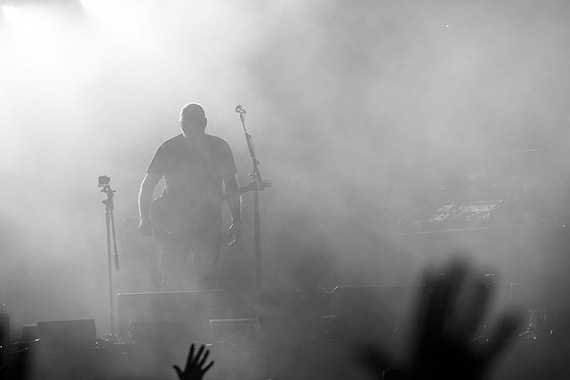
Manual mode. Photo by Levente Fulop
When you’ve got your camera in Program mode (usually signified by a letter “P” on the mode dial of your DSLR), you’re basically handing over all of the decision making responsibility to the camera. The camera will then use its coded algorithms to decide what is the most appropriate settings to use—that is, how wide the aperture should be, how fast the shutter speed should be. Both of these (aperture and shutter speed) affect the amount of light data that can be captured by the camera’s digital image sensor, and what the camera calculates as appropriate might not result in an image that’s desirable. Essentially, when you buy a DSLR and keep it in Program mode, you’re treating it like a cheap compact camera, where you just aim and click the button to take the photos, rather than treating it like the sophisticated image creation machine that it is. You’re not taking control of what will be blurred in your image and what will be crystal clear; or choosing when you want motion blur in your image and when you don’t.
The main features of your DSLR camera that you will want to master are:
- Mode Dial (Program vs. Shutter Priority vs. Aperture Priority vs. Manual Modes)
- ISO
- White Balance
I’ll walk you through each one in turn, the way that I learned to become comfortable with working these features, so that I was able to take responsibility for how my photos were (if I may be so bold as to say) crafted.
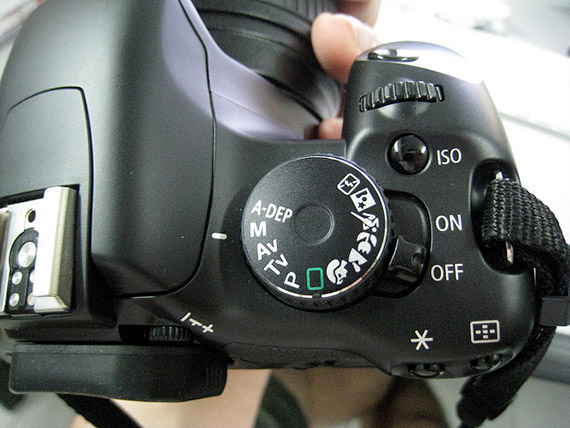
photo by Cheon Fong Liew
Mode Dial
The obvious first step is to get out of Program mode and learn to become comfortable in the other three modes. Because I wanted to be totally in control of using my DSLR, my ultimate aim was to comfortable using the camera in full Manual mode. My route to this was to take advantage of what you might call the two “semi automatic” modes: Aperture Priority and Shutter Priority, respectively.
Aperture Priority Mode
All you need to know is that when your camera is set to Aperture Priority mode, you are in control of setting the correct aperture value (f-stop numbers, such as f/2.8, f/5.6, f/8, all the way down to f/22) and the camera will be in charge of calculating the shutter speed. When you’re changing the aperture of the lens, you’re either widening the opening of the lens to let more light in, or you’re narrowing the lens to let less light reach the sensor.
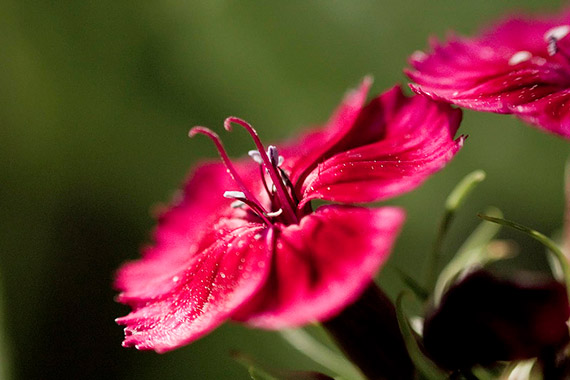
photo by Larry Jacobsen
When you widen the aperture (choosing a lower f-stop number, such as f/2.8), background subjects will become more blurry, allowing foreground targets to stand out more when you focus on them—either by turning lenses manually to achieve clear focus or taking advantage of the camera’s autofocus technology.
When you narrow the aperture (choosing a higher f-stop number, such as f/8 or higher), more things deeper in your scene will be in clear focus, including the foreground subject you’re targeting.
Shutter Priority Mode
If you’ve understood what happens when you select Aperture Priority mode, you may already have figured out that when you put your camera into Shutter Priority mode, you are responsible for choosing how long the shutter is allowed to stay open. The image sensor of your camera will record all the available light data for as long as the shutter remains open. So, if you choose a faster shutter speed (measured in fractions of a second, such as 1/50, 1/250, 1/1000, 1/4000), the sensor will have less opportunity to continue recording light and this results in a darker exposure. You know, when you’re ultra disappointed because your photos have come out too dark? That’s known as an “underexposed” image, as it hasn’t been exposed to the light for long enough.
If, on the other hand, you choose a slower shutter speed (greater than 1 second, such as 1″, 1.3″, 15″, 30″, 60″), then you’re allowing the shutter to stay open longer, so the image sensor will be able to record more of the light, resulting in a lighter image. Have you ever been disappointed because your photos have become too light and nice details have been lost to the brightness? That’s known as an “overexposed” image, as it has been exposed to the light for too long.
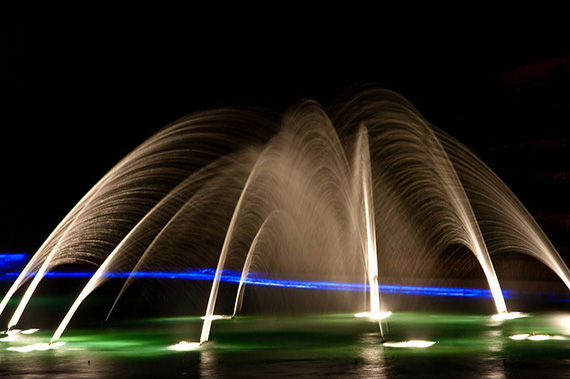
Shutter Speed: 8 seconds. Photo by Andrew Moore
It may have dawned on you that one of your roles as a photographer is to master the balance of light coming into the lens and onto your camera’s sensor. If the scene is too dark, your job is to use the settings and tools at your disposal (i.e. a flash, if necessary) to help the image sensor to record more of the light—either by allowing the shutter to remain open for longer and/or allowing more light in through the lens by widening the aperture. If the scene is too light, you want to go the opposite way and either restrict the time the shutter stays open and/or narrow down the aperture so that less light enters the lens when the shutter button is pressed.
It sounds pretty straight forward, but there is a slight catch. The shutter speed and aperture are both tools used not just to get more or less light onto your camera’s sensor. They’re also creative controls that give you different effects, and once you get the right setting you might not want to change it even if you still need either more or less light in your image.
For instance, while the aperture can be narrowed to let less light onto the sensor, thus helping to darken overly bright images, you might not want to reduce the aperture any further than what you’ve selected, because at the wider aperture that you’ve selected, you’re getting a nicely blurred background, which is helping to make your foreground subject stand out more clearly. This is known as “selective focus”; you’re telling a story by helping those viewing your photos to better understand that the clear, foreground item, whether person or other object is the main subject of the photo, and you’re helping them know this by blurring out everything behind the target subject.
Alternatively, you can create different effects by choosing a faster or slower shutter speed. Perhaps you want to freeze every drop in a waterfall? Or capture a bird of prey as it hovers in the air without any blurring of the wings? For both situations, you’ll want to select a faster shutter speed. The shutter will stay open for only a very, very short time (fractions of a second, such as 1/2000 or something like that). You’re doing this to freeze the motion, not primarily to let the sensor record light for less time. If you wanted motion in both those examples, you’d be choosing a slower shutter speed. The shutter stays open for longer, even if it’s only a few fractions of a second, and all that movement will be recorded onto your final image.
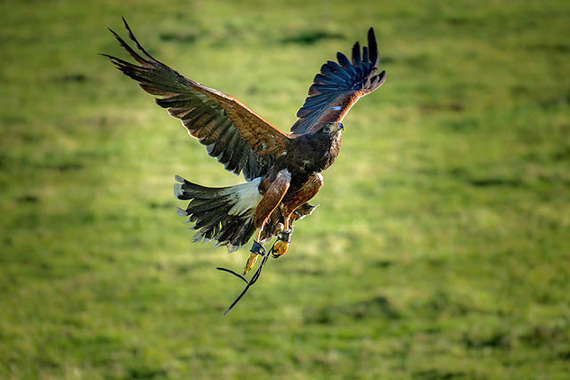
Shutter Speed: 1/1600 of a second. Photo by Ben Cremin
Okay, this is all very good to know, but how do you go about learning how to use this knowledge to master the main features of your DSLR camera?
I ended up playing about with the camera in both modes. Some of the time I spent in Aperture Priority mode, controlling the aperture; some of the time I was in Shutter Priority mode, controlling the shutter speed. I wasn’t concentrating on the technical aspects of whether I wanted to freeze motion with a faster shutter speed, or blur out certain subjects in the background with a wider aperture (that all came to me later, as I got more experienced with the camera). I was focusing solely on looking at the LCD screen to see whether the image was too bright (overexposed) or too dark (underexposed).
From a personal point of view, I found I learned faster while in Shutter Priority mode. This was because, on the camera I was using at the time (a Panasonic FZ1000), whenever I half-pressed the shutter button, as I scrolled the dial to change the shutter speed, I could see the image on the LCD screen either get lighter or darker and I was able to use this to gauge whether to increase or decrease the shutter speed.
At this point, I need to mention my upgrade from the Panasonic FZ1000 to a proper DSLR, in the form of the Panasonic GH4. When I went to use the same method of looking at how bright or dark the image was on the LCD and simply deciding whether I needed to increase or decrease the shutter speed, I discovered that the brightness didn’t alter on the GH4’s LCD screen. As it turned out, this was to be a good thing, as it forced me onto YouTube to look for a solution, and that’s where I discovered how to take advantage of the Exposure Compensation indicator to help determine when the image was exposed properly. It turns out that when you have the light balance right—not too dark (underexposed) and not too light (overexposed)—there should be a little symbol that has a plus and a minus in a box, with a zero next to it (+/-0). When you see this, you have the right light balance and you’re ready to start snapping. Now, it doesn’t matter what DSLR I use, I know I can find the right balance of light to gauge the correct exposure, before I waste hours taking photos that are either too light or too dark.
Even with this knowledge, I’d still continue to practice in Shutter Priority mode, first, letting the camera dictate which aperture to use. Do this until you feel you’ve grasped the proverbial nettle and feel that you’re ready to begin experimenting with the camera in Aperture Priority mode. When I made the switch, I found I got the hang of it pretty much immediately. Setting a wider aperture (lower f-stop number) will make things brighter but also make the background elements more blurred; setting a narrower aperture (higher f-stop number) will make the image darker but will bring more of the scene into clear focus.

Aperture: f/1.8. Photo by r. nial bradshaw
I spent only a few hours in Aperture Priority mode before I felt I’d got the hang of it and felt ready to begin learning to use the camera in full Manual mode. But, guess what? The transition was pretty much instantaneous; I’d learned how to use the shutter speed in Shutter Priority mode, and I’d learned how to use the aperture in Aperture Priority mode. In Manual mode, you’re essentially putting the two lessons together, but doing it all yourself. You’re now in control of what to adjust to let more or less light onto the sensor and now you’re able to start learning to be more creative with this knowledge. You can make subtle changes to both the shutter speed and aperture to improve the quality of your images.
You can start to use the shutter speed to explore freezing moving subjects or letting some of their movement show in your photos by slowing the shutter speed to introduce a bit of motion blur. And you can adjust the aperture to have more things in focus in your scene (which is often what you want in landscape photos, when you want to see everything in the foreground and everything to the horizon in clear detail, and when you want to select a narrower aperture, with a higher f-stop number). Or, maybe you want to use selective focus and have only your main subject in focus in the foreground, while the background is allowed to be blurred, to help the subject “pop”? That’s when you can widen the aperture with a lower f-stop number.
But what if you still don’t have enough light entering your camera? What if you have your aperture and shutter speed correctly set and your photos are still turning out too dark (too underexposed)? Well, that’s when you can explore the next setting I learnt to adjust.
ISO
The ISO setting (pronounced EYE-so) determines how sensitive your camera’s sensor is to light. When I first got my cameras (both of them, the FZ1000 and GH4), they were already set to “Auto ISO”, which meant the camera used its algorithms to calculate the most appropriate ISO setting. But, like having the camera in Program mode, you also want to get comfortable adjusting the ISO settings as the situation demands it, rather than letting a snippet of computer code make a best guess (albeit a binary one).
It’s not all that difficult to learn. When not in Auto ISO mode, the ISO settings are displayed as different numerical values, such as 100, 125, 200, 400, 800, and 1600. The higher the value, the lighter the image will become. However, this isn’t a magic feature that will allow you to take high quality photos, regardless of how dark it is. The camera needs to make certain algorithmic adjustments to help illuminate dark images. However, the higher you push the ISO setting, the more grainy the photos become. This graininess is referred to as “noise” and, if you can help it, you want to avoid noise in your images, because it detracts from the overall quality of the photo. That’s just the nature of this technology, which is gradually getting better as cameras become ever more sophisticated. However, as things stand in 2016, cameras like the Panasonic FZ1000 and Panasonic GH4, which I know well, don’t fare so well above ISO 1600, which is my current limit that I’m willing to go to, despite being able to push the ISO over 12800. Images are just about acceptable at ISO 1600, certainly for posting smaller photos on the internet; if I still needed more light for a correct exposure, I would ignore pushing the ISO any further and instead scale back to a lower ISO (such as 200 to 400, maybe 800 at most) and reach for my external flash to provide the desired illumination. If I can get away with it, though, I do like being able to take photos without fiddling with the flash and will explore the ISO range to try and get me there.
ISO 2000. Photo by Jimmy Baikovicius
That said, there are times when an external flash comes in useful. Recall those instances where the you didn’t want to adjust either the shutter speed (because you wanted a certain motion blur, perhaps) or the aperture (because you wanted to use selective focusing to help your image tell a story) in order to help your camera’s sensor capture the right balance of light? Well, you can have your proverbial cake and eat it if you use an external flash. The flash allows you to introduce light so that you’re not having to steal light from shutter speed and/or aperture adjustments. Let the power of a flash (aka Speedlight) take charge of illumination and leave the shutter speed and aperture settings at the sweet spot for your current project.
So, by this time, I was getting better at selecting the shutter speed and aperture and adjusting the ISO all in tandem to help improve the overall quality of my exposures / photos (whatever you want to call them). That left just one other main feature to get to grips with.
White Balance
The color of white can take on a reddish or blueish tinge, depending on the lighting conditions, such as sunlight or when taking photos indoors, under incandescent lights. The white balance feature allows you to adjust the color temperature so that it looks natural, just the way you see it with your naked eye.
Most modern DSLR cameras come with certain preset white balance settings, usually identified by specific symbols in your camera’s White Balance menu. For instance, you can set it to AWB (Auto White Balance) and let the camera calculate the most appropriate setting. Or, you can take a look at the environment you’re in and, if you’re outdoors and the sun is shining, select the “sun” icon; if you’re under a cloudy sky, well, there’s usually a “cloud” icon that will adjust the white balance to a suitable color temperature for this situation. When taking photos indoors, there’s usually a “light bulb” icon for taking photos under incandescent lights.
On some of the more sophisticated DSLR cameras, you’re able to manually adjust white balance by adjusting the Kelvin color temperature values. Those presets that I just mentioned were doing this, to a certain degree, by changing the white balance to a certain Kelvin temperature value, according to the situation. However, if you have the option on your particular camera, you can choose to warm things up a little bit more, by selecting a slightly higher Kelvin value; or, you can cool down the color temperature by lowering the Kelvin value. The lowest value is 2500K (K = Kelvin), which will cool the image down by increasing the amount of blue. The highest value is 10,000K which will warm up your image by increasing the amount of orange in the exposure.
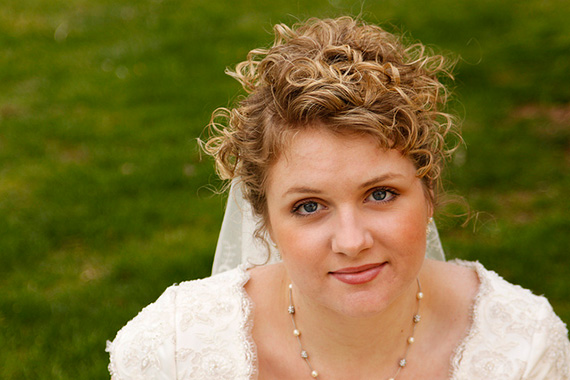
White Balance: Cloudy. Photo by Jen
There is no hard and fast rule about which white balance setting to use. There was a time when I wanted to set the white balance manually and dictate the color temperature in my photos, so I would always go into the Kelvin menu and decide whether I wanted more warmth in my images (increasing the K value) or less warmth (reducing the K value). However, I have come to find that the presets do a pretty good job so, for instance, if it’s sunny outside, I just stick the white balance into the “sun” preset and get on with taking my photos. Experiment, see what works best with your workflow.
And that’s pretty much it. That’s how I learned what I consider to be the main features of a DSLR camera. This is how I went from never having used a DSLR before to feeling fairly comfortable using any DSLR camera in full Manual mode, where I take control of the creative process of crafting (or trying to craft) the photos I want to take. It is a rewarding skill to master.
About the Author:
Graham Wadden created and maintains the Creative Commons photography website, WaddenCCPhotography, specializing in creating stock photography primarily for home educators and those in education.
Go to full article: How I Learned to Use a DSLR Camera
What are your thoughts on this article? Join the discussion on Facebook
PictureCorrect subscribers can also learn more today with our #1 bestseller: The Photography Tutorial eBook
The post How I Learned to Use a DSLR Camera appeared first on PictureCorrect.