If you read my previous article where I give you some tips for doing more spectacular sunset photography, you’ll understand that I love taking photos during the magic hour. For my portraits, I also book my sessions during that time because the light is very soft and flattering. There is one thing I particularly like to do when I process my images and that’s adding a sun flare to my portraits and landscapes. I love to use Photoshop to recreating a scene that would have ideally been there in real life.

I added sun flares to this portrait to add depth.
It’s difficult to not underestimate the effect of a sun flare but it really does make a big difference, especially if you like cinematic results to your images. They’re a great way to add color and depth to your images.
Analyze your image first
The process of adding sun flares is actually quite easy, it only takes two steps and a few minutes. The most difficult thing however is to get a realistic result. You need to analyze your image before doing anything. Start by looking at the position of the sun, how the shadows and highlights are wrapping around your subject.
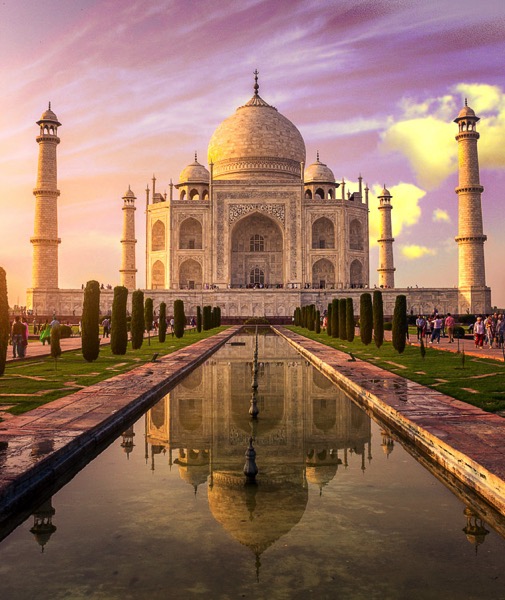
In the image below, I added a sun flare on the left, but before doing that I noticed that the highlights were hitting the Taj Mahal from the left and the shadows were in the right side of the monument. If I were to position the sun flare on the right side of the image, the results wouldn’t be realistic because the highlights and the shadows wouldn’t correspond to the direction of the light of my sun flare. Try to consider the position, direction and intensity of the light.
This is another example of a GoPro image I took. I added a sun flare on the right side of the image because the sun was positioned there in real life. We’re not trying to create another sun, we’re just enhancing it with more colors and more intensity.

In this portrait, I added a sun flare to the left of the model. The result looks realistic because you can see the orange flair spreading and lightning the hair of the model but her face isn’t affected.

How to create and add a sun flare in Photoshop
It’s actually quite easy to add a sun flare in Photoshop. Start by opening your file in Photoshop and creating a new empty layer. The next step is to analyze where you want to place your sun flare and how strong do you want the effect to be. In this case, I want to place my sun flare in the top right of the image and make it pretty big. The sun was actually setting in that position but I am not completely satisfied with how it looks. I want to make the flare more vivid and more intense.
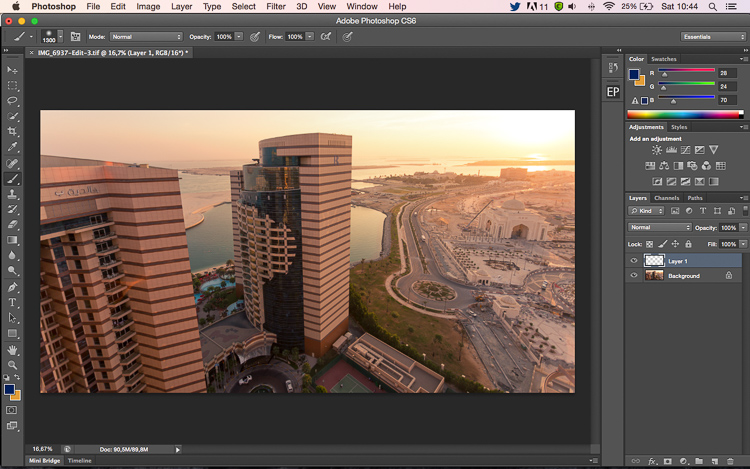
Select the Brush Tool and pick a color
The next step is to select the Brush Tool with an opacity and flow of 100%. Make sure to select a soft brush with a hardness of 0%. I usually like to pick my own color of the sun flare, the color code I use is #fd9424, but there are different ways to pick a color for the sun flare.
You can use the Eye Dropper Tool and select a color from the image by pressing I on your keyboard or by selecting it in the tool box on the left (the chosen color will automatically be set in your palette). Or after you have created the flare, you can create a hue/saturation adjustment layer only affecting that layer and just playing around until you find a color you like.
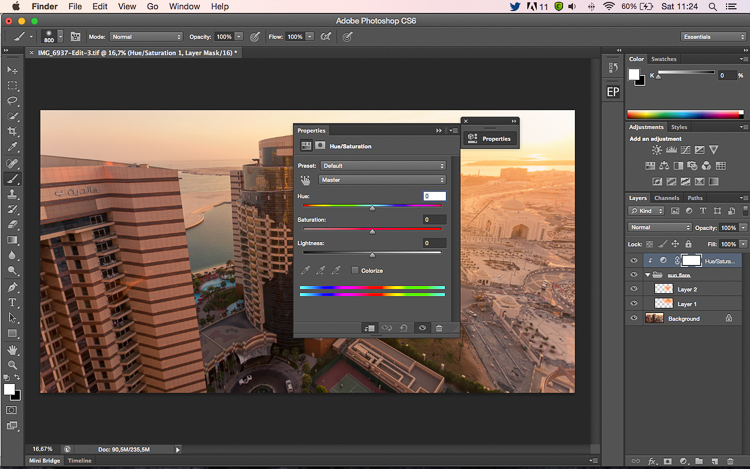
Adding your flare
To create the sun flare, the first step is to simply create one brush stroke (you just have to press once). Make sure your brush is quite big. So far your image should look something like this:
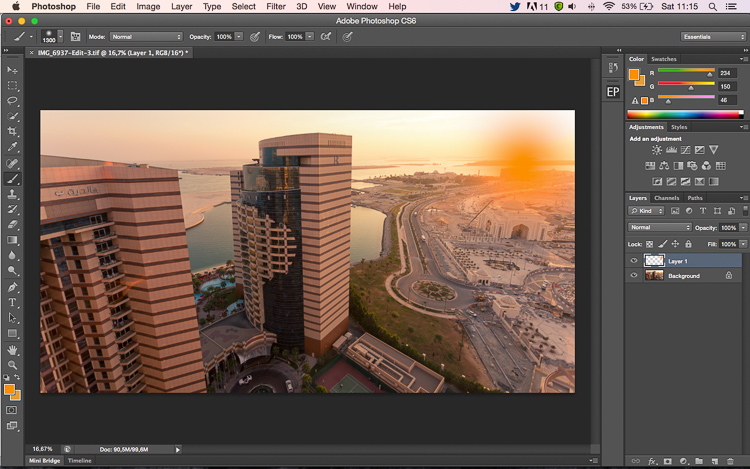
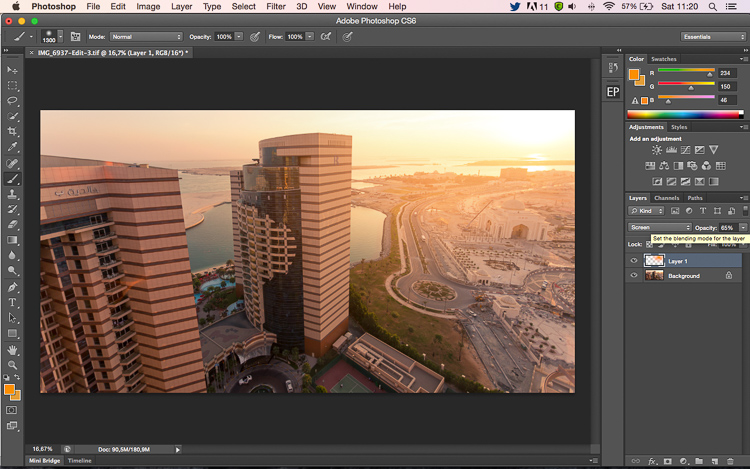
The next step is to go to blending modes for your current layer (the layer with the brush stroke). The default blending mode is normal, you need to change it to Screen. The screen blending mode by definition will invert both layers, multiply them, and invert the result. Your sun flare is going to get brighter and blend in with the sky after you do that.
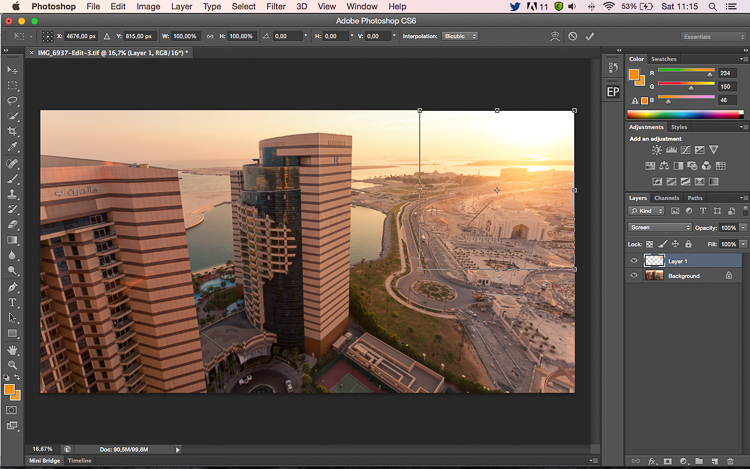
Transform
The next step is to select your layer with the sun flare and press CTRL/CMD+T to transform (resize) it. A little box will appear, you want to drag the corners to make it bigger. How big you want to make it depends on your image and your desired effect. The sun flare will affect the whole image if you make it too big and will brighten up the shadows.
Using a brush tool on a new layer is really helpful because you have full control. You can change the position, color, brightness, or saturation of your flare whenever you want by creating new adjustment layers that only affect that layer.
If you think that your effect if too strong, you can reduce the opacity of the layer, if it is not strong enough, you can duplicate the layer. Always remember that the effect should be subtle otherwise if will look quite unrealistic. We are just trying to create a scene taking in consideration how light works.
Your turn
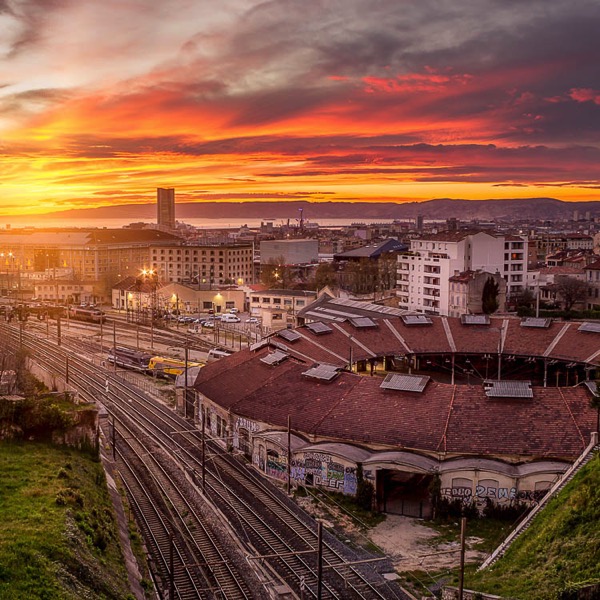
Now you try you hand at adding a sun flare to one of your images using Photoshop. Please share your images and any questions in the comments below.
The post How to Add a Sun Flare to Your Images Using Photoshop by Yacine Bessekhouad appeared first on Digital Photography School.