Related note: Skylum is currently offering Aurora HDR 2018 at $ 20 Off for 72 Hours
High Dynamic Range, or HDR as it is commonly known, is a popular and simple way of combining three or more exposure bracketed images of the same subject to give a single image that holds all the shadow and highlight detail that can’t be captured in a single image.
In this article, we’ll be looking at creating a multiple-shot HDR image, and a single tone-mapped HDR image in Aurora HDR 2018. The aim here is to produce a natural looking final image, instead of the bright and heavily saturated HDR images that are everywhere you look on the internet.
Aurora HDR 2018 is a dedicated HDR creator and is one of the most powerful and intuitive HDR image editors available. First, we will upload three bracketed exposures of the same image. I’m assuming that you already know how to bracket your exposures to create the building blocks of an HDR image. If that’s not the case, there are lots of great tutorials on this site and others that offer in-depth teaching of this technique.
When you open Aurora HDR 2018, you will see this screen:
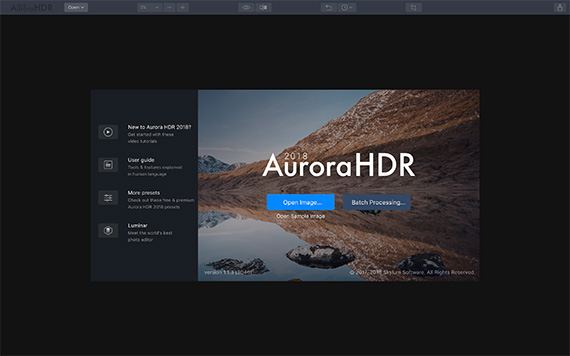
Opening Screen
The two options under the title are Open Image, or Open Sample Image. If you don’t have any images of your own yet that you want to use, try experimenting with the sample image. It’s a great way to learn new things without risking messing up your own photos.
Click Open Image, or Open Sample Image
Three bracketed exposures of the same image will appear. The HDR image will be created from these:
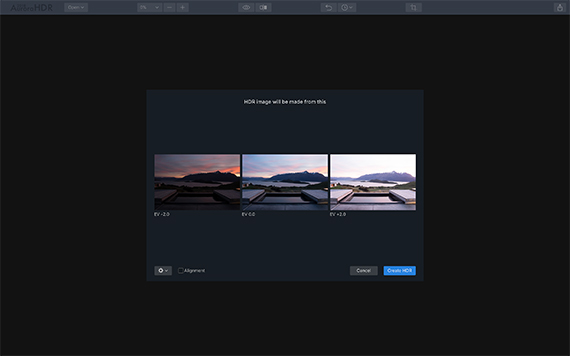
Bracketed Exposures
There are some extra options in the menu if you click the arrow next to the settings icon. These are Ghost Reduction, and Chromatic Aberration Removal. There’s also the Alignment tick box.
Ghost Reduction is good if you have moving things in your exposures, such as clouds or trees, as it tries to blend and fix the issues these things cause. You can select the strength of the Ghost Reduction applied to the images from the drop-down box.
Chromatic Aberration Removal will fix the purple or green fringing you sometimes get along the edges of things where there is a sharp contrast, like tree branches and skies.
Alignment is a great help if you have shot your images hand-holding your camera, as it will seamlessly blend them even if you have moved the camera a little while taking the images.
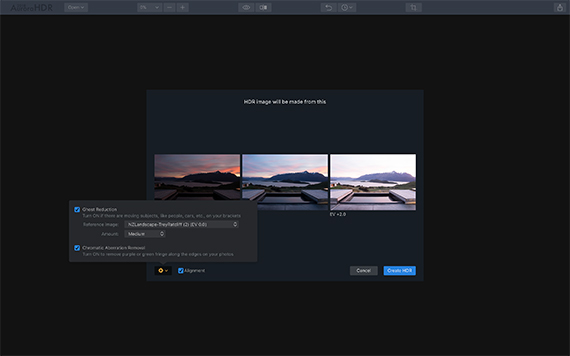
Alignment
Tick all three if you think your images need it, then click Create HDR.
Create HDR
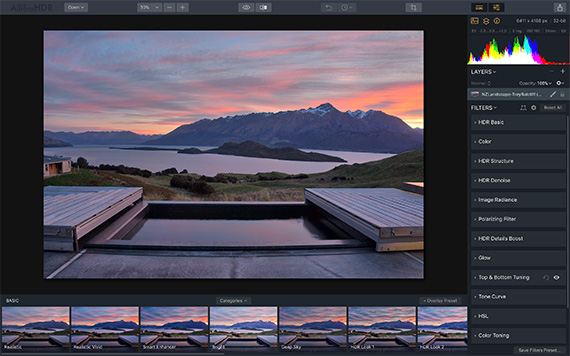
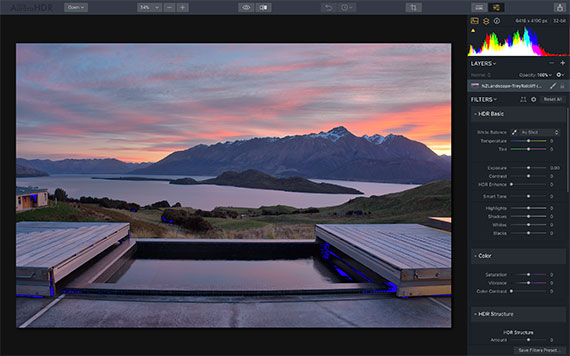
This is the merged HDR image that Aurora HDR 2018 produces from the three sample images. It’s completely unedited at this stage, and this is where the fun begins! On the right-hand side of the screen, you’ll see the develop module with all the options available:
Develop Module
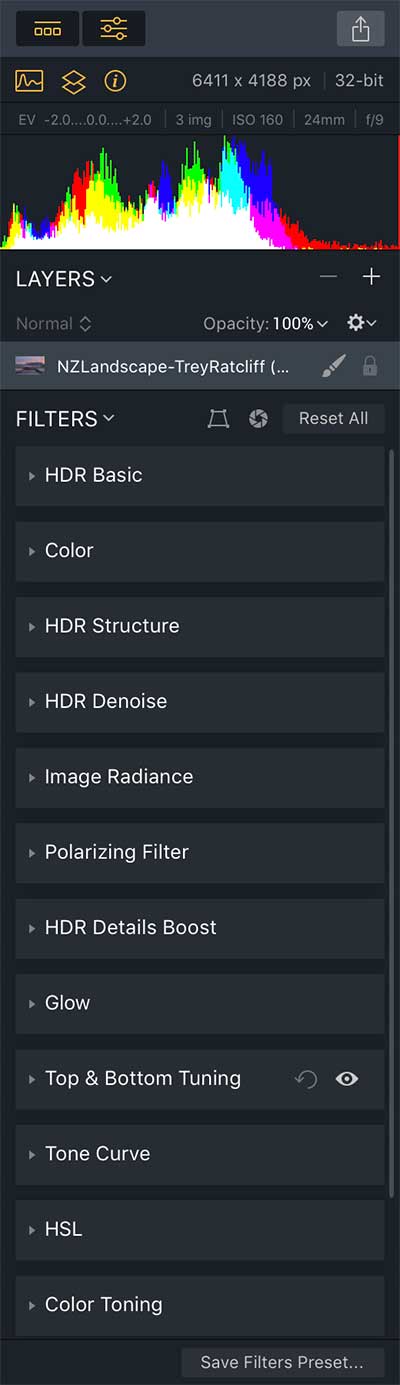
As you can see, there’s a large range of HDR editing tools here, from the HDR Basic tab, to more advanced Color Toning and Top & Bottom Tuning. We’re looking to create a natural and realistic looking HDR image, so start off with a bit of basic editing such as shadows and highlights if you like.
A handy way to see if your highlights and shadows are blown or blocked is to look at the histogram, and click the two triangles at either side of the histogram. They will turn orange when activated:
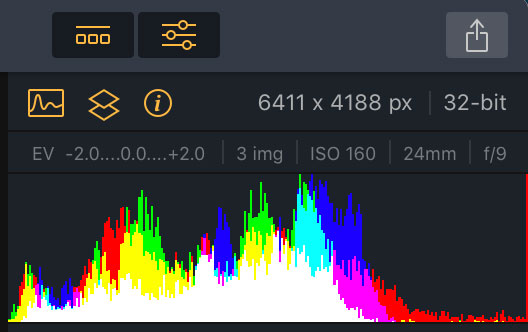
Histogram
This will show up as red on the image where your highlights have lost all details, and as blue where the shadows have lost all details. This is the image with the clipping option turned on:
Clipping
You can reduce the highlight clipping by adjusting the Highlight slider, or doing some dodging with the Dodge & Burn tool. Use the Shadows adjustment slider or use the Burn tool.
If you want to boost the details in the image, try using the HDR Details Boost tab, like below:
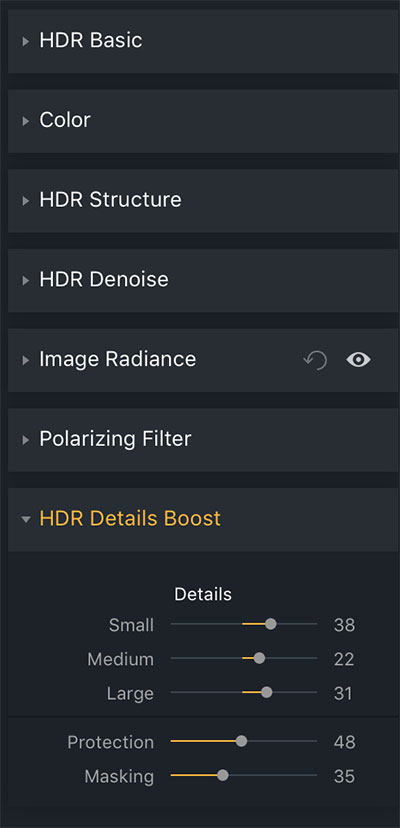
Details Boost
This panel will emphasize either the small, medium or large details in your image, to give a crisper look.
Have a go with all the tools and filters, to see what they do. You can add layers and mix in different effects and presets, too—the options are limitless.
Presets
The presets in Aurora HDR 2018 are a great way to quickly find the right look for your HDR image. There is a large selection of these overlays, arranged in different collections and styles, and you can make them appear at the bottom of your screen by clicking this button, which is in the menu bar at the top of the screen on the right-hand side:
Preset Button
To choose different presets than the default ones that will appear when you click the button, click the Categories arrow which is just above the overlays at the bottom of the screen. A new screen will appear with the categories on:
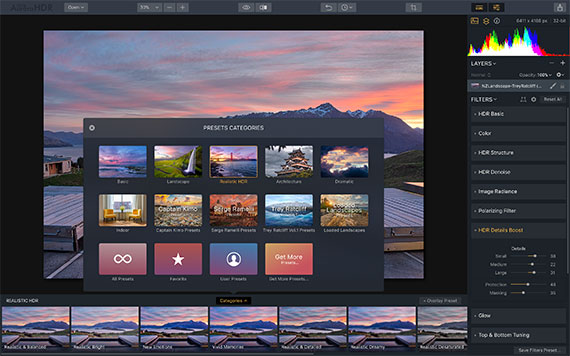
Preset Categories
As you can see, there is a huge choice of HDR presets. As we are looking for a realistic style of HDR, I chose the Realistic category. The options will appear at the bottom of the screen. I chose the Realistic Bright overlay, and reduced the strength to around 74 percent.
All the overlays have sliders that allow you to reduce the strength of the effect, and you can create multiple layers, each with a different preset for a really individual effect. You can also still adjust and tweak the HDR editing settings in the panel on the right-hand side.
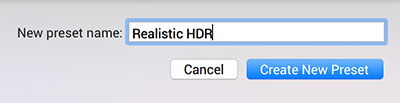
Once you have found the look you are happy with, you can save this as a preset by clicking on the Save Preset button on the right, below the adjustments panels. This will bring up a box on screen asking for a new preset name. Type the name you have chosen in the box and click OK:
Save Preset
To find your preset in the future, click on Categories again, and then User Presets. Your saved presets will appear along the bottom of the screen:
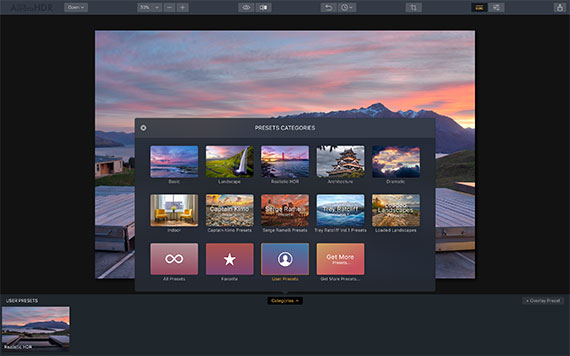
Saved Presets
Before and After Views
A really handy feature in Aurora HDR 2018 is the ability to view your image before and after in either a split screen, or by holding down the view button, which will allow you to switch between full-screen before and after modes. These buttons are along the menu bar at the top:
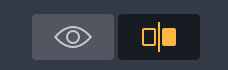
Before and After View Buttons
The eye icon lets you switch between full-screen before and after, and the one next to it is the split screen view, like the one below:

Split View
This is the before and after full screen view:
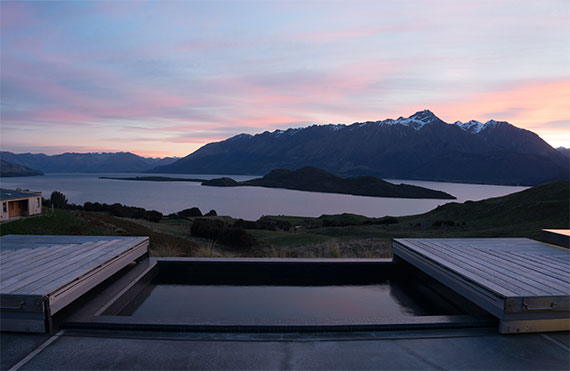
Before
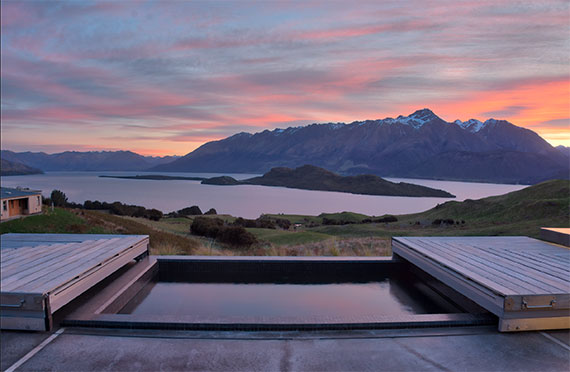
After
Aurora HDR 2018 has allowed us to create a beautiful, natural-looking HDR image from three exposures, using overlays and the editing tools. You can add more than three images to make more complex HDR images, or you can add one RAW file to create a single tone-mapped HDR image, and this is what we are going to look at next.
Single Image HDR
Although you won’t get such amazing detail on a single-image HDR as you would with more exposures, Aurora HDR 2018 does a great job of tone-mapping a single image to give you a good-looking photo.
To do this, choose a single image, and click the Tone Mapping tick box:
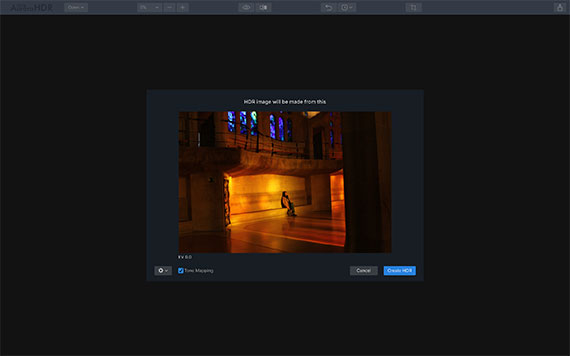
Tone Mapping
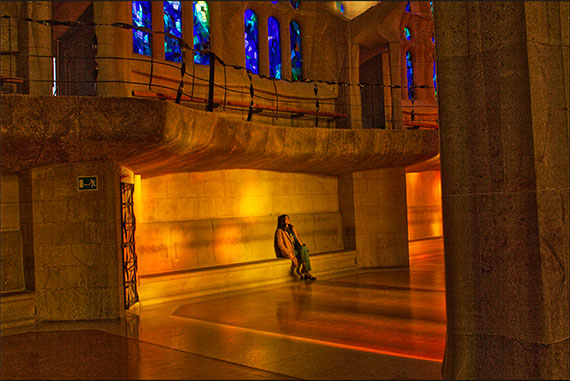
I chose this RAW image to see what Aurora HDR 2018 could do with such a challenge. It was taken handheld at high ISO inside the Sagrada Familia, Barcelona. It’s dark and noisy, and it will be interesting to see what Aurora can do with it:
RAW File
I brought up the Indoor preset from the preset categories menu at the bottom of the screen:
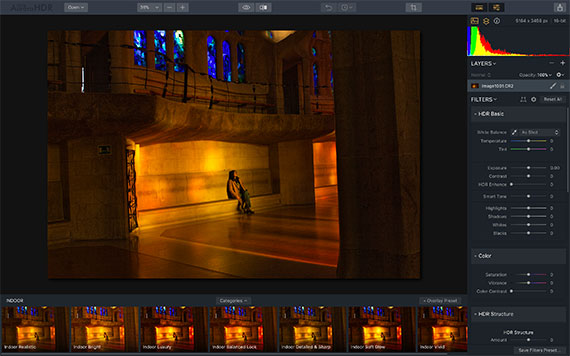
Indoor Preset
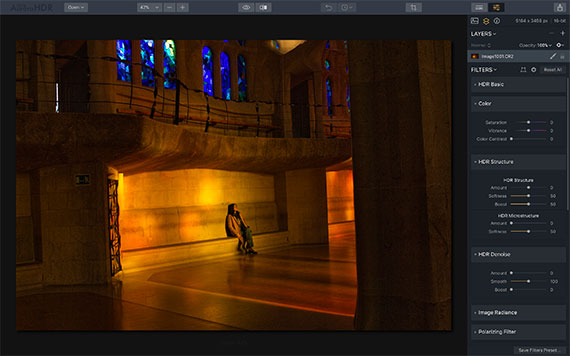
I chose Indoor Bright for this image, and you can see it has brought up the shadows amazingly well. I chose to do a bit more tweaking with the handy Smart Tone tool, which is in the HDR Basic editing menu on the right-hand side of the screen:
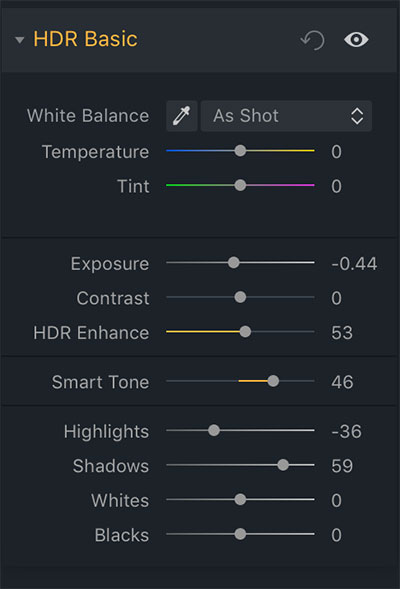
HDR Basic Menu
I also reduced the amount of noise in the image to give it a smoother look, and tweaked some other settings.
This is the final image in a before/after split:
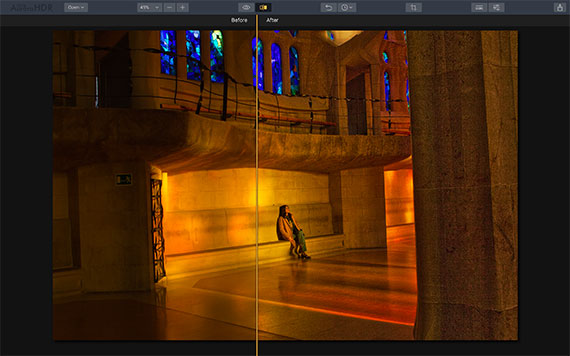
Split View
Aurora HDR 2018 has done a great job, and has radically improved the image without making it look unnatural.
Here is the same image in full-screen before and after:
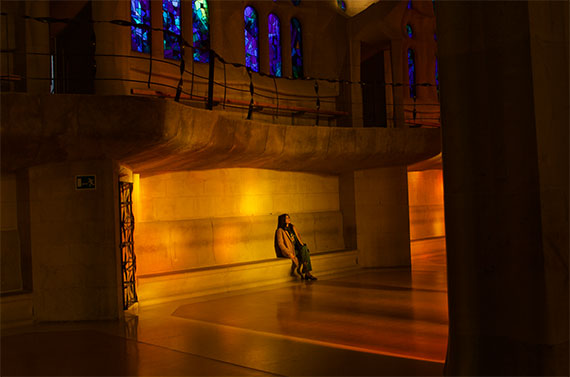
Before
After
Final Thoughts
Aurora HDR 2018 is a powerful tool for creating all kinds of HDR images, from natural to heavily stylized. The main advantage of Aurora HDR 2018 as an HDR tool is that it includes of the features and options that photographers need to use for creating beautiful HDR photos and all of them can be found on the right-side panel.
To really get to know this software, you should look at the tutorials and user guide that you can click on the opening screen page. Another way to learn, and perhaps the most fun, is simply to get in there and get experimenting!
Aurora HDR 2018 on Sale for 72 Hours:
From Friday, May 18th until Sunday, May 20th Skylum will be offering Aurora HDR 2018 for the lowest price ever! Plus you can get an additional $ 10 off if you use the coupon code picturecorrect at checkout.
Aurora HDR 72 Hour Sale
- Aurora HDR 2018 + 10 sets of proffesional brackets for the lowest price ever!
- Current users of Aurora HDR 2017 may upgrade for $ 39 ($ 29 with coupon code picturecorrect);
- New users can purchase Aurora HDR 2018 for $ 79 ($ 69 with coupon code picturecorrect);
Found here: The Aurora HDR 2018 72 Hour Sale
Go to full article: How to Create Natural Looking HDR Images with Aurora HDR
What are your thoughts on this article? Join the discussion on Facebook
PictureCorrect subscribers can also learn more today with our #1 bestseller: The Photography Tutorial eBook
The post How to Create Natural Looking HDR Images with Aurora HDR appeared first on PictureCorrect.