Related reminder: only a few days left for The Long Exposure Photo Guide at 52% Off
Have you looked at a landscape photographer’s photo and wondered how they got the water coming down from a waterfall to look so misty? Or how they got the ocean in a seascape photograph to look so smooth?
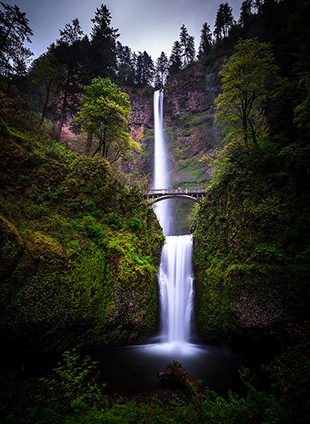
photo by AirHaake
My guess is that if you’re starting out in landscape photography it’s probably one of the first things you’ve tried to do. If you got it right the first time, that’s great. If you didn’t, then let me show you just how easy it can be to create the misty water effect.
There is every chance that if you are just starting out that you won’t have purchased yourself any filters yet. Filters will make it easier for you to create the misty water effect, but they aren’t essential; it just means you’ll have to get up a little earlier in the morning and stay out a little later in the evening.
The first thing you’re going to need to do is to get up early in the morning to get your misty water shot. It’ss pretty much impossible to get the misty water effect during full daylight conditions unless you have the new breed of neutral density filters that are extremely dark. Even then I wouldn’t recommend shooting during full daylight, as you just aren’t getting the best available light. You should be ready to start shooting your subject at least 30 minutes prior to sunrise or 30 minutes after sunset. You will also need to have your camera mounted on a tripod, as you’ll need to keep your shutter open for quite a few seconds to create the effect.
Once you’re ready to go, it’s probably easiest to set your camera on aperture priority mode and use the lowest ISO setting that you possibly can. Set your aperture to a setting around f/16. It goes without saying that your next step should be to focus on your chosen subject to make sure your photo will be as sharp as possible. You should also consider getting a remote shutter release and using mirror lockup to make sure that your camera doesn’t shake. Now for the fun part; take the photo! If your shutter is open long enough, you’ll see that you too have created the misty water effect that you have been after. How hard was that?
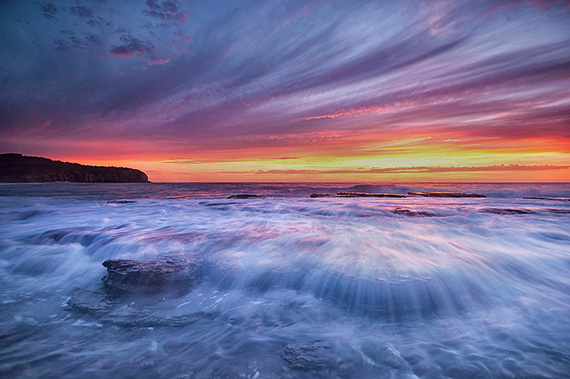
photo by Nigel Howe
If you decide that landscape or seascape photography is something that you definitely want to continue doing, then you should at some stage consider purchasing a few neutral density filters—the darker the better. The darker a neutral density filter the longer you can shoot your subjects after the sun has risen or the earlier you can take a photo before the sun sets.
Over the years, I have found that the best shutter speed for creating the misty water effect is anywhere between 1 to 4 seconds. Anything less than this and the water doesn’t have that silky smooth look, and anything more than that flattens the water almost entirely and makes it look almost boring. Of course, every scene is different. You may need to hold your shutter open longer or shorter depending on what you’re trying to achieve. Now for my last tip: make sure that you focus on your subject before putting on your neutral density filter, otherwise it’s almost impossible to focus.
About the Author
Landscape and seascape photographer Jamie Paterson is based in Australia. He is always trying to capture those elusive perfect moments that nature shares with us and loves to share his knowledge to enhance others’ photographic abilities.
For Further Training, Deal Ending Soon:
If you’ve ever been mystified by other photographers’ tack sharp extended exposures and mind-blowing daytime long shutter speeds, then you may want to take a look at this popular in-depth eBook while it’s on sale. Photographer Dieter Appelt said, “A snapshot steals life that it cannot return. A long exposure creates a form that never existed.”
Transform everyday scenes into amazing images with shutter speed secrets
This premium guide aims to transform your photography into whimsical, jaw-dropping images that just cannot be created in any other manner. Not even in Photoshop. The chapters will walk you through every step of the important techniques with a complete description and a visual reference. This ensures that your technical knowledge will be complete. It is currently on sale for 52% off until the end of the month, March 31, if you’re interested!
Sale ending soon: The Long Exposure Photography Guide at 52% Off
Go to full article: How to Create the Misty Water Effect in Photography
What are your thoughts on this article? Join the discussion on Facebook
PictureCorrect subscribers can also learn more today with our #1 bestseller: The Photography Tutorial eBook
The post How to Create the Misty Water Effect in Photography appeared first on PictureCorrect.