If you’re like thousands of other occasional users Photoshop, you may not have given this a thought. A lot of the popular editing software’s interface is customizable, which means you can play around with the default panel and toolbar. This video from the PTC gives you a quick demonstration for a better workflow:
Customizing the Photoshop Toolbar
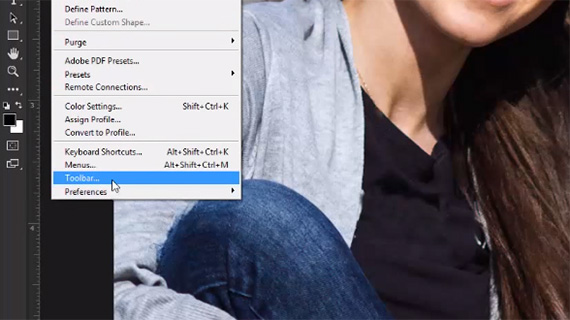
Click on Edit > Toolbar to bring up the Toolbar edit dialog.
The Photoshop toolbar is located on the left of the screen and this toolbar can be customized in Photoshop CC 2015 using two different approaches. You can either go to the Edit menu and click on Toolbar, or you can click on the icon with the three dots and open the Edit Toolbar dialog.
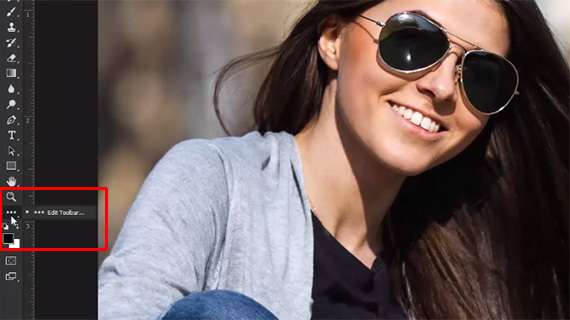
Click on the icon with three dots.
The Customize Toolbar dialog is pretty much a drag and drop thing. Each time you remove a tool or change its position, the toolbar is updated in real time.
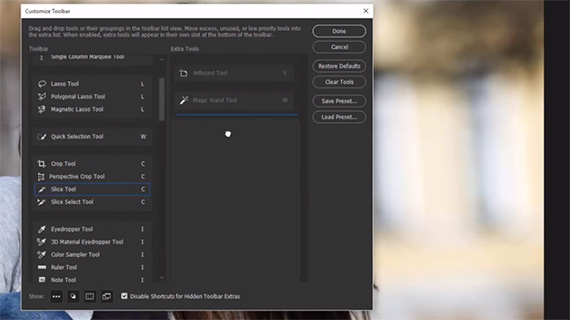
Customizing the tools in Photoshop is a simple drag and drop exercise.
You can even create your own new sets of nested tools by dragging a tool out of its nested position and dropping it between two sections. From there you can drag and drop other tools under that new section to create your own new set.
Custom Workspaces
Custom Workspaces is a new feature that works in tandem with the Custom Toolbars. This feature lets you create a custom workspace that is attuned to the kind of work that you are doing.
Let’s say you’re working on a new logo or editing a photo or doing some sort of 3D work. For each of these tasks you may have a set of tools that you frequently use. With the standard toolbar it’s a big irritating to locate the specific tools each time you need it. The solution is to create a customized toolbar that is activated as soon as you switch to the specific workspace.
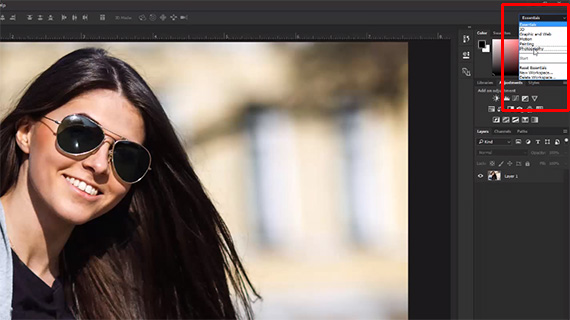
Create a custom Workspace in Photoshop.
Click on the Workspaces dropdown menu and select the type of task that you want to do to bring up the related panels on Photoshop. You can then change things around, adding the tools you need and closing the ones that you don’t normally use. Each time you bring up the Workspace your customized toolbars will be available to you. You can even assign keyboard shortcuts to each of the tools to make things easier to remember.
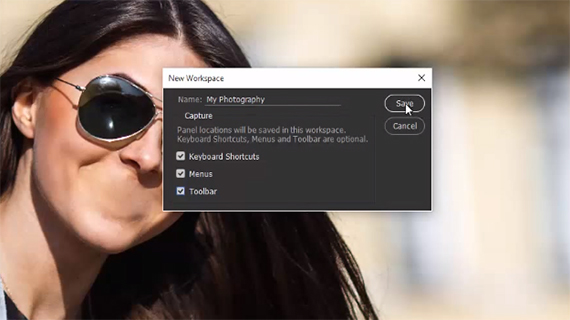
Save the custom Workspace.
To save the customized workspace and toolbars, drag the workspace to New Workspace and the Save New Workspace dialog will open up. Enter a name for the new workspace, check keyboard shortcuts, menus, and toolbars, and hit Save.
Have you tried this out? Let us know how you customize your Photoshop workflow.
For further training: 33 Premium Photoshop Tutorials
Go to full article: How to Customize Your Photoshop Toolbar
What are your thoughts on this article? Join the discussion on Facebook
Article from: PictureCorrect