In this article, we’re going to look at how to get the best out of your RAW processing using Luminar 2018 v1.2.0.
If you haven’t used Luminar to edit RAW files before, the process is very simple and intuitive. It’s also amazingly quick! Not that long ago, RAW processing in a RAW converter meant that it took a while for the changes to be applied to your images. With this latest update of Luminar 1.2.0, your changes are applied lightning fast, and anything that saves processing time is a good thing, right?
How to Use the RAW Develop Module in Luminar 2018
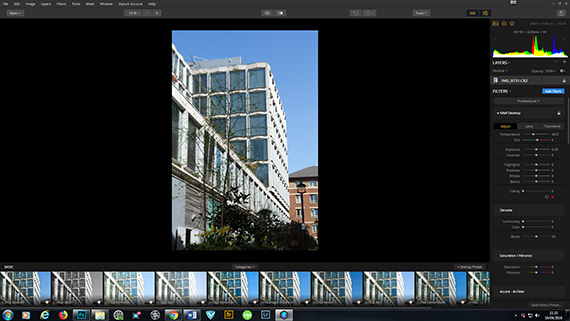
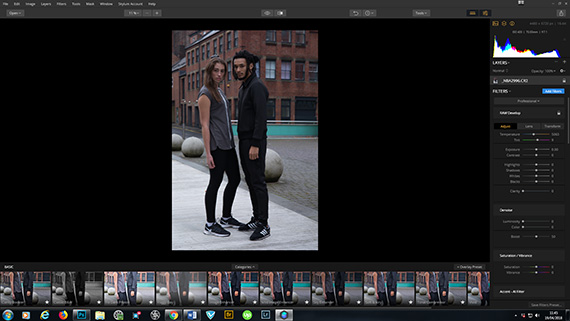
When you open up Luminar, choose your RAW file to process. It will open up just like a normal image, but the RAW Develop drop-down appears on the right-hand side of the screen:

RAW Develop Drop-down
The close-up below shows you all the adjustment sliders and buttons you can use to improve your RAW file. You can adjust the exposure, contrast, color temperature and tint, and there are also options for adjusting only the highlights, shadows, blacks or whites in your RAW file.
Small adjustments in these sliders can make a dramatic difference to your image.
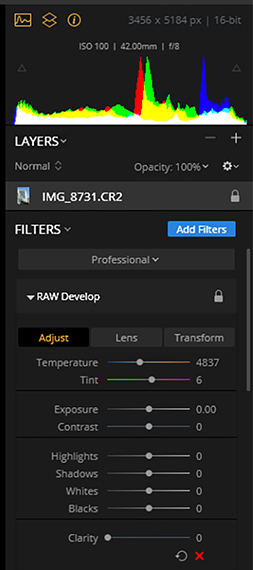
RAW Develop
That’s the Adjust module. Next to the adjust button, there is one called Lens. Click on that, and it will give you all the options for lens corrections.
If you click on the tick boxes for Lens Distortion, Chromatic Aberration, and Defringe, Luminar 2018 will automatically take care of those issues for you. If you wish to adjust your lens distortion manually, there is a slider at the bottom of the Lens module which will let you decide the amount of distortion you want to correct. There is also an option to manually devignette. This will remove any vignetting issues the lens has added to the image.
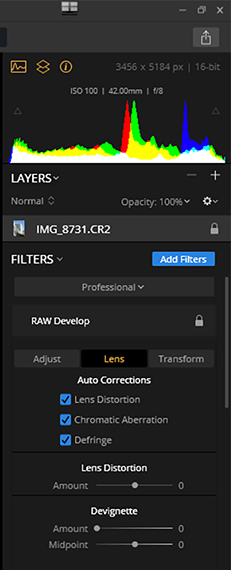
Lens Correction
The last button on the right is Transform. This powerful tool is great for straightening up any shots where you want to adjust the lines or perspectives.
The sliders give you total control over scaling, rotating and adjusting your horizontal and vertical aspects, as well as several others. Architectural images can really benefit from a bit of fine-tuning with the Transform module.
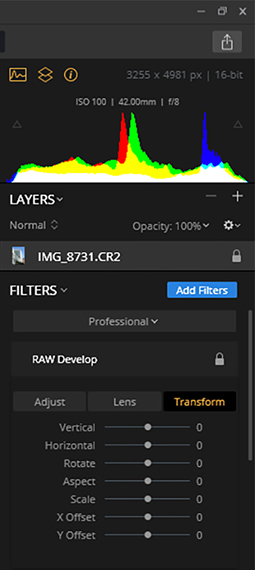
Transform Module
This is the before and after of the image I used after a few quick adjustments in the RAW Develop module:
Before
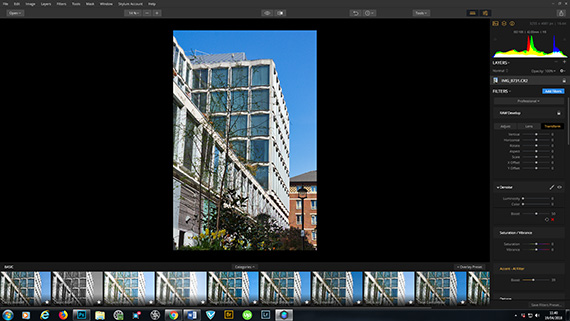
After
RAW Develop isn’t just for making adjustments on landscapes or buildings – you can get great results with all types of RAW images, from fashion to food, in Luminar 2018.
The before and after of the fashion RAW file below shows what can be done with the RAW Develop module. I also used AI adjustment on this image, which uses artificial intelligence to determine how any issues in your image can be fixed. You then decide how much of this adjustment to use by adjusting the slider. All of this literally took me under a minute, and now the image is ready to be exported as a TIFF file for further retouching work, all of which can be done in Luminar 2018.
RAW File
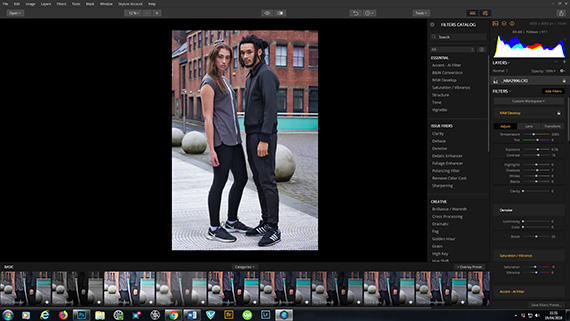
AI Adjustment
The new update has also brought batch processing for the Windows version, which is a great feature. You can make your RAW file adjustments, then apply them to all the images from the same shoot to keep continuity and save you a lot of time.
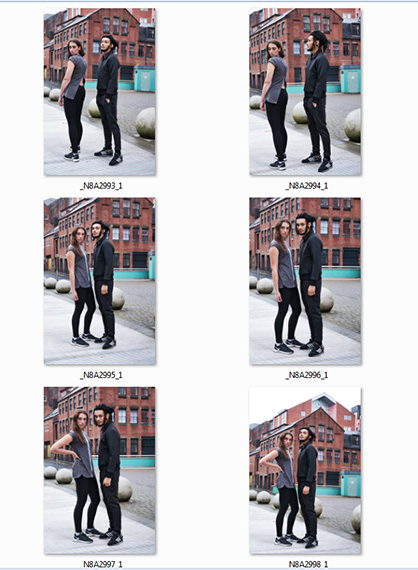
Simply choose the images you wish to batch process:

Select Images for Batch Processing
You can apply any of Luminar’s presets to your batch images, or ones that you have created yourself in Luminar. In the screenshot below, I have chosen to apply the preset I created for the fashion image above to other RAW files from the shoot:
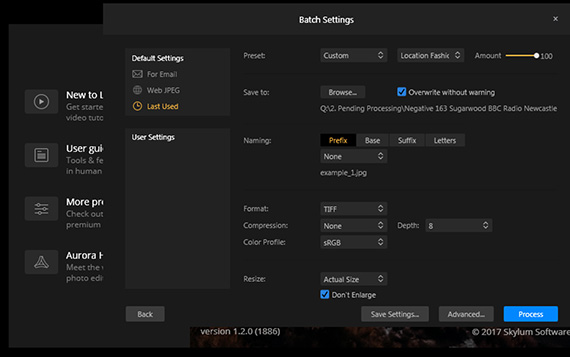
Batch Settings
The screenshot below shows that the same preset has been applied to all of the RAW images I chose, and has converted them to TIFF files:
Batch Process Results
This is an amazing and time-saving way to get all of your RAW files to have a certain look and feel before you take them on for any further retouching.
Luminar 2018 is an image editor that is going to be very hard to beat for processing speed, ease-of-use and beautiful, consistent results. The RAW develop module, batch processing features and all the other things that make it simple to produce great, professional-looking images are there in the updated version of Luminar 2018.
As an added bonus, there is an offer dedicated to the newest update, called Luminar 2018 Jupiter, which comes together with some amazing gifts for photography and photo editing.
Update: Luminar 2018 Jupiter (Click to Learn More)
While enhancing speed and overall app performance was the major focus for the Jupiter update, Skylum also dramatically improved the RAW Develop filter with new tech to provide better color and less noise, plus incorporated automatic lens distortion removal. The result is a superior, cleaner starting image, ready for further editing. Plus if you use the coupon code PICTURECORRECT at checkout you can save an extra $ 10.
Launch offer ending soon: Luminar 2018 Jupiter Release
Go to full article: How to Edit RAW Photos in Luminar
What are your thoughts on this article? Join the discussion on Facebook
PictureCorrect subscribers can also learn more today with our #1 bestseller: The Photography Tutorial eBook
The post How to Edit RAW Photos in Luminar appeared first on PictureCorrect.