This is one of those tutorials that’s great to play around with, maybe do it once or twice. But in the end, the thing they are great for is that they always teach you something. It may not be much, but it might help you think in a different way, or learn a skill you didn’t know about. This one is about how to make a sketch inside a photograph.
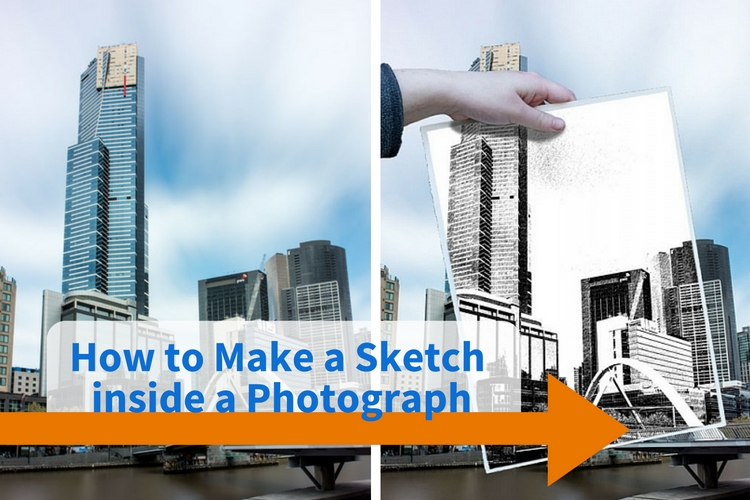
This is a simple tutorial that can help you learn how to use layers, and combine images. There are so many things you can do with layers, but in this example, we are going to work on putting a drawing of a scene in front of the photograph. Of course, it isn’t a real drawing, but one that is created from the image using the artistic filters in Photoshop.
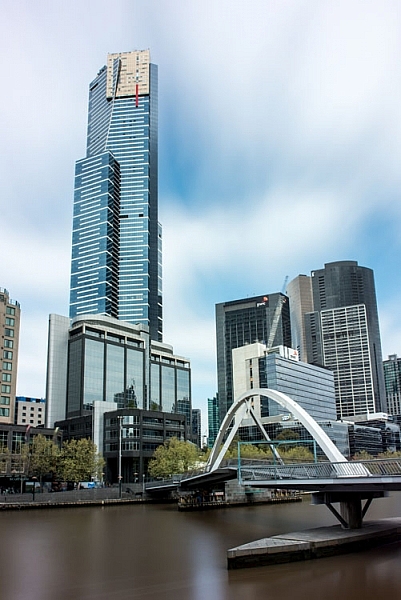
The image
Deciding which image you are going to use can be harder than you think. It could take a while to find one that will work well, one with lots of contrast is good. You want an image that will stand out when you put the drawing over the top of it.
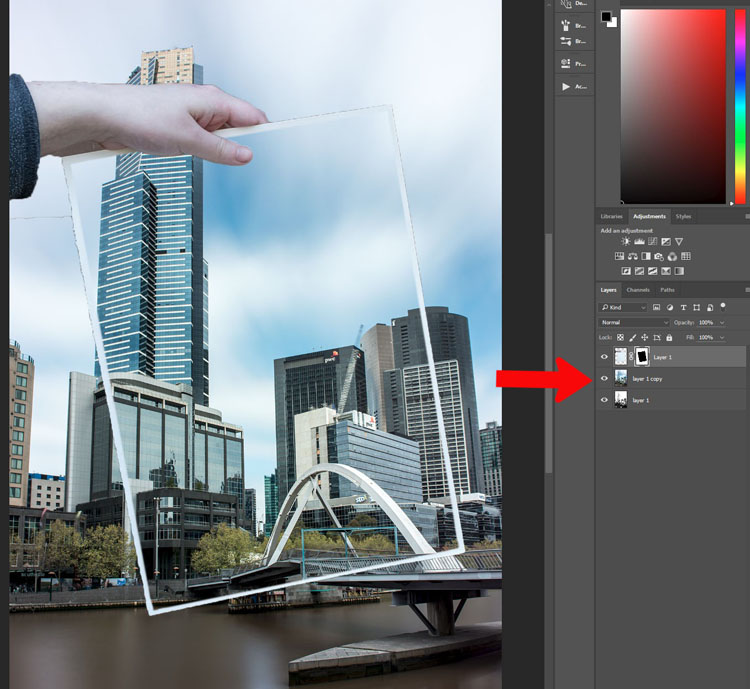
Open the image and process it normally to get it ready. If you have several layers flatten or merge all of them, and copy that new merged layer so there are two. To copy the layer press Ctrl/Cmd+J.
Turn off the top layer by clicking on the eye icon next to the thumbnail. That will make it disappear, or turn off temporarily.
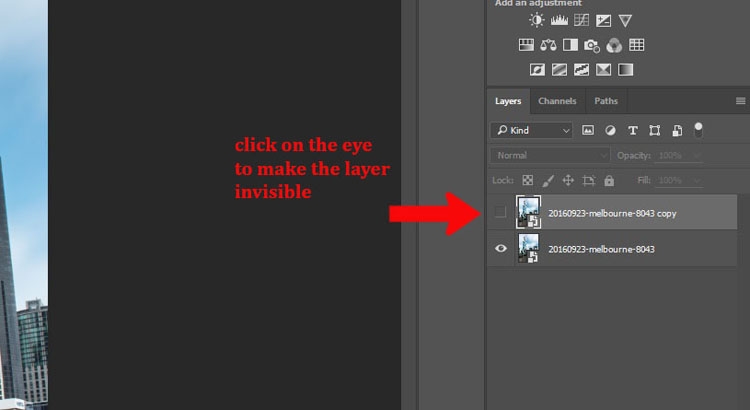
Click the bottom layer to select it as the one that you will change into a drawing.
Making the drawing
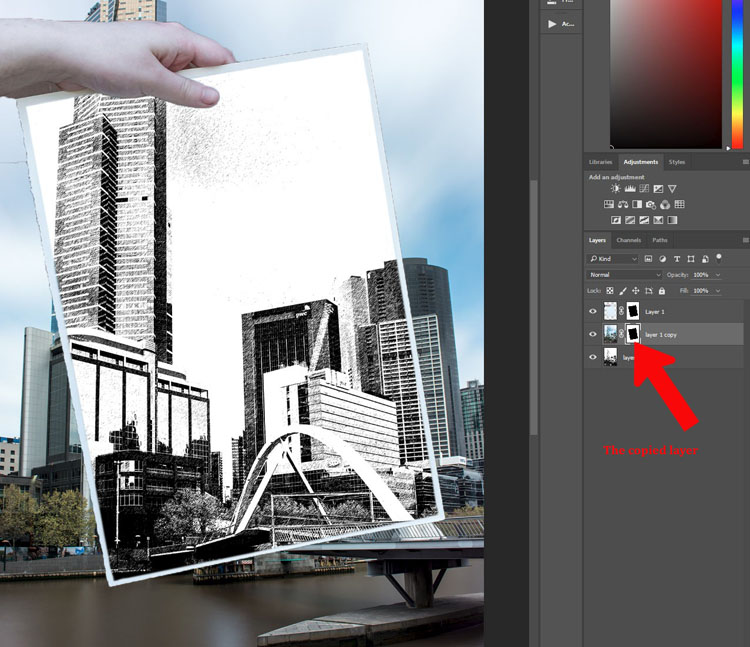
Go up to the Main Menu and click Filters > Filter Gallery, or use the keyboard shortcut Ctrl/Cmd+F.
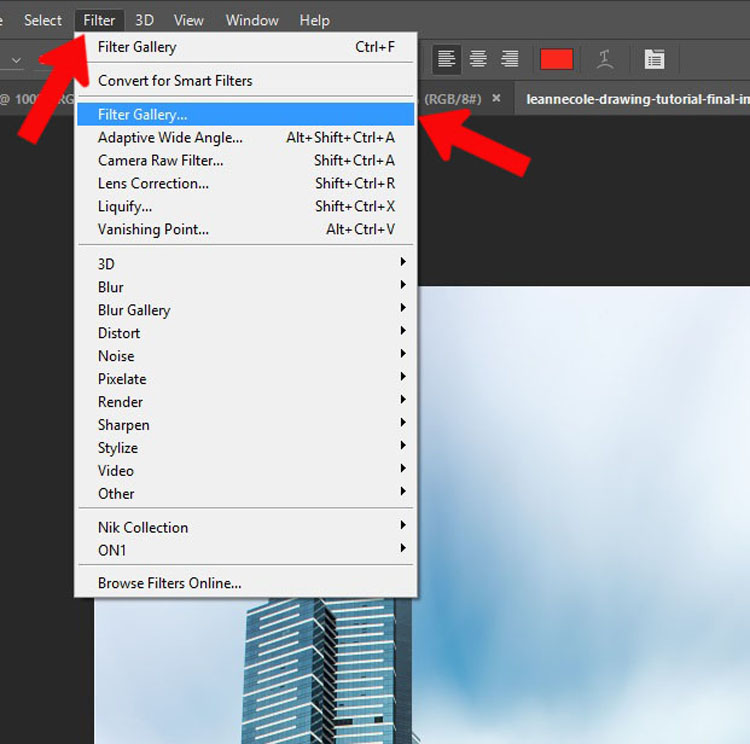
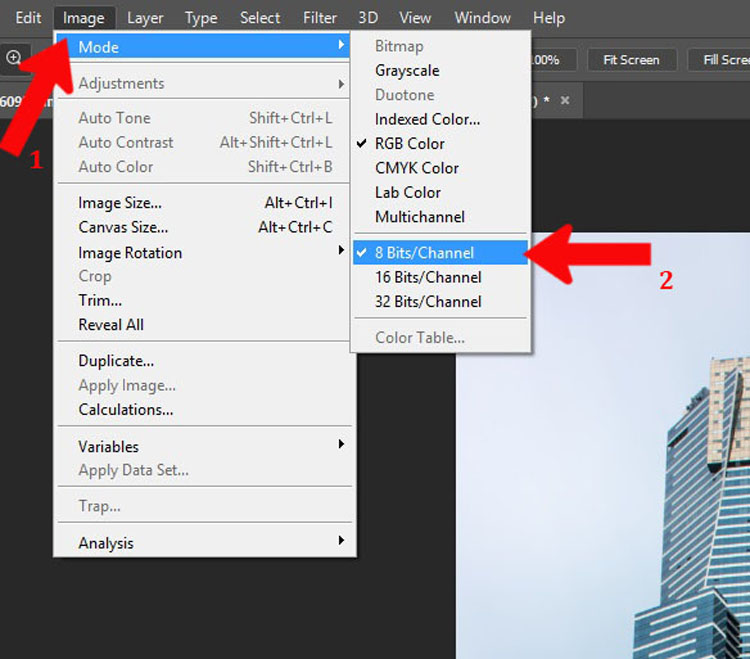
If you can’t bring up the Filter Gallery or click on it in the menu, it may be because your image is either 16 or 32 Bits, so you will need to change it to 8 Bits.
To change the image to 8 Bits select from the top menu bar: Image > Mode > 8 Bits/Channel. You should now be able to use the Filters Gallery.
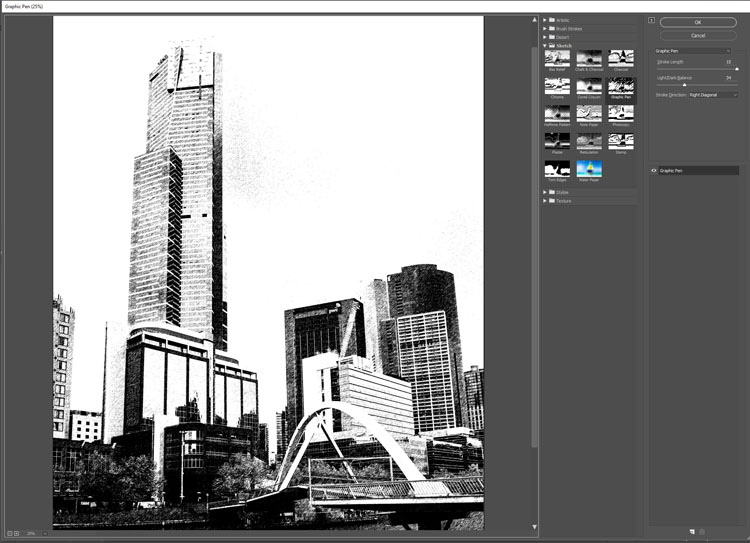
There are loads of options in the gallery to give you an artistic look. Select the one you like. For this example, I used the Graphic Pen found in the sketch section. If you don’t like any of the ones that Photoshop has to offer, you can look for artistic actions (google search) that may give you a better drawing.
Adding the hand
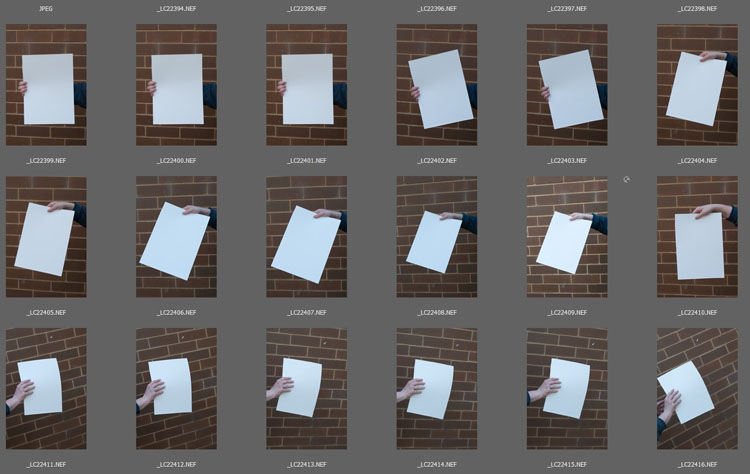
I took several images of my daughter holding a piece of paper. It’s good to get a large variety, and if you have the time, shoot in different lighting conditions as well.
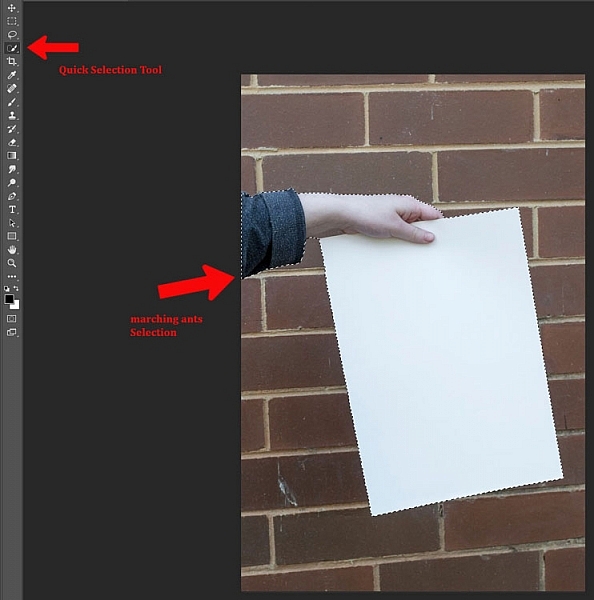
Choose an image of the hand holding the paper. Open it in Photoshop and use the Quick Selection tool to select the hand and paper. It doesn’t have to be exact, as long as everything you need is selected. Once you have the hand on the image you can fine-tune it.
Press Ctrl/Cmd+C, then Ctrl/Cmd+V. This will copy and paste the selection onto a new layer (in the same document). However, if you go back over to your original image and pressCtrl/Cmd+V it will paste the hand onto your image as a new layer. Use the move tool, the top one in the tool bar.
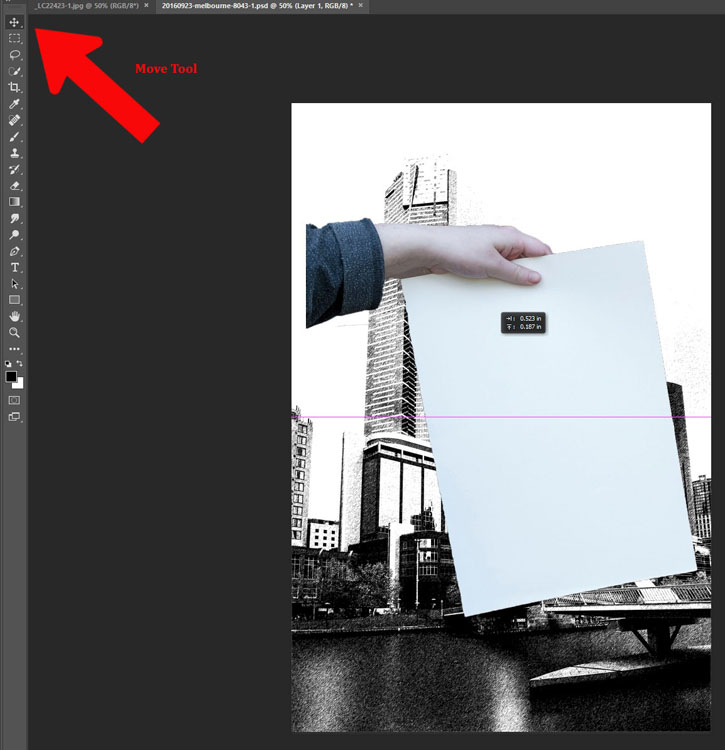
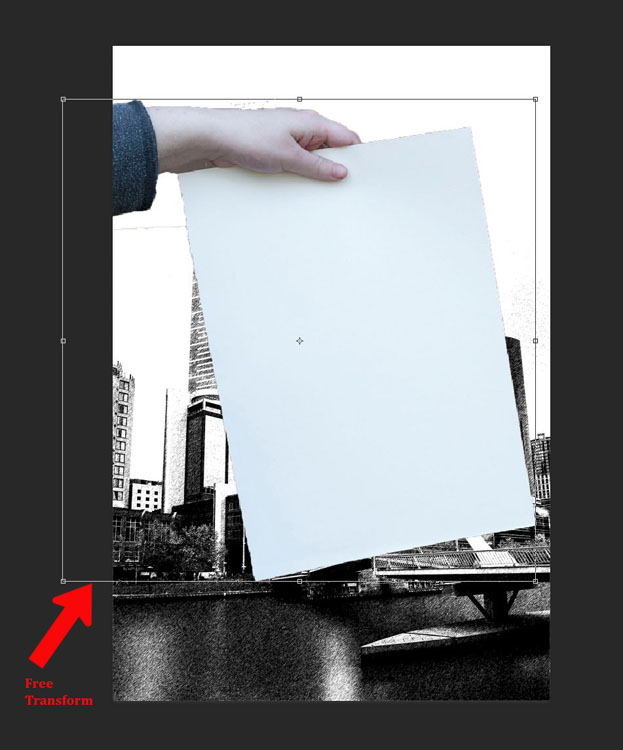
Size and position the hand
If you are lucky the hand will be the correct size, however, if it isn’t you may have to resize it. You might also have to change the angle. Free transform will allow you to do that, press Ctrl/Cmd+T to activate it. If you click on the corners you can make it bigger or smaller (hold Shift down to keep the proportions the same!). If you hover around the corners you will see a small curve appear with arrows on either end, this will allow you to rotate it to the desired angle.
The hand looks a little odd because it needs a shadow. Take note of your original image and how the shadow was placed. You also need to look at the main image, it will look a bit off if the light is coming from a different direction than the image of the hand.
Creating the drawing on the paper
To get the image on the piece of paper you need to ensure the layer that is the photograph is still not visible. It should still be invisible from when you did the drawing.
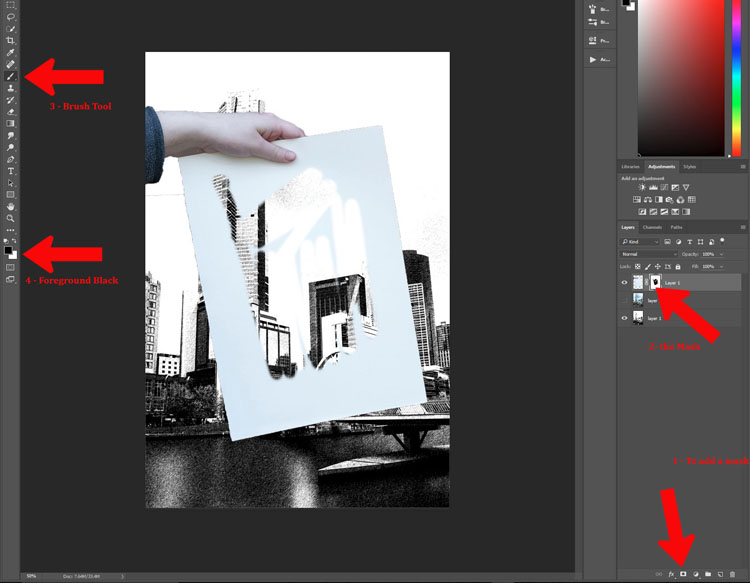
Add a mask to the layer with the hand and paper. At the bottom of the layers panel click on the mask icon, looks like a white rectangle with a round black circle in it. It should be down in the bottom right corner.
Next, make sure the layer mask is selected. If there are white lines around the outside of the mask (not the image thumbnail, it means the mask is selected.
Select the Brush Tool and make sure the foreground colour is set to black. Go down the tool bar and find the foreground and background colours. If white is on top click on the arrow above it to make it black (if other colors are showing hit D on your keyboard to set to the defaults of black and white).
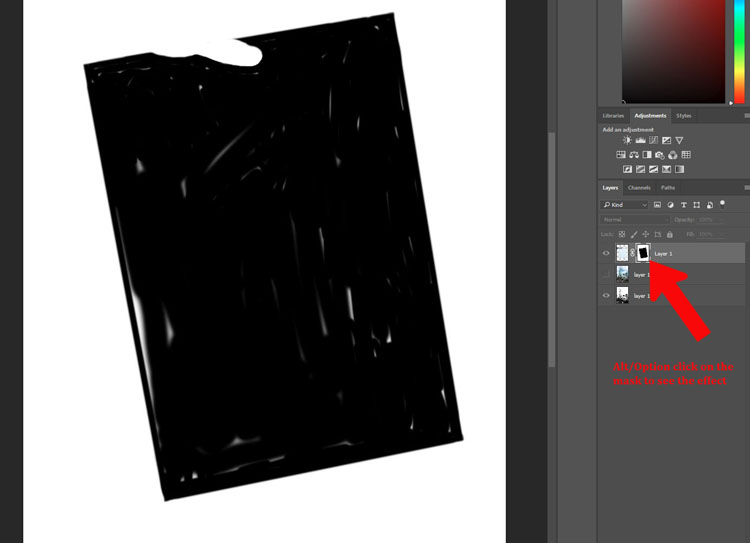
You could mask out the whole sheet of paper, or leave an edge around the image. For this tutorial, I left a border intentionally. Once you think you have gotten the whole image, press Alt (PC) or Option (Mac), and click the mask. You should then be able to see what you have masked – the black areas are the mask, so make sure there are no white spots left. Brush over any white bits and remove them. If you realize that you are painting white, then the foreground color is wrong. Press X and it will reverse the color so you can go back to painting with black.
Putting the photograph back
Once you have the drawing showing through the paper, you need to make the photograph appear again. Click on the eyeball icon next to the image so it is visible. You will notice the whole drawing has disappeared, it is now behind the photograph. You will need to do another mask so you can see the drawing on the paper again.
The beauty of this image is that you can use the same mask that you used for the paper layer.
If you go to the layer mask that you used to show the drawing, press Ctrl/Cmd and click on the mask you will see it make a selection (marching ants around the selected areas). Press Ctrl/Cmd+C, to copy that selection. Then, make sure the photograph layer is selected and click the layer mask icon to create a new one. You should get a new layer mask the same as the other one. (Alternately you can click and hold Alt/Opt, and grab the layer mask from the paper layer and drag it over to the image layer. That will copy the same mask over for you).
It is time to remove the parts that don’t really belong. You can use the mask that you had for the hand layer. Use your brush tool and remember to make black the foreground colour. You can now mask out the parts of the hand that you didn’t mean to select when you did the quick selection (zoom in close, you can also use the refine edge function).

Fine tuning
The hand can look a little weird, so next you need to add a shadow that the hand would have created. This will make it more believable looking.
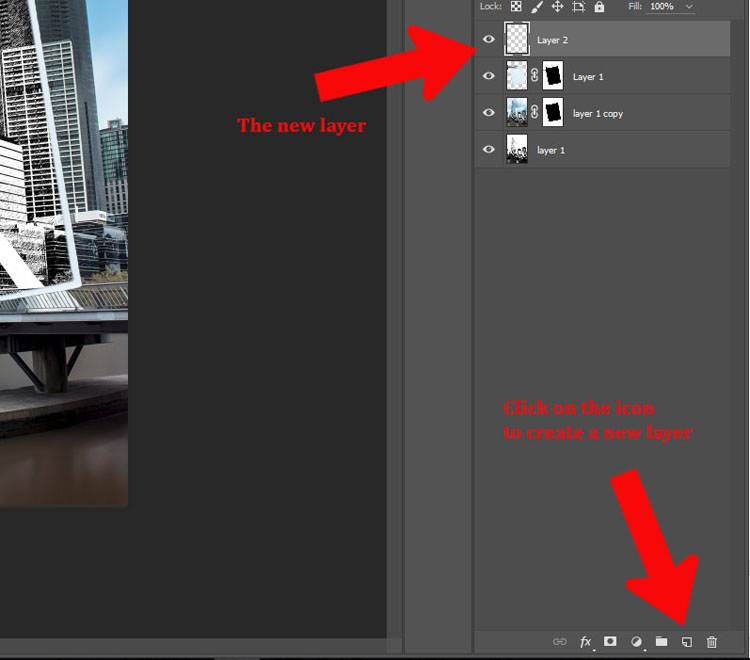
Add a new layer by clicking the icon at the bottom of the layers panel. It is the square outline with the folded corner, usually located next to the trash can. Alternatively, you can go to Menu > Layer > New Layer.
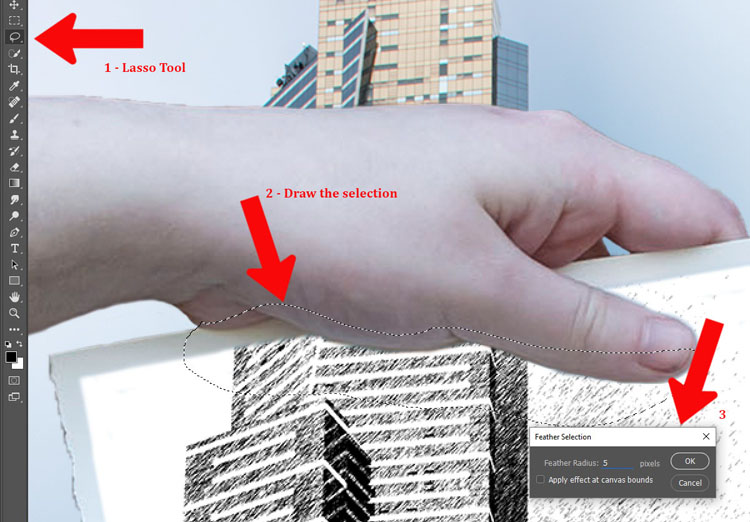
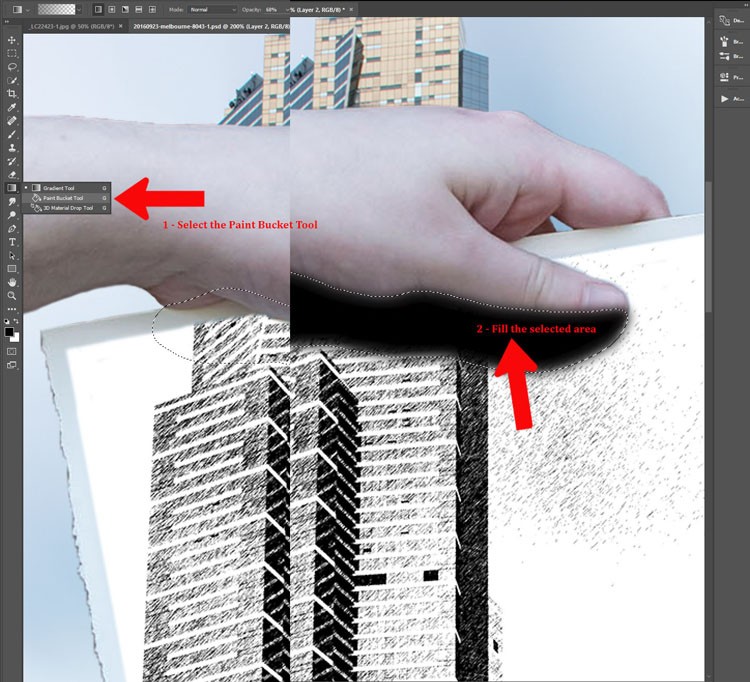
You will need to use the lasso tool. It is also helpful to zoom in so you can see what you are doing. The zoom tool is also in the tool panel, or you can press the letter Z which will make it appear. Click the image to zoom in, or to zoom out press the Alt or Option key and click the image. (Note: Press B to get the brush back.)
On the new layer, draw under the hand with the lasso tool to get the shadow. You don’t have to be exact as it is not going to be really dark. Go up to Menu > Select > Modify > Feather. In the popup window enter the amount of feathering you want. 5 pixels was the setting selected for this image. Alternatively you can press Shift+F6.
Add in the shadow area
Fill the selected area with black using the Paint Bucket Tool. Make sure that the foreground colour is black.
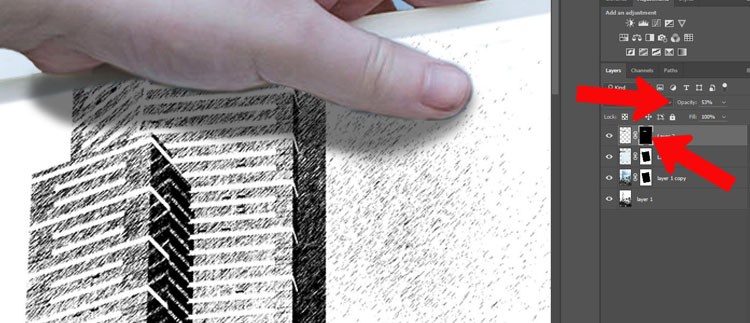
You may need to add a mask to remove any parts of the hand that you don’t need. You can also change the opacity of the layer so the shadow isn’t as dark. The opacity slider is located at the top of the layers panel near the blending modes. Adjust to where you think the shadow looks natural.
To deselect hit Ctrl/Cmd+D.
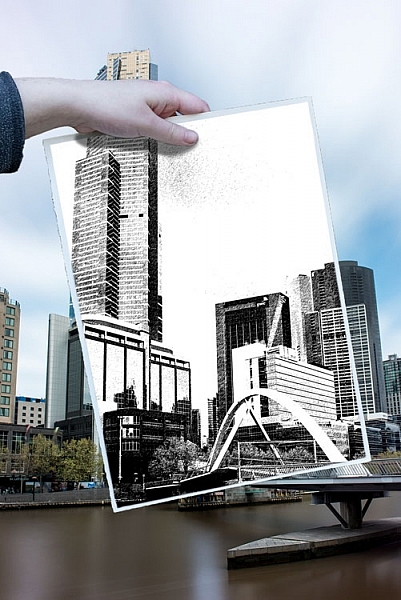
The image is now done.
Conclusion
I don’t know how many of these you would do, but some of the techniques used to create it can be used for many other things. Try doing this tutorial a few times, then see how you can use some of the processes in different ways. Don’t forget to share your images so we can see what you have done.
The post How to Make a Sketch Inside a Photograph by Leanne Cole appeared first on Digital Photography School.