
The theory
Bokeh (pronounced b??k?) is a Japanese term that translates to blur in English. Bokeh is used by photographers to describe the quality of the unfocused or blurry parts of a photograph. Every photograph has a depth of field – the area of a photograph that is in focus.
For example, in the image below, the upper half of foreground is sharp and in focus, meaning that it is inside the depth of field. The background, however, is blurry or outside of the depth of field. The reason the leaves in the upper foreground are focused is because I physically positioned myself close to them with my camera set to a wide aperture – resulting in a shallow depth field and an unfocused background. It’s this subsequent softness and shape in the background that is described as Bokeh.

Looking at the image again, you’ll notice that the points of light in the unfocused areas of the photograph are circular in shape. That’s because my lens renders them to appear that way. However, you can change this shape to create your own patterns by making simple filters and attaching them to your lens.
What you need to make custom bokeh

- Camera
- A large aperture lens (I used a Canon 50mm f/1.8, but the larger the aperture the better the effect)
- Lens cap for the above lens
- A sheet of black poster board
- Scissors
- Craft knife
- Pen
- Compass (optional)
Making the filter
To begin, place the lens cap on the sheet of black poster board and carefully trace around the outside of the cap with a pen. Alternatively, you can measure the diameter of your lens, set a compass to the measurements and trace an outline with the compass instead. Mark out an extra little tab coming off of the outline to help remove the filter later.
Cut around the outline of the lens cap and tab so that you have a circle that fits snugly in front of your lens. Usually, the filter diameter is about 0.5 mm smaller than the lens cap size, so you may have to trim the edges of the circle a little more for a tight fit.
In the very center of the circle, draw the outline of the shape or design you want to use. Keep in mind that to work properly, the shape can’t too be too big or small. Making the shape too small blocks so much light that most of your photos will be underexposed and turn out black. Too large a shape and you won’t be able to see the effect in your photos at all. It’s a little fiddly, but keep the shape to at least 5mm and at most 20mm. As an example, I cut shapes that were about 15-20 mm on the longest side for my f/1.8 lens. It may take some experimentation to get perfect.

Keep the design simple
The simpler the design, the easier it is to cut with the craft knife, which will make for a more defined bokeh shape. I recommend shapes like 5-pointed-stars, triangles, hearts, crosses, or even question marks. Cut the outline of the shape out with the craft knife, tidying up any messy corners carefully or they will show up in your photographs.

Take your filter and press it into the front of your lens so it sits snugly in the ridges.
Using your custom bokeh filter
Set your camera to Aperture Priority or Manual mode. For maximum effect, you want to set the f-stop to be as wide as possible. On my lens, the lowest aperture available is f/1.8 but depending on the lens you use, you might be able to go wider still (f/1.4 or f/1.2). Because the filter blocks a lot of light, you will need to make longer exposures and/or use a higher ISO, so having a tripod will prove handy.
Remember that only unfocused points of light in the photograph will be affected by the filter. If you want a dramatic effect, try going out at night with your camera set to manual focus and see the results at different focal lengths. The most dramatic effect will be seen at the closest focus distance (when you’re close to the subject and the background is far away). Have fun with reflective objects, fairy lights, reflections, and even glitter to create some eye-catching bokeh patterns. My favorite shape is the heart, can you tell?


The outline of a tree is marked out at night by the pretty fairy lights draped on its branches. I couldn’t resist the opportunity to test one of my heart-shaped bokeh filters.


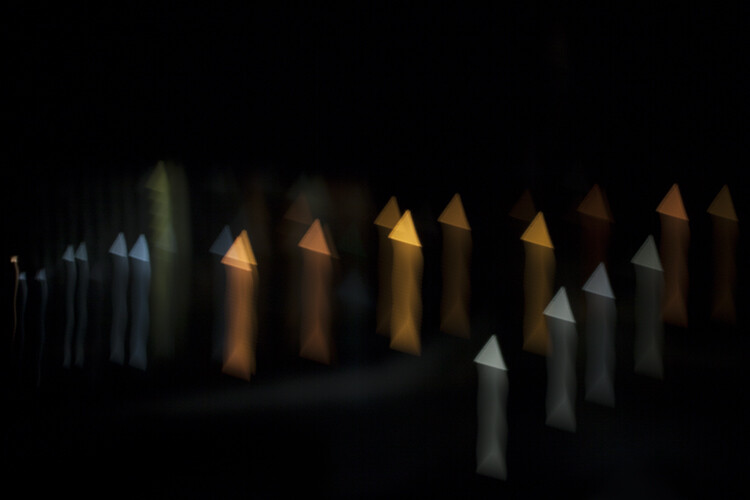
Moving the camera around during exposure with a custom bokeh filter can produce some interesting results


Light filtered through an oak tree transforms into an intriguing array of diamonds.

This bokeh filter transforms car lights into a sprinkle of stars
The post How to Make Custom Bokeh Shapes by Megan Kennedy appeared first on Digital Photography School.