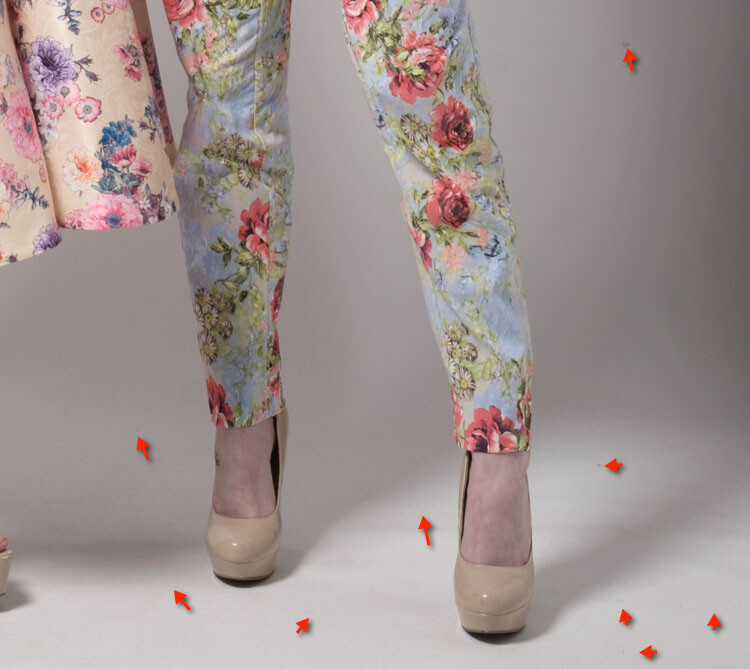
You’ve rolled out your white background for your shoot; whether it’s vinyl or paper. It’s a bit dirty from shoes, but you’re under pressure to get the shoot done, so you carry on regardless. When the shoot is over and the photos are back on the computer, that’s when you see how bad it really was. The scuff marks, the footprints, the stray hairs, these are going take ages to clone out. You’re sorry now that you didn’t clean it up, or cut off some paper. Sigh. Better just getting going on the processing.
But wait! There’s a better way.
It doesn’t have to all be cloned out. There’s an easy way, using one of Photoshop’s lesser known tools called Median. Median is a form of blurring, where groups of pixels get changed to the middle value of the pixels. Higher values are reduced, lower values are increased, averaging out the values.
Steps for cleaning up your white background
So your floor has specs of dust, hair, and just general footprint dirt on it.
Step one – duplicate layer
Duplicate your background layer by dragging it on to the New Layer icon at the bottom of the Layers panel.

Alternatively, use the shortcut Command/Control + J. If you’ve got a set of layers, then use the shortcut Shift + Cmd/Cntrl + Option + E to stamp them into a new layer.
Step two – Median
Go to Filter>Noise>Median.
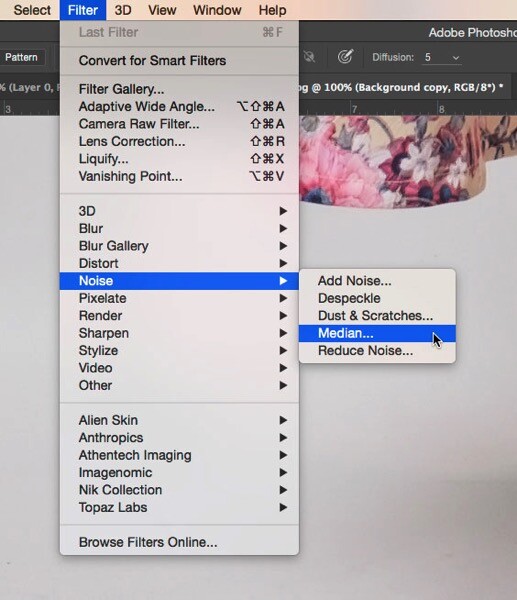
Move the Radius slider until the dirt disappears. I’ve used 10 here.

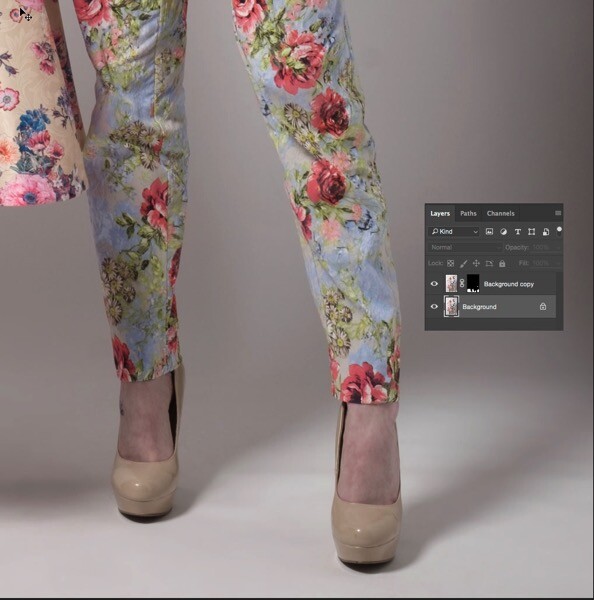
Step three – apply a layer mask
If you’re not familiar with Layer Masks, you can use the Erase brush to bring remove the areas you don’t want blurred, but I recommend using Layer Masks.
A white Layer Mask reveals everything on the layer, while a black mask conceals the contents of the layer. You want a black mask for this layer, so hold down the Option key on Mac (Alt for PC), and click the New Layer Mask icon at the bottom of the Layers Panel. A black mask appears on the layer and the Median filter is concealed.
Next, select the Brush Tool (or use the shortcut B), then hit D for Default colours. Then use the shortcut key X to swap foreground and background until the foreground (i.e. the top swatch in the tools panel) is white. With a soft brush, paint over the dirt to reveal the Median filter’s affect. Don’t go too close to the edges of your subject. If you make a mistake, press X to swap the brush to black, and paint it back to hide that area again. This is the beauty of Layer Masks, you can reveal or conceal over and over again without having to undo (this is called non-destructive editing).
This trick isn’t limited to backgrounds. You can be use it on any areas of continuous tone, for a quick result. I’ve had to use it on skies, where I’d accidentally used a dirty sensor cleaning brush and left marks on the sensor. Here’s how you could fix such an issue using Median.
Fixing a dirty sky with Median
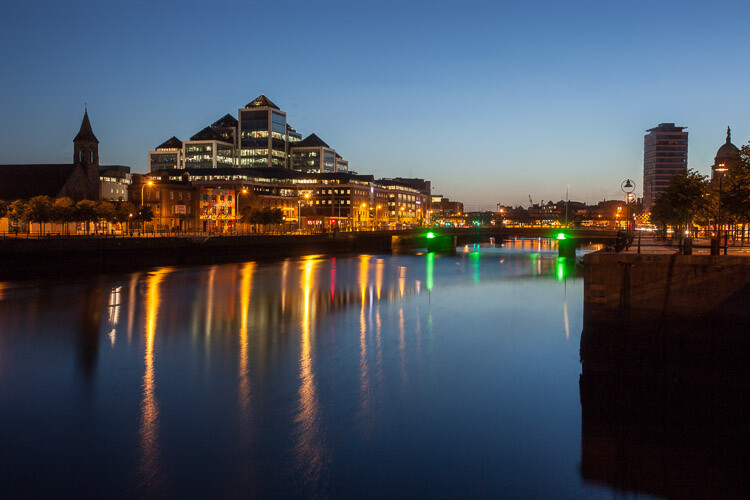
As with the background cleaning technique, start by duplicating the background layer. You can see the issue quite clearly in the sky (below), and in the smooth parts of the river.
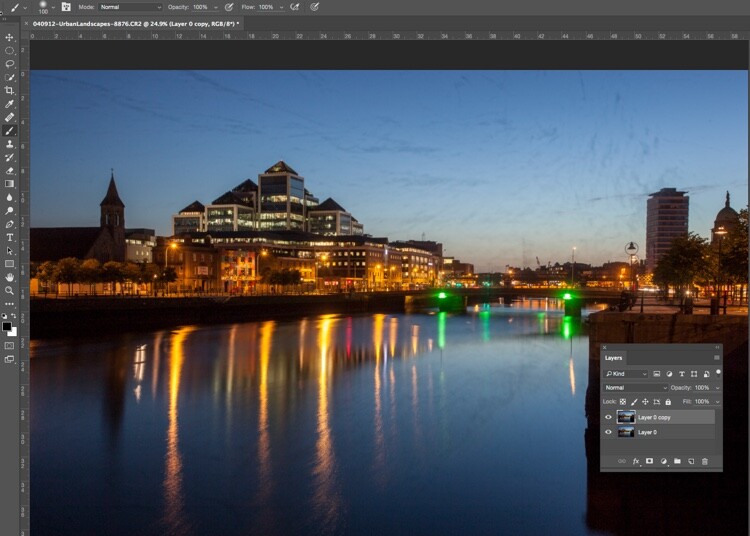
Next, apply Filter>Noise>Median. The issue will need a far higher Radius than the background required.
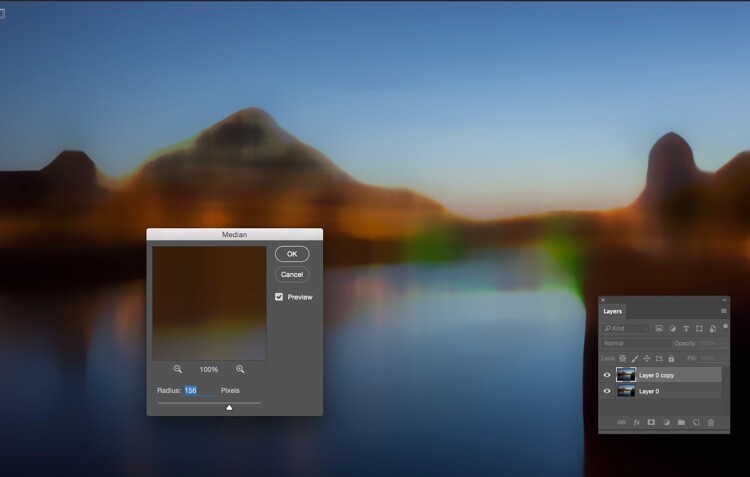
Select only the sky area
Next, hide the Median layer by clicking on the eye on the layer, then select the layer underneath. From the tools panel, choose the Quick Selection tool or press W. From there, drag the cursor along the sky, close to the buildings. Because of the hard edges against the sky, the selection is made easily.
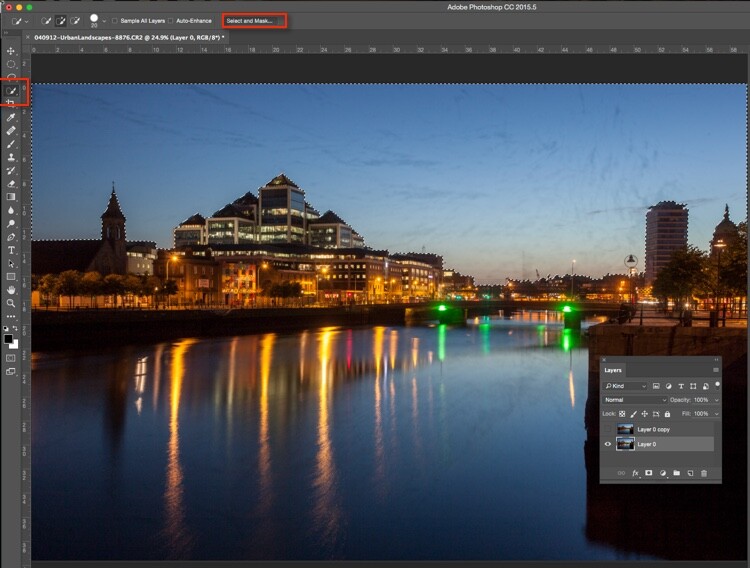
Next click “Select and Mask” (outlined in red above). You’ll see the sky clearly, and the rest of the image faded. Brush the cursor over the tips of the buildings, street lamps and other things that need to be protected from the blurring effects of the Median filter. Press return (enter) to create a selection with marching ants visible.
Turn the visibility back on for the Median layer. Press the Layer Mask icon in the Layers panel to create a mask.

You will see areas where the Median filter has blurred edges, so you’ll need to brush the mask with a black brush to hide these. You don’t need to be precise, using a large soft brush along the edge of the buildings will make it a quick job.
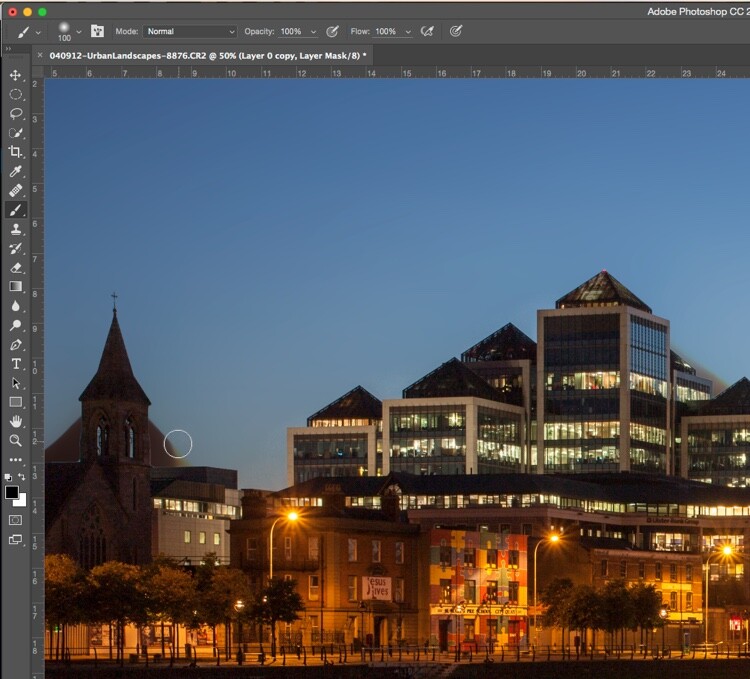
Remove the Median where it has blurred the edges of the city buildings.
The final part is to go along the water with a white brush, set to 50% Opacity, to hide the dirt in the water.
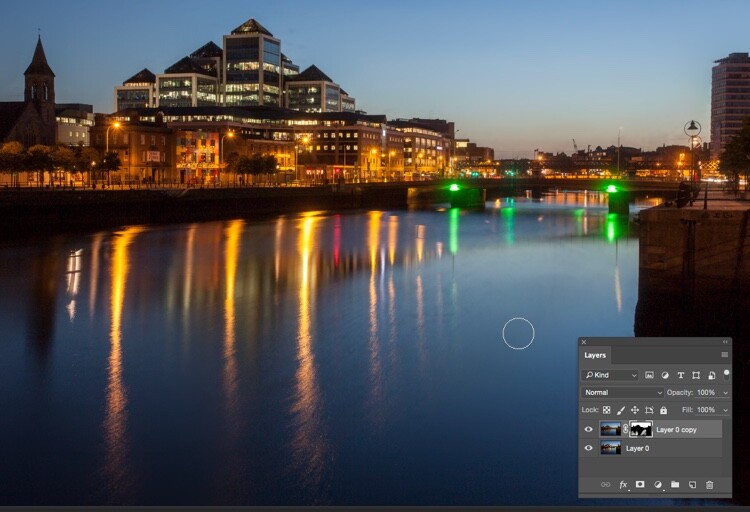
The final image looks far better than the original.
Much quicker than manually cloning the dirt out, right?
Have you tried this method, how did it go? Do you have another fast way of removing dirt? Please share your thoughts in the comments section below.
The post How to Quickly Remove Dirt Spots Using Median in Photoshop by Sean McCormack appeared first on Digital Photography School.