How many times have you been driving and wanted to stop and take a shot of that breathtaking landscape. You then stop, look around and the shot even looks better. Your heart even skips a beat. You go for it and return to the car with a huge smile.

“Kintyre Rock” captured by PictureSocial member Tony Taffinder
When you get back home you download your pictures, process them, and then you find out that what you shot was not what you placed your eyes on. What went wrong? Well, it’s simple; your lens and the sensor of your camera do not work like your eyes and your brain. You select different parts of the scene and produce beauty out of them—your sensor doesn’t.
So what do you do? For landscape photography, you need time and a couple of tips; follow them, practice, and your shots will improve.
Maximize Depth of Field
The general rule for landscape photography is to keep as much of the scene in focus as possible. This means that you have to maximize the depth of field or DOF. In other words you have to choose a small aperture setting (remember small in this case means a large number) to obtain a greater depth of field. The greater the DOF, the more focus you will achieve. This also means that your shutter will stay open longer.
Stabilize Your Camera
Since you are now using a longer shutter speed to maximize your Depth of Field, you need to ensure that your camera is stable and not shaking. The best thing to do is to use a tripod and a cable or wireless shutter release mechanism so your camera will not shake and your photo will be not blurry.
Choose a Focal Point
Decide what your central point will be. What is your subject, where is it, what size is it, does it have enough contrast with the rest of the picture, and how does its shape compare to the rest of the composition? Your central point, know as focal point, is what will make your shot stand out and keep the eyes of the viewer from wandering. The focal point in landscape photography can take the shape of many different things: a building, a tree, a rock, a person, etc. The placement of your subject is very important; use the rules of composition for this purpose.
Keep the Horizon Level
Your horizon is the next step to consider and an important one. Make sure your horizon is straight and in the lower third or the top third of the photo. The rule of thirds applies very well to landscape photography.
Use Leading Lines
Now look for lines in your shot. Lines are a way to guide the eye. It gives your image a sense of direction. Lines should direct the viewer toward your subject. A line can be a road, a river, a shoreline, mountain edges, etc.
Include a Foreground Object
Another element of your landscape composition that can create an amazing landscape shot is a foreground object. This creates depth in your shot and prevents it from being flat. The foreground will help you balance your image.

“Mountain Reflection” captured by PictureSocial member Avar Guomundsson
Show Movement
When possible convey and transmit the movement that you see: wind, water, moving clouds, a bird. A static image is less dramatic than one that showcases movement; it adds drama and creates a point of interest.
Shoot During the Golden Hours
Shoot landscapes either early morning or at dusk; light is the best at this point, and colors, textures, and patterns will pop out and impact your image.
Change Your Perspective
Take your time before taking the final shot. Try different points of view. The same image will look completely different if you go lower or if you go higher. So walk around, climb a little, get on your knees or in a ditch. You will be surprised at what you see.
About the Author:
This article was written by Joaquin Duenas. Website: theduenitas.com. PhotoBlog: theduenitas.blogspot.com. The Duenitas Digital World is based in Miami, Florida and covers South Florida, the Caribbean, Mexico and Central America.
Only a Few Days Left for Amazing Landscape Photo Editing Presets:
These new photo editing presets are designed to help photographers instantly bring out the best attributes of their landscape photography with exposure adjustments, clarity, vibrance, saturation, split toning, highlights, shadows, sharpening, noise reduction, vignetting, graduated filter adjustments and much more. Currently 50% off for the launch sale which ends Friday!
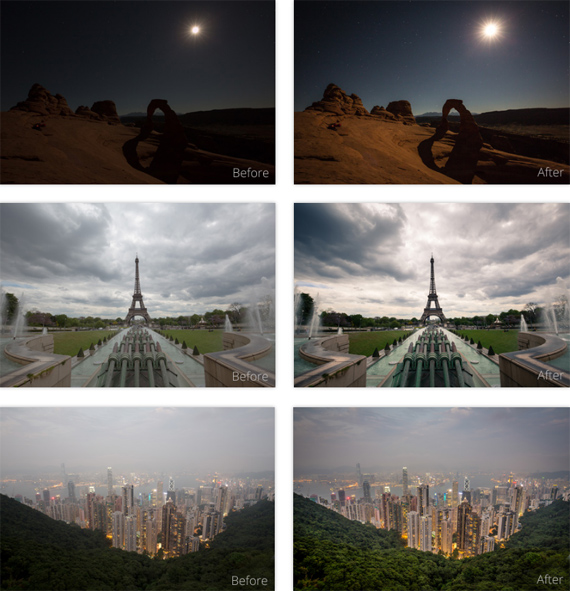
Landscape and urban landscape examples with the presets (click to see more)
A premium collection of over 100 presets designed and developed specifically for landscape photographers but any photographer can benefit.
Lauch sale ending soon: The Landscape Photographer’s Lightroom Presets
Go to full article: Landscape Photography: Steps to Improve
What are your thoughts on this article? Join the discussion on Facebook
Article from: PictureCorrect
The post Landscape Photography: Steps to Improve appeared first on PictureCorrect.