LAPP, or light art performance photography, is a style in which you literally paint your pictures with light. If you own a DSLR camera or even a Lomo camera, this could easily be your new favorite hobby! The crazy part is, LAPP is created with only one picture. There aren’t any Photoshop skills needed; by simply grabbing a flashlight you will create spectacular works of art.
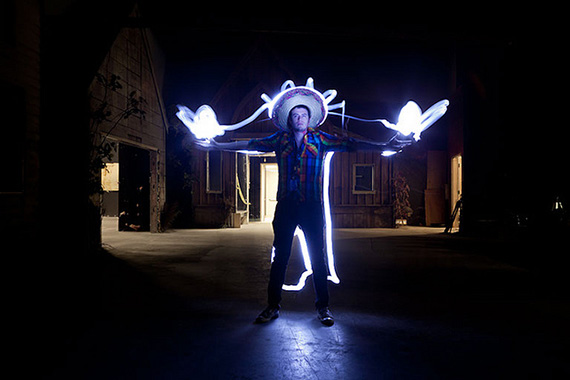
photo by VFS Digital Design
Tools you will need:
- DSLR camera (or any camera with shutter speeds slower than 5 seconds)
- tripod
- shutter release cable (or the camera’s self timer can be used)
- flashlights of any color
Now here’s how to create simple photo paintings. Start by getting all the camera settings correct for the scene you’re going to paint. It can be real tricky to get the lighting correct the first couple tries, but it will become easier after your first successful photo painting!
Planning. First, start planning on what you want to create whether it be a light globe, a sentence or name, and so on. Having the shutter open for extended periods of time means you will have to pay close attention on how much light you are feeding the sensor. Big objects like globes spanning from head to toe will produce huge amounts of light even if you are able to finish the picture in under 60 seconds. For beginners, I recommend starting with a completely dark room (even small lights like computers or your phone charging light will end up ruining your photo). Once you learned all the variables with of painting with the light, try different outside scenes with surrounding light.
Aperture. With such extremely long shutter speeds, you’ll need to dial up the aperture setting very high. You want the least amount of light hitting the sensor to counter the long shutter. Usually any aperture above f/8 will work. I know it feels weird using such a high aperture in the middle of a dark room, but don’t forget you can always post edit the image to increase or decrease exposure.
ISO. As ISO settings go for all circumstances, lower is always better. The same goes with light painting photography. Experiment by taking a couple sample shots and try lowering the ISO as much as you can.
Shutter Speed. For the first couple LAPP shots, try shutter speeds of a couple seconds and just scribbling with your flashlight. Then you can quickly adjust the ISO and aperture according to what you plan to paint. Once the photos are looking better and you want more time to draw your photograph, move to the bulb setting on your DSLR.

There are a couple more tips that will help tremendously.
Always keep the light dead straight toward the lens; if you curve your hand and point it sideways (trying to add depth) the camera wont pick it up.
Make sure to have the light in front of you and not to step in front of it. If you do end up stepping in front of your light it will make a silhouette of yourself!
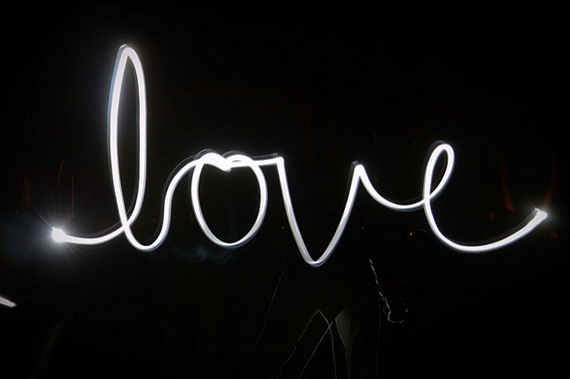
photo by Jeremy Raff-Reynolds
Spell everything backward, as if you were writing in a mirror; that’s the trickiest part.
That’s about all it takes to create mind blowing LAPP paintings that will expand you’re creativity—and your portfolio!
About the Author
James Bern wrote for the former Lomo Photography Everything, a photo blog dedicated to film photography and Lomography.
Go to full article: Light Painting How To
What are your thoughts on this article? Join the discussion on Facebook
PictureCorrect subscribers can also learn more today with our #1 bestseller: The Photography Tutorial eBook
The post Light Painting How To appeared first on PictureCorrect.