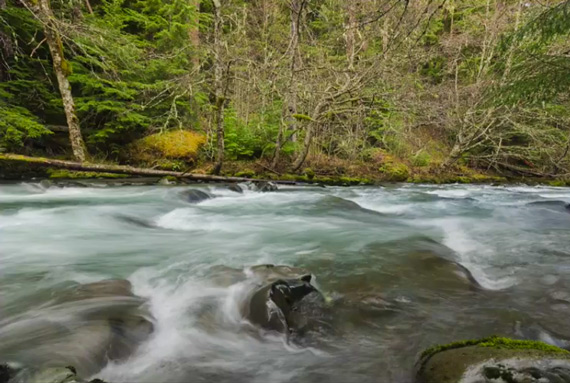
You must have come across images of rivers and waterfalls where the flowing water looks silky smooth and surreal. Such images are captured by using a long exposure. Travel photographer Dave Morrow shares some of his tips on taking beautiful long exposure photos of water:
Composition
Morrow always has his eyes out for good compositions before pulling his camera out. He especially avoids those parts of the rivers that have trees or snags coming out over them, which break the flow of the water and hamper the composition. Once he finds an area where the river is undisturbed by trees and snags, he looks for his composition using his camera but without the tripod. This allows him to look out for various perspectives from low and high angles and see how the visual elements and the leading lines of the river intermix with each other.
It’s also important to be aware of elements in the frame while composing the shot. Morrow looks for where the stream drops down, how the water behaves, and also foreground elements, like the rocks and moss. By moving close to the rocks, going down or up to a vantage point, Morrow evaluates all his composition options before coming to a final decision. By going too low, the rocks block off the stream entirely and the leading line disappears. Instead, by shooting slightly from above, the water and the leading line become prominent, making the image more interesting.
To evaluate each possible composition, Morrow takes practice shots, picks out the best from the bunch, and selects them so that he can re-shoot those locations when the lighting is better.
Taking the Shot
Once he’s clear about what he wants, he finally sets up the shot using his tripod when the lighting is appropriate. When it’s time to actually take the shot, he doesn’t just take one shot. Here’s his method:
- Take the first image with standard settings to have a greater depth of field by focusing on the approximate hyperfocal distance. He also makes sure that his file has maximum details by keeping an eye on the histogram and adjusting the exposure compensation (on aperture priority mode) to make sure that no clipping occurs in the shadow and highlight areas.
- Refocus on the water at various sections of the frame by using varied shutter speed to capture more of the water details. While in aperture priority mode, Morrow makes adjustments to the ISO and the aperture value to change the shutter speed.
- Finally, slow down the shutter speed to capture the motion blur and unique water patterns.
Blending the Images in Photoshop
Once Morrow is done taking multiple frames of the same composition (but with varied focus on different areas), he loads them all into Photoshop to blend them into a single image. He makes use of layer masks to hide and reveal selective portions of each image so that the final image is a composite of the best elements of each photo.
Try these tips for using multiple exposures to achieve more dynamic long exposure water images. And just imagine how the amazing film photographers did it with their more limited technology!
Go to full article: Long Exposure Water Photography Tutorial
What are your thoughts on this article? Join the discussion on Facebook
PictureCorrect subscribers can also learn more today with our #1 bestseller: The Photography Tutorial eBook
The post Long Exposure Water Photography Tutorial appeared first on PictureCorrect.