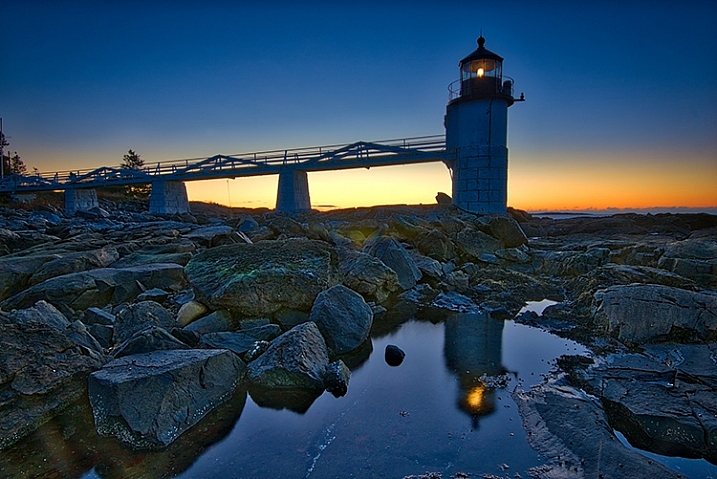
An picture edited utilizing Macphun Luminar picture modifying software program.
At some level, after you decide up your first digital digital camera, the query of picture modifying arises. For years, the chief has been Adobe with their package that includes Lightroom and Photoshop. However, these days, different software program corporations have been dipping their toes within the waters of picture modifying purposes. One of the newest is MacPhun, makers of the Macphun Creative Kit. Their entry into picture modifying, out there for Mac OS X based mostly computer systems solely, is called Macphun Luminar.
Luminar is a standalone software for nondestructive RAW processing and picture modifying, however may also be used as a plugin for Lightroom, Photoshop, Aperture, and Apple Photos. The software window and instruments out there are similar whether or not it runs as a standalone or as a plugin.
Overview
When opening Luminar, you’ll be introduced with a window that provides you two choices; Load Image or Batch Processing.
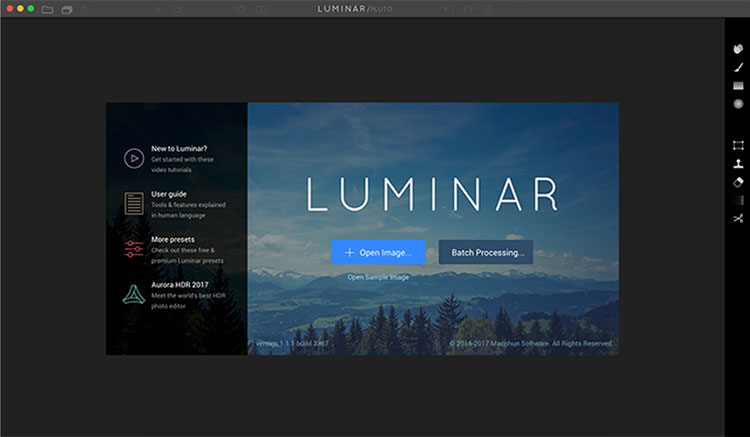
Luminar opening display
Luminar’s workspace is clear and straightforward to navigate.
Selecting Batch Processing permits you to drag and drop pictures, or load them from folders in your pc. You’ll then be prompted to decide on sure settings similar to a preset to use (extra on the presets later), in addition to the place you desire to the pictures saved, what sort of file to save lots of as, resizing, and file naming. In addition to the opening dialog, Batch Processing can also be obtainable from the File menu inside the software.
I’m a bit dissatisfied that I can’t see a preview of the preset I’m making use of to the batch, however general, the method is straightforward to know and runs fairly effectively. I processed a batch of 24 RAW pictures in slightly below three minutes on my late 2013 iMac.
The different choice you see when beginning up Luminar is “Load Image”. This lets you open a single file and edit it to your liking, after which export it in any variety of methods. I sort of want Luminar had a file browser to permit me to view thumbnails, quite than simply the “Load Image” dialog.
Workspaces
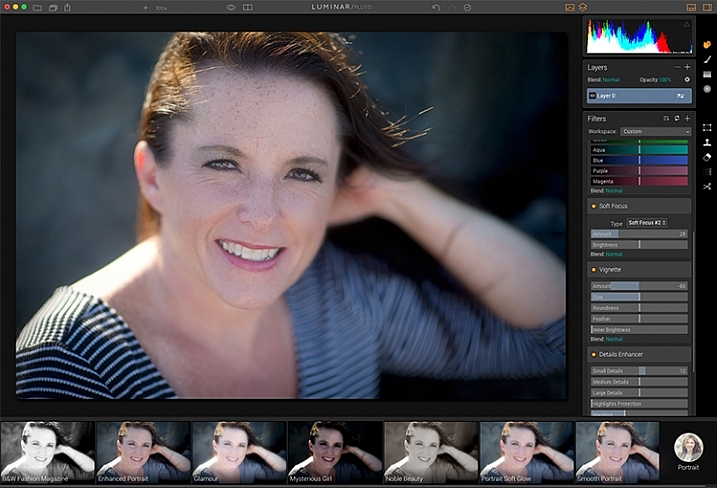
You can change the workspace based on your material. For occasion, choosing Portrait brings up a special set of instruments than does Landscape, or Street.
You can customise the appliance through the use of one of many workspaces out there, which routinely brings up a set of filters applicable for the subject material. The preset workspaces embrace Black and White, Landscape, Street, and Portrait. You also can create your personal workspace based mostly on the filters you end up utilizing probably the most (see above).
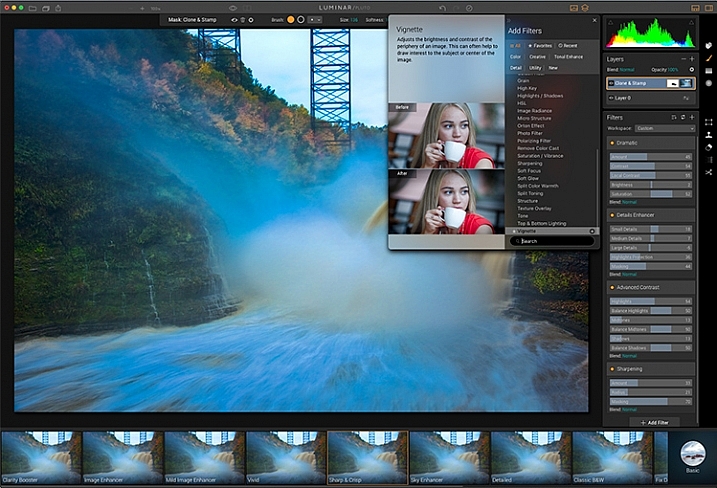
Editing window
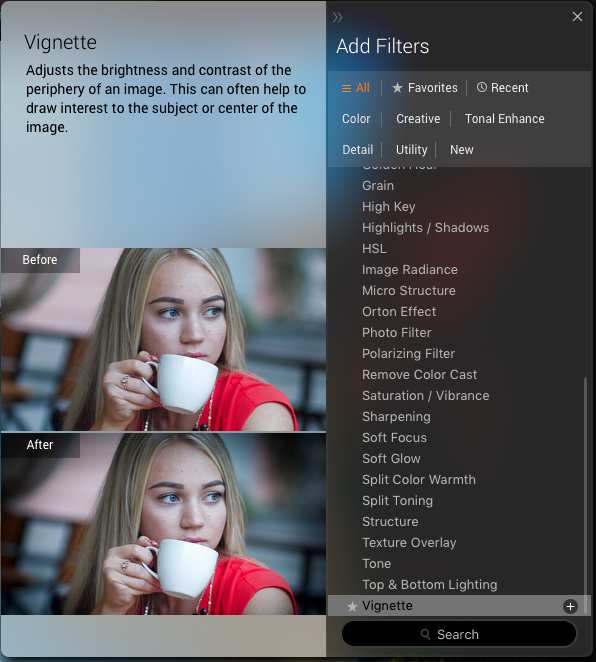
When choosing Add Filter, this window itemizing out there filters seems, permitting you to pick from dozens of filters to use to your picture.
Once you might have a file opened, you’ll be introduced with the modifying display. The principal window will present your picture. Across the underside, you’ll see the Preset Panel. This exhibits numerous presets that may be utilized to your picture. In addition to the default presets, Macphun has a selection of preset packs available for download on their web site (some are free, some are for buy). The presets are separated into numerous workspaces, together with Outdoors, Portrait, Street, Dramatic, Basic, and Travel.
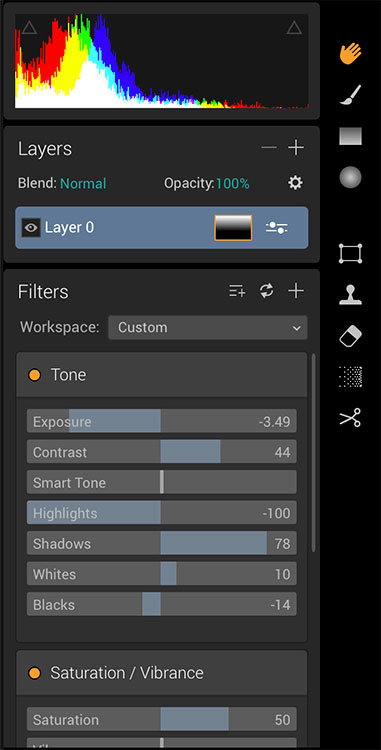
Luminar sliders
On the suitable aspect of the display, you’re introduced with the layers panel which exhibits the totally different layers you will have in your present picture. Similar to Photoshop, layers can use totally different mixing modes, and the opacity of every one might be adjusted to offer you precisely the look you need. A Transform software can also be out there to work with the layers if wanted.
Beneath the Layers palette, you’ll discover the sliders to regulate the filters presently in use. Each preset makes use of numerous filters that may be adjusted utilizing these sliders. You may also create your personal look just by including the filter or filters of your selection from over forty obtainable. In addition, every filter has a separate mix mode that may be modified to regulate the look as properly.
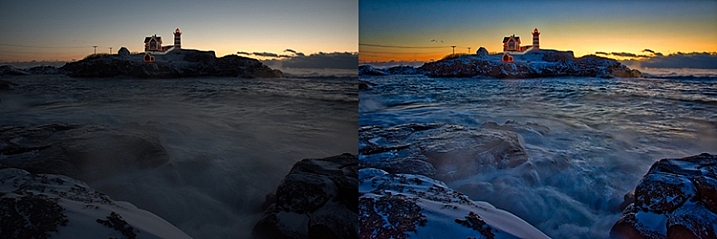
A RAW picture earlier than processing with Luminar on the left, and after on the correct.
Toolbars and palettes
On the fitting fringe of the display sits a toolbar, which homes numerous instruments together with Move, Masking Brush, Gradient Mask, Radial Mask, Transform, Clone Stamp, Eraser, Denoise, and Crop.
Any of the panels and palettes inside Luminar could be proven or hidden with a click on of the mouse, making it straightforward to customise the workspace to your liking.
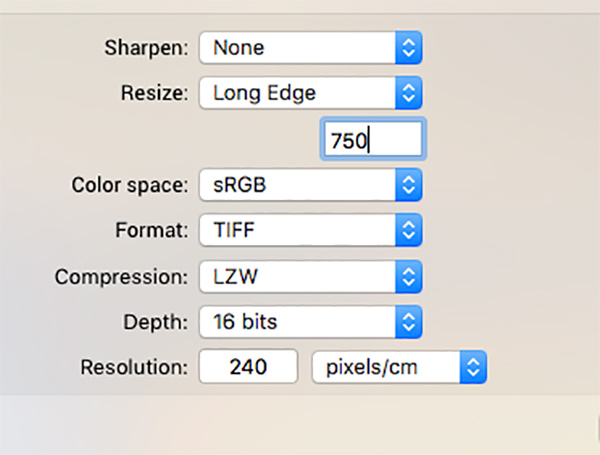
The Luminar Export Dialog
Once you’re finished making your edits, Luminar presents a simple interface to share your photographs to varied photograph sharing and social media websites, together with Facebook, Twitter, 500px, Smugmug, Flickr, Messages, and Mail.
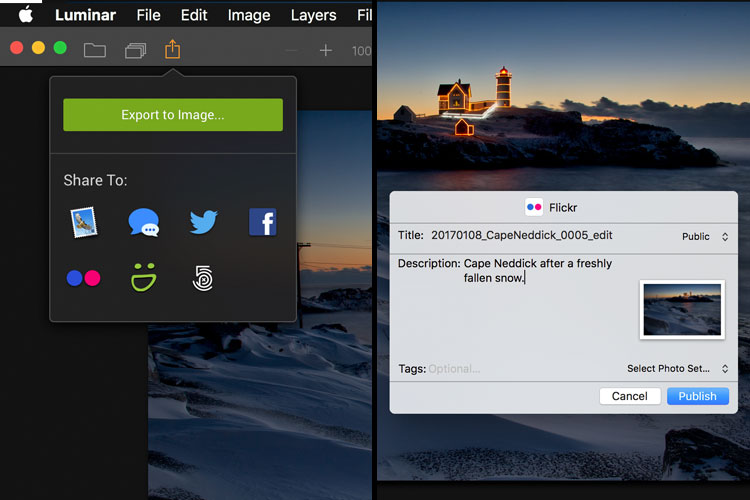
Luminar sharing choices.

A portrait edited utilizing the Black and White Fashion Magazine preset beneath the Portrait presets in Luminar.
Pros of Luminar
Macphun’s Luminar, as a standalone software, presents a superb choice for many who don’t need to become involved in a subscription service. Luminar is presently out there from Macphun for $ 69, making it a simple strategy to get began modifying RAW pictures with a strong picture editor. For these already utilizing Photoshop or Lightroom for his or her modifying, Luminar works as a plugin that gives all the highly effective modifying choices of the standalone.
Luminar is straightforward to make use of, with a mess of sliders which might be fairly self-explanatory and supply for wonderful management over picture results. In a really brief period of time, you might be modifying your RAW information and exporting completed pictures in quite a lot of codecs, together with TIFF, JPEG, PNG, GIF and PSD. If you’re acquainted with MacPhun’s interface within the Creative Kit, Luminar might be straightforward to determine.
I discovered the standard of the pictures edited in Luminar to be wonderful, however as in Creative Kit, I thought a few of the presets wanted to be dialed again a bit for the most effective outcomes. The number of results and choices obtainable actually permits you to customise the look of your pictures as nicely. I discovered some presets to be wonderful beginning factors, however then by including one other filter or two, I was capable of get precisely the type I needed for my picture.

An picture edited utilizing MacPhun Luminar.
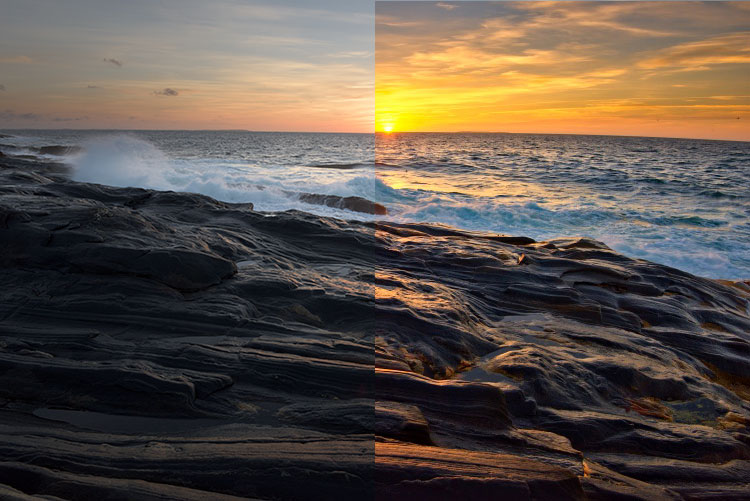
Before/after
Layered information
As of a current replace to this system, there’s now the power to save lots of photographs as .lmnr information, which can save the layers and work carried out on a picture, so you’ll be able to come again to it later. A good function just like saving as a layered PSD file.
Cons of Luminar
As somebody who’s used Photoshop for years, I discovered that a few of the instruments, such because the clone stamp, labored in a different way than I anticipated. This is definitely overcome as familiarity with Luminar grows, nevertheless it took a short while earlier than I acquired outcomes I favored.
One different puzzling query is, why isn’t there native help for Macphun’s Creative Kit? MacPhun signifies of their product FAQ that there shall be help for plugins ultimately, however it might appear to make sense to have that highly effective suite of plugins out there from Day M. Once help for plugins is out there, Luminar turns into a good higher worth, for my part.

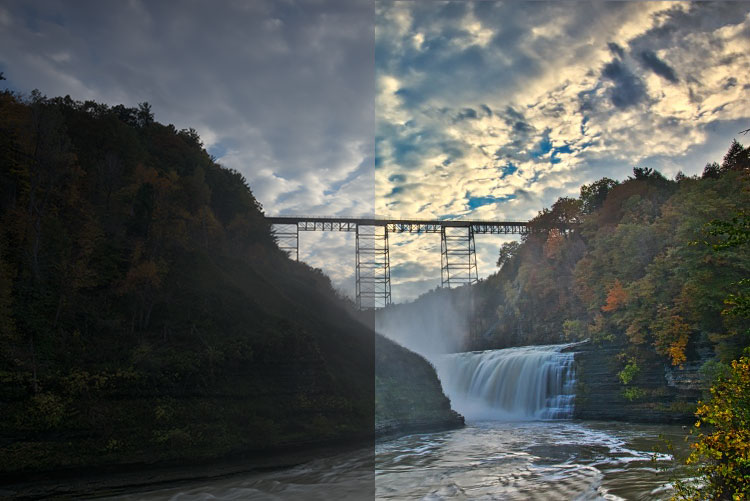
Landscape picture edited utilizing Macphun Luminar.
Luminar, whereas a superb photograph editor and RAW processor, lacks sure instruments obtainable in Photoshop, similar to the power to output to CMYK, have a number of print format choices, or add textual content to a picture. While many won’t ever have a have to do any of that, it’s a distinction that must be made, particularly for many who like so as to add a watermark to their pictures being shared on-line.
Finally, Luminar lacks an asset administration element like Lightroom, so for many who wish to create catalogs, collections, and add key phrases and descriptions to pictures, you’ll nonetheless want to make use of Lightroom whereas utilizing Luminar as a plugin.

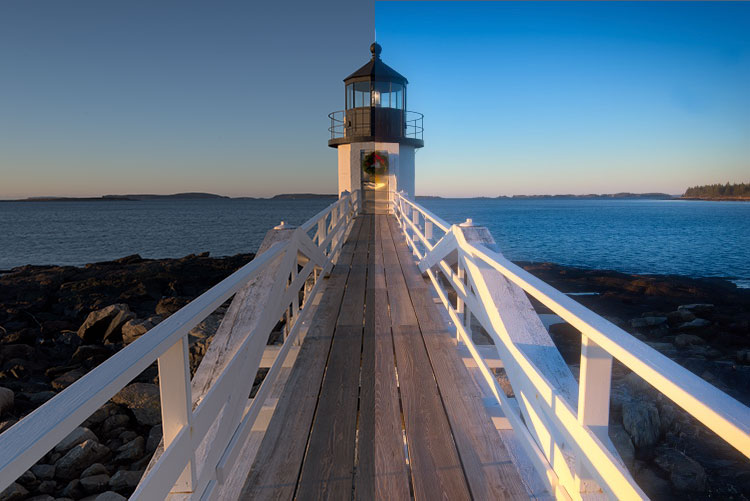
Edited and exported utilizing Macphun Luminar.
Final Verdict
Macphun Luminar has a easy to know interface and a whole lot of nice options that make it a superb RAW processing software. Its flexibility to work as both a standalone software or a plugin for Photoshop, Lightroom, and different photograph purposes signifies that Luminar will probably be straightforward to combine into your present workflow. My first thought, nevertheless, is that its main market is individuals who need a highly effective photograph editor that’s easier to make use of than Photoshop, with out paying a subscription charge each month.
Luminar gives some wonderful modifying instruments, and with over 50 presets, it’s straightforward to get began in the direction of the look you need. The interface is straightforward to know, with self-explanatory sliders clearly marked to let you regulate the impact to your liking. If you’re simply getting began with processing RAW information and photograph modifying basically, Luminar is a superb selection.
Luminar is obtainable from Macphun’s website for $ sixty nine, for Apple computer systems solely (presently, supposedly a PC model is coming sooner or later tbd). Here are a pair extra earlier than and after photographs of what you are able to do with Luminar. Have you tried it? What are your ideas?
The submit Overview and Impressions of the new Macphun Luminar Software by Rick Berk appeared first on Digital Photography School.