Regardless if you’re new to photography or a seasoned pro, for many of us, our first love is landscape photography. There’s just something so magical about a perfectly crafted landscape photo that can’t help but command a person’s attention. On the other side of the lens, photographing nature not only provides us with endless opportunities for amazing shots, but also serves as a great way to challenge ourselves as photographers.
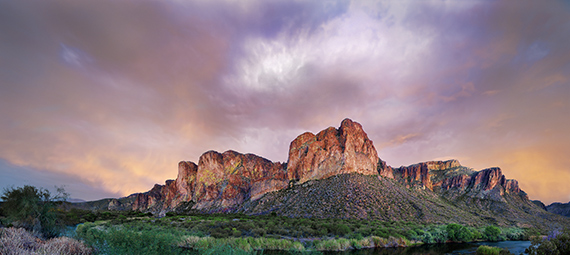
“Bend on the Salt River” captured by PictureSocial member Nathan McCreery
At any moment, the elements within nature can change, which may drastically affect the outcome of a photograph. While great landscape photography may seem hard to master, it’s not as intimidating as you may think. In this landscape photography tutorial, we’ve put together a list of techniques and tips that are sure to help you learn how to take stunning landscape photos.
*Also remember the launch sale on these new Landscape Photographer’s Lightroom Presets is in it’s final days, only a little while left to get 50% off.
Look for a great foreground element to maximize depth and perspective
You’d be amazed how the simple act of including a foreground element within a landscape photo can totally transform a scene. By adding a foreground element to your photo, the image can instantly portray a deeper sense of perspective and depth. Without it, the photo may look too flat for your taste.
It’s also best to use a wide-angle lens. Wide-angle lenses, by design, enhance the sense of depth within a shot. Combining this with a foreground element will really open up the perceived space within the scene.
With a wide-angle lens the foreground element will seem much larger than the background objects, maximizing the sense of depth.
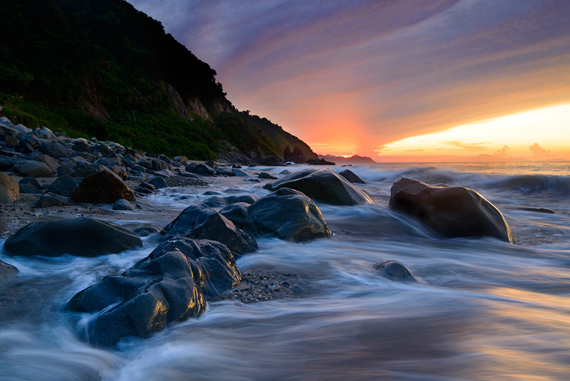
“God’s Light” captured by PictureSocial member Jet Rabe
Finding the perfect foreground element to include within your scene may take only a few minutes or several hours. Before setting up your shot, scour a site until you find the best element to include, whether it’s a clump of flowers, group of rocks, a reflecting pond, or fallen tree branch. Be creative with your selection!
Take advantage of bad weather
When bad weather strikes many photographers pack up their gear and go home. What they don’ t know is that they’re missing some amazing opportunities for great landscape photography!
We’ve all seen countless numbers of photos that have been captured on a sunny days. Which is fine. But, think about the photos you’ve seen that consisted of nature at its worst: cars buried in pile of snow after a blizzard, bolts of lighting filling a purple the sky, 20+ feet waves during a hurricane, a tornado forming miles away, etc. Those types of shots are incredible to look at!
Since most people are fearful when bad weather strikes, and stay inside, this is an opportune moment for you to capture some great photographs. As a photographer try not to let bad weather frighten you, but instead intrigue you to capture some awesome shots!
Documenting bad weather while it’s occurring (or even after it has passed) is fascinating for viewers to look at. We love to see these types of shots because most of us don’t get to experience it first hand.
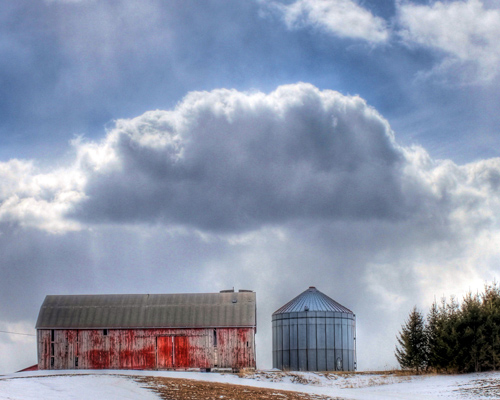
“A Storm is Brewing” captured by PictureSocial member JoAnn Fougere
Just make sure to take the proper precautions and stay safe when photographing bad weather scenes. Always put your safety first.
The best landscape photography takes planning
Often, when you see an image of a great landscape photo, you think to yourself “Wow, the lighting and composition are so perfect! The photographer got lucky by being at the right place at the right time.”
Usually, this couldn’t be further from the truth!
Most beautiful landscape photos take a vast amount of time and planning. It’s nearly impossible for a photographer to appear at a site at a random time on a random day and expect a great result.
It just doesn’t work that way.
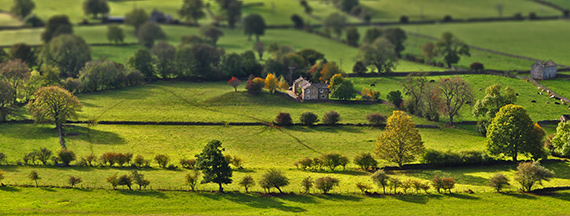
“North Pennines” captured by PictureSocial member Floyd Franklin
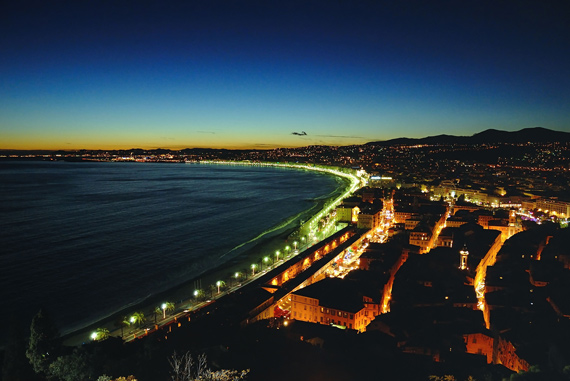
If you want to capture the best photo for a given scene it’s best to scout out the location ahead of time and take a few test shots throughout the day. That way can see how the natural lighting affects the scene and know what time of day you should come back.
Then, when you come back, you can arrive about 30 minutes ahead of time, set up your composition and be ready to capture a great shot when the lighting moves perfectly into place.
As a rule of thumb, it’s usually best to capture landscape photos during the golden (or magic) hours of the day.
Get creative by capturing a variety of angles
Many new photographers instinctively shoot landscape photos by setting their tripod on the ground at eye level and then framing up the shot. Yes, this can result in a good photograph, but a lot of other great opportunities are being missed!
If you really want your photos to stand out from the work of other photographers, you should work hard at framing a common setting in a creative way.
“129” captured by PictureSocial member Cristina Ciutan
You can do this in several ways. Try capturing a different vantage point. Shoot from high up or really low to the ground. Compose the shot using Out of Focus Foreground Framing. Position natural elements within a scene in unique ways. Capture the scene at night. Use reflections. And so forth.
Bracket your exposures
When you start out in landscape photography, you’ll notice that taking one photograph usually doesn’t result in capturing a scene’s full potential. Often, the darker areas of the scene look too muddy while the highlights are just right, or vice versus, the highlights are blown out while the darker areas are rendered beautifully.
This common problem can be easily solved by bracketing your exposures and you should make it a common practice to do so on every landscape shoot.
Bracketing your exposures simply means to capture the same composition with multiple exposure levels. Usually, it’s between 3-5 shots varying in exposure brightness. This allows you to maximize the dynamic range within a photograph.
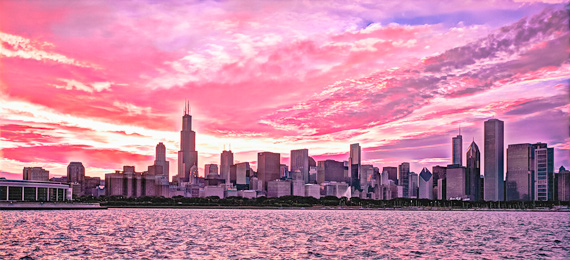
“When The Sun Goes Down On My Kind of Town” captured by PictureSocial member Ronald Quillopas
Here’s how it works:
Capture one image using the settings your camera deems as being a proper overall exposure for the scene. Then, use the exposure compensation button (if shooting in an automatic mode) or aperture, shutter speed or ISO setting (if shooting in manual mode) to force a one stop overexposure. Next, force a one stop underexposure.
This results in three different exposures.
If you want to capture five exposure, just take an additional two shots. One with a two stop forced overexposure and another with a two stop force underexposure.
Then, in a photo editing software,such as Adobe Photoshop, Elements, Lightroom or Apple Aperture, you can automatically combine these 3-5 photos together to create one photograph with a more appealing dynamic range.
All elements within the scene, from the dark shadows up to the bright highlights will be exposed correctly.
Let nature be your teacher
You could learn all of the tips and tricks in the world about how to take better landscape photos, but there’s no school or workshop that will teach you how to become a better landscape photographer than nature itself.
Only hours of practice in the field with an open eye and desire for creativity will make you a better photographer.
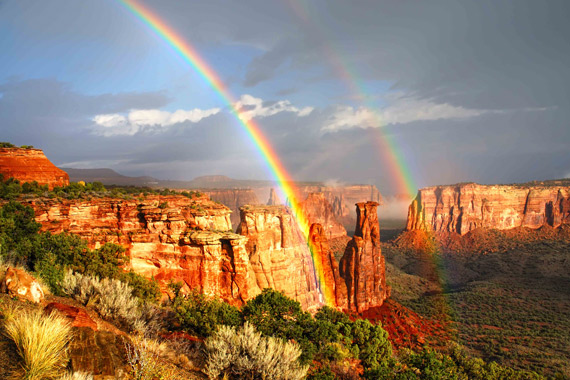
“Double Rainbow over Colorado National Monument” captured by PictureSocial member Matt Shetzer
So, get out there and start applying these tips and techniques we’ve shared with you so you can learn how to utilize each to its full advantage. You’ll find out what works and what doesn’t for different scenes and discover your own tricks along the way.
About the Author:
This article was written by Stephen Hockman (www.freedigitalphotographytutorials.com). He spends a lot of his time shooting photographs and looking for ways to improve upon his skills.
Take Your Landscapes from Average to Stunning in just 1 Click:
These new photo editing presets are designed to help photographers instantly bring out the best attributes of their landscape photography with exposure adjustments, clarity, vibrance, saturation, split toning, highlights, shadows, sharpening, noise reduction, vignetting, graduated filter adjustments and much more. Currently 50% off for our readers during the launch sale which ends in a few days!
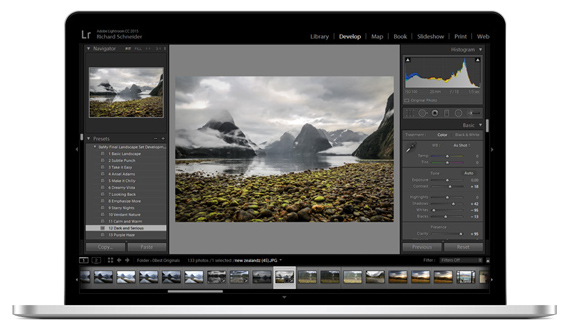
Amazing landscape edits in seconds (click to see how they work)
A premium collection of over 100 presets designed and developed specifically for landscape photographers but any photographer can benefit.
Deal found here: The Landscape Photographer’s Lightroom Presets
Go to full article: Tips for Capturing Better Landscape Photos
What are your thoughts on this article? Join the discussion on Facebook
Article from: PictureCorrect
The post Tips for Capturing Better Landscape Photos appeared first on PictureCorrect.