Number One: If you have read any of my previous photography guides then you probably know that I strongly recommend shooting in RAW format. Why is this so important? The answer simply boils down to control.
Shoot in Camera RAW Format
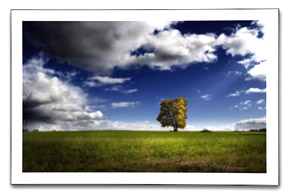
When you set your digital camera to automatically convert your images to JPEGs, you give up a great deal of processing control. Most digital cameras automatically apply sharpening, saturation, and tonal adjustments during the conversion process. The image is also compressed into an 8-bit file removing a great deal of the exposure latitude that you had with the original photograph (up to 16-bits for many cameras).
Essentially the camera automatically applies a standard set of processing routines to the image and then throws out roughly one third or more of the data during the compression process. The JPEG file format is destructible in that it compresses and recompresses the image (and thereby removing file information) each time it is saved. If you do shoot in JPEG format, be sure to save your processed files as PSDs or TIFFs to avoid additional compression and to retain all of your Photoshop layers.
Always be on the Lookout for New Locations
Number Two: It goes without saying that traveling to exotic locations around the world is an exciting part of landscape photography; however you can find just as many wonderful places to photograph in your own area. Success as a landscape photographer has a lot to do with preplanning and scouting out potentially new locations. Scenes that you photographed during the summer have a whole different look and feel during the fall. Whether you are out photographing a specific location or just driving through a new area on unrelated business, always be on the look out for hidden gems. This might be a little known area where eagles are feeding or an abandoned farm concealed by years of overgrown weeds and brambles. Even while I am out and about hanging out with my family and friends, I always have my eyes open for new places to work.
Shoot During Hours of Dawn and Dusk
Number Three: Many of my favorite images were taken during the golden hours of dawn and dusk. A successful landscape photographer is usually willing to get out of bed well before dawn or to stay out late into the evening to capture the beautiful light of the setting sun.
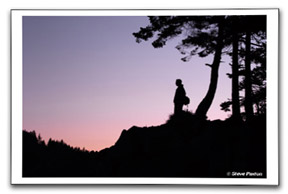 I have a good friend who is an exceptional landscape photographer. He recently paid a good deal of money to travel to exotic areas of South America with a small group of photographers. He told me that when they arrived at each location he was surprised to find many of the photographers in his group unwilling to get up early with him to work during the early hours of dawn. Imagine paying thousands of dollars to travel to exclusive parts of another country to photograph landscapes just to sleep in! Having this kind of discipline must extend beyond fancy trips to other countries. A good landscape photographer knows that dawn and dusk are two of the best periods of time during the day to capture exceptional landscapes. Take advantage of this as much as your schedule allows and try to establish a routine of going out early and/or staying out late. Whether you come back with beautiful images or not, you will always be rewarded with the wonderful solace that comes with watching the sunrise and sunset.
Arrive Early and be Ready
Number Four: Consider getting to your pre-selected location well in advance of the time you actually expect to shoot. Photography is a creative endeavor and should not be rushed. If you find yourself chasing the sunset or rushing to capture the sunrise at the last minute, you are missing the point! High quality landscape photography usually requires that you take a slow, methodical approach. I think that a lot of us fall into the trap of shooting off the hip and hoping that one of our shots will stand out.
Landscape photography should be creative and not mechanical. This is a little bit like going to an important business meeting where you have been selected as group’s main presenter. If you leave for the meeting late and rush into the conference room just as things are getting started, you are much more likely to give a dismal performance. In contrast, if you make an effort to arrive early, get your equipment setup, and take a few moments to collect your thoughts; you are much more likely to give a more impressionable and meaningful presentation. The same approach is true of landscape photography. Arrive early and give yourself plenty of time to transition into a creative mode.
Bracket Your Exposures
Number Five: When I worked with 35mm cameras, I was always conscious of how much film I was using. Between purchasing the high quality film I needed and then processing it later, it was always extremely expensive! Today with high-resolution digital single lens reflex cameras we have less to worry about when it comes to the cost per image (of course today’s DSLRs are generally more expensive that traditional SLRs were). Now there are fewer reasons to avoid bracketing your exposures.
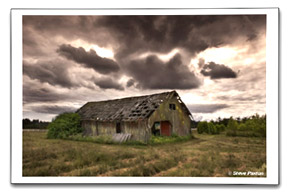
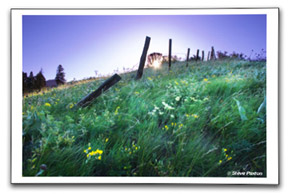 In photography there is nothing more disappointing than to capture what you think was the perfect shot just to later find that it was improperly exposed or even out of focus. When you can, take the time to bracket your images. Bracketing also gives you a bit more creative latitude in processing by allowing you to use Photoshop CS2’s HDR feature to combine shots to increase an image’s total dynamic range. Even better than HDR is manually combining images that have been exposed for different areas of a scene and using layer masks to create a single photograph with additional dynamic range. For example, the image above is a composite of two shots: one exposed for the sky and the other exposed for the foreground. This could have only been accomplished by taking multiple photographs at different exposures; the total dynamic range was just too great in any single exposure.
Use a Tripod
Number Six: The reason for using a tripod might seem obvious on the surface. For me using a tripod goes beyond reducing camera shake and taking photographs at slower shutter speeds. I have found putting my camera on a tripod forces me to slow down and really examine my composition. It is so easy to just fire off a bunch of hand held shots without really thoughtfully looking at the composition. Intuitively most of us know what we are trying to achieve in a particular shot; however taking the extra time to setup your camera on a tripod can help you slow down and pay extra attention to composition. Remember that having a creative mindset is central to capturing high quality landscape images.
Keep in Mind the Rule of Thirds
Number Seven: Sure, rules are meant to be broken. This is especially true of rules that involve such a creative process as photography; however the Rule of Thirds is a pretty good standard to keep in mind. Push yourself to try out different ideas and compositions that may be outside your comfort zone or usual style. I estimate that 20% or fewer of my landscape images rise to a level of quality where I feel comfortable presenting them to others! With digital cameras and massive amounts of storage, you can have fun with your work and try out new ideas. You never know, you may like what you see!
Do Not Forget to Look Around
Number Eight: I have to constantly remind myself to look around my environment and to refrain from getting locked into a single perspective. What do I mean by this? How many times have you been photographing a spectacular scene just to look over and see an even better possibility? If you get too focused on one particular composition, you may miss opportunities for other equally or better photographs that are within walking distance of where you are shooting.
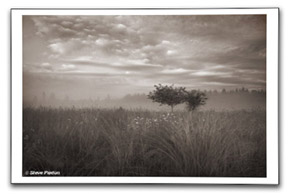 The classic example of when this seems to happen to me the most is when I am shooting directly into the rising sun (which can be wonderful for silhouette and high dynamic range landscapes). Occasionally I get so wrapped up in what I am seeing that I forget to look behind where I am standing (opposite the sunrise). Even after I setup my camera on a tripod and finalize a composition for the scene I am photographing; I still try to remember to move around and look for additional perspectives. I typically make a point to walk approximately 20-feet in all directions staying alert for additional ideas. My main point here is to suggest the importance of remaining open minded about the other possibilities that might exist and to avoid getting overly committed to just one perspective.
Shoot Often
Number Nine: This should be a no-brainer, but remember that you increase your odds of capturing outstanding landscape photographs if you go out in the field often and on a regular basis. If you are like me and have a real job during the day, you may only be able to get out a couple times a week. It is so easy to put off going out (especially early in the morning!) when you get busy with other aspects of life. Again, much of this boils down to discipline and creating good habits for shooting regularly. Even if you are facing poor weather conditions (e.g. gray sky, clouds, rain, etc.), push yourself to go out and shoot anyway. You never know, you might just come back with wonderful black and white images or beautiful photographs of a dramatic lightning storm.
Keep a Photo Diary
Number Ten: Keeping notes about your work in a small notebook or diary can be a useful way of remembering important details about a location or a series of photographs. This can include the direction you were looking while taking a particular shot, weather conditions, temperature, how you accessed a specific area, and any other unique information that you want to recall later on. It does not take very long before I forget unique little details about a series of images. Fortunately with EXIF data we do not have to worry about keeping track of exposure information, resolution, color space, and the time and date an image was taken; however taking note of some of the other details mentioned above can oftentimes be useful later on. These details can be added later to the EXIF file so that the information always stays with the image. Consider placing a small notebook and pen in your camera bag so that you are ready.
Recognize that You May Come Back Empty Handed
Number Eleven: This really does not qualify as tip as much as it is a state of mind. I used to get so frustrated going out to shoot landscapes just to come back with nothing (or only a couple of decent shots). I remember driving five hours to a hiking trail that I was sure would have a great deal of wildlife and landscape opportunities to photograph (from previous experience). When I arrived I spent two hours climbing to the top of a large peak that had a commanding view of the entire valley. After all the work and effort to get to the top, it started sprinkling and then eventually the conditions worsened to lighting and heavy rain (I was in shorts too!).
The deteriorating weather conditions forced me to hike back down and eventually drive home. I was so frustrated because in the end I was only able to capture a couple of decent shots. All of the wildlife had literally disappeared and the extremely poor weather conditions made for mediocre landscape photography at best. As I drove home I was struck by how I was trying so hard to force things to work that I had not truly enjoyed the experience. After considering it for a while (on my five hour ride back home) I came away with the realization that it was ok for me to come back empty handed once in a while.
Most of the time my hard work and discipline are rewarded and I capture wonderful landscape images, but sometimes I end up returning with nothing but another experience. I think as a landscape photographer you have to be ok with that and remember that sometimes you will strike out despite all your best efforts. Planning your outings, having some experience in photography, and taking the proper equipment are important factors, but the weather and conditions are-what-they-are when you arrive. You cannot control everything. Remember this and try to have fun!
Learn How to Use Photoshop or Lightroom
Number Twelve: As a film photographer, I worked very hard to make sure all of my shots were spot on. I was careful to use the appropriate film for the lighting conditions, to adjust my exposure and shutter speeds appropriately, and to take my negatives to well known and respected businesses for processing (if I was not doing it myself). After switching to a digital camera, it took me a while to grasp the significance Photoshop plays in this new era of photography. Going digital means that you (the photographer) are now in complete control of the processing. We have so much more power and latitude in Photoshop with digital images that we do not have while working with film in a traditional way. On average, I estimate that I spend 30-40% of my time composing and taking photographs in the field and 60-70% of my time later processing them in Photoshop. This means that a great deal more of my time is now spent in front of my computer than in the field. Having a basic understanding of how to use Photoshop can be the difference between simply a good image and a jaw-dropping, incredible one.
Please do not hear me suggest that you can stop worrying about exposure, shutter speed, and composition just because you can “Photoshop” away problems later on in processing. All of the basic principles of photography still apply. It is still important to work hard to get your shots “right” out of the camera, but we are now able to do so much more with the digital photographs in processing (especially if you shoot RAW images) than would have ever been possible just a few years ago. Even if you do not consider yourself technologically proficient or the complexity of Photoshop scares you, take the time to learn how to use a few of Photoshop’s basic processing tools and develop a consistent digital workflow. This means gaining familiarity with using adjustment layers for levels, curves, saturation, channel mixer, and others. Layer masks also provide an incredible amount of control in processing selective areas of a photograph.
 There are so many free resources available on the Internet to learn from that there are really no excuses for not becoming familiar with Photoshop. If you are a visual learner, look for free video tutorials; if you like to take a slower approach, look for written guides like this one. You might also consider purchasing a book or two on using some of the basic photo processing tools offered in Photoshop from a local bookstore (can you say Half Price Books!).
About the Author
Steve Paxton currently lives with his wife and two children in the Seattle area. Steve has been a photographer for over ten years and has spent most of that time shooting with a variety of Canon 35mm cameras. His experience ranges from wedding and portrait work to crime scene photography; although he particularly enjoys the solitude of shooting landscapes. Check out the PDF version of this article.
Steve always welcomes comments and feedback on his work. You can leave a comment on his website at www.paxtonprints.com.
Go to full article: Twelve Ways to Improve Your Digital Landscapes
What are your thoughts on this article? Join the discussion on Facebook
Article from: PictureCorrect