When you view an image that you love, do you find yourself asking, “What camera settings did the photographer use?” This is a common question, that overlooks other important aspects which would have helped to create that image, such as the lighting conditions, and any post-processing techniques involved. As you become more experienced, and progress in your journey as a photographer, you may begin to realize that the things you originally obsessed over, may not be as important as you once thought.
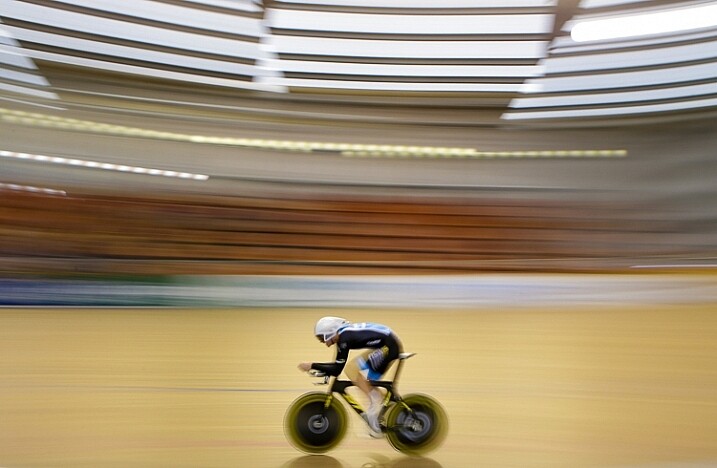
For this image I used a shutter speed of 1/5th, as this would blur out the background quite nicely, as I panned with the rider to make him pop out more. This meant I had to increase my aperture to f/10, and could also decrease my ISO to ISO 320, too. © Daniel Smith / Getty Images.
A topic that many photographers are caught up in, is knowing which camera settings were used; more specifically, aperture, shutter speed and ISO. Any photographer will tell you that these three elements of exposure are very important in creating the desired image. If you use the wrong combination of these in any given environment, you could very well end up with undesired results. Keeping that in mind, it is completely understandable why new photographers obsess over knowing exactly which camera settings were used.
In theory, this should help you to recreate that particular image, right? Unfortunately this may not be the case. Images are created from much more than just the correct combination of aperture, shutter speed and ISO. These three fundamentals do more than just control the exposure; they also give us a creative language to use in our images.
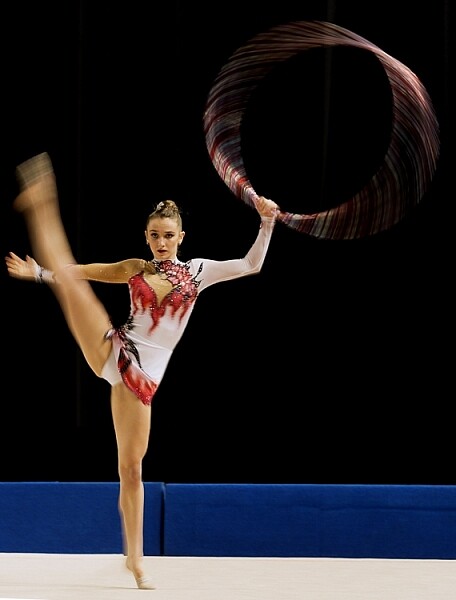
In this image, I wanted to show some motion in the gymnast’s movements, rather than taking another frozen frame. To do this I lowered my shutter speed from 1/1000th to 1/15th. This reduction meant I could also lower my ISO from ISO 3200 to ISO 500 and increase my aperture to f/7.1.
But before diving into this further, let’s explore the two different perspectives of this question; firstly from the point of view of a beginner, who would hope to replicate this imagine. They may assume that by knowing the exact camera settings, and dialling them into the camera, that they will somehow magically achieve the same result. Looking at this from an experienced photographer’s perspective, they may ask this question but with a different scope in mind. It may be when they are perplexed as to the techniques behind a particular image, or in relation to a very specific genre in photography, such as astrophotography, where knowing the settings may help provide a breakthrough.
So why is the question unhelpful?
This question will not always equip you with the knowledge you need, to recreate that image, or with your endeavours of becoming a more successful photographer. There is a lot more to creating an image than just the camera settings. By focussing on camera settings alone, you are missing out on a lot more information as to why those settings were used.
Settings are only a small part of what makes up that image. Lighting conditions, post-processing and the outcome the photographer wants to achieve, are just some of the factors that will dictate what settings the photographer uses. It’s akin to having the correct ingredients for a cake, but not knowing the method behind making it, or the reasons behind that method. Relying on camera settings alone does not tell you anything about the environment the image was taken in, nor does it give you an indication of what the lighting conditions were like.
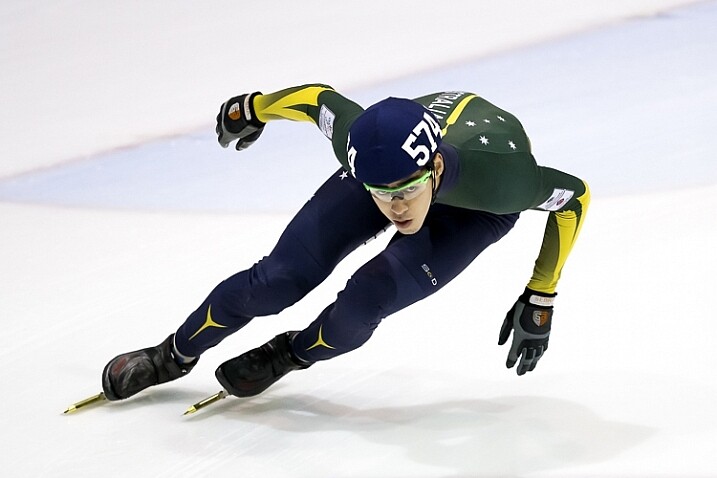
To freeze the action here I used a shutter speed of 1/1000th. To keep my ISO as low as possible, but still have a little more depth of field than what f/2.8 would offer, I used an aperture of f/3.5. I then set my ISO to 3200 to give me the correct exposure. Being indoors, with low light conditions, the ISO is a little higher. © Daniel Smith / Getty Images.
Deciding what camera settings to use is a result of knowing how you want the image to look. For the above image, if I told you that I used a shutter speed of 1/1000, aperture f/3.5 and ISO 3200, and you were to go out and dial in the same settings, it would be highly unlikely that you will get the same result. Why? Because the chances of the lighting in your environment, compared to where this image was taken, being the same is highly unlikely.
The reason I chose these particular settings was simple; I needed a fast shutter speed to freeze the action, so I used 1/1000th of a second. I also wanted to use a wider aperture that would allow me to isolate the subject more. A bi-product of this, is that it allows me to maintain a fast shutter speed, but also helps me use a lower ISO. I then use whatever ISO needed to create the correct exposure – in this case it was ISO 3200. The settings you that you require could be 1/2000th, f/4 and ISO 800. The exposure may come out the same, but the settings used are different, and tailored to the specific lighting conditions.
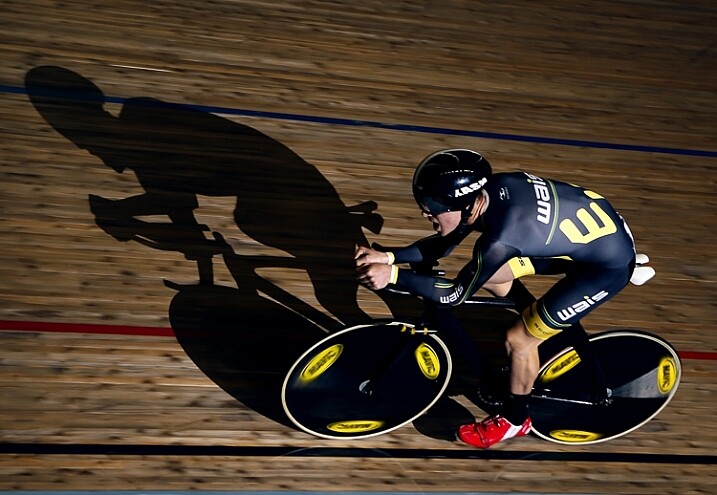
1/160th, f/2.8 ISO 100 © Daniel Smith / Getty Images.
Consider the image above. If you ask me what the camera settings for this image were, I will gladly tell you that this was shot at 1/160th, f/2.8 and ISO 100. But what this doesn’t tell you is that I had a speedlight on the ground, off to camera right, at full power. The majority of the light in this image is coming from the flash, with very little ambient (available light) influencing this image at all. Knowing just the settings will not help you to understand how this image was made. There is more to the image than just the camera settings.
The camera settings here are geared more toward the speedlight, as it is quite a distance from the rider. The slower shutter speed is just below sync-speed, which allows for more power of the flash to affect the image (high-speed sync decreases the flash output range) and it also adds a slight blur to the wheels, which gives a nice sense of speed to the image. I used f/2.8 again to aid in the power of the flash, because my ISO was low to reduce the amount of ambient light. The flash is also freezing the majority of the action here.
Knowing why those settings were used, is far more important than just knowing the settings by themselves. It’s knowing the why, that will help you in your journey as a photographer. As the saying goes, “Give a man a fish and you feed him for a day; teach a man to fish and you feed him for a lifetime.” The same principle is at work in photography. Even if I was with you, and told you the settings to use, what will you do when you are alone? You need to understand why those settings have been used.
Reading an image
When looking at an image, understanding what and why you like it, will be of great benefit to you. This is something that you will develop more and more, as you mature as a photographer. Just a hint, it’s not the camera settings that made an image great. It could be the location, the lighting (time of day is very important), composition, perspective, focal length, any editing techniques used, etc., that all worked together to make the final piece. Each one of these is no more or less important than the next, and they all need to be considered.
For me, moving from obsessing over camera settings, to these other factors that influence a photo, was somewhat of an epiphany for me, and made me realize that photography may not be as simple as I once thought it was!
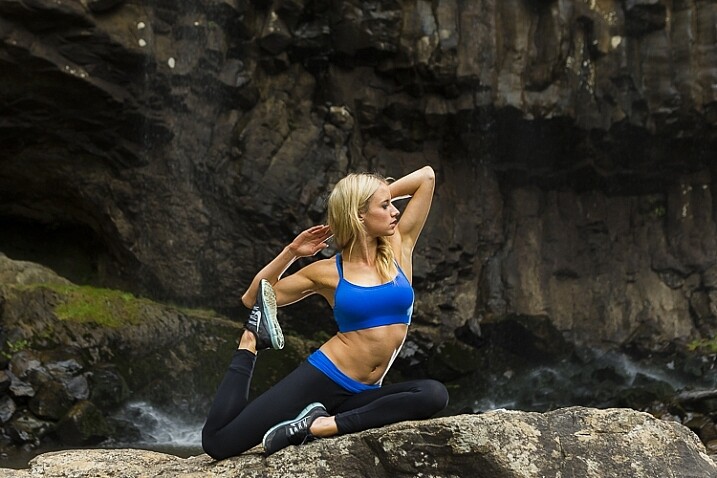
With this image, I used 1/160th, f/4 and ISO 400. I also have two flashes fired remotely; one camera-right just behind the model, creatng the rim light on her front side and arms. I also have my key light placed at camera left and at approximately a 45-degree angle, facing the model. Both lights are un-modified (bare-head, or bare-bulb).
As you advance in photography, you will slowly develop a skill that is often referred to as reading an image. This is were you look at an image, and begin to work out how it was created.
For instance you will be able to have a rough idea of the position of the camera, any lighting setups that were used, etc. This is something that you will build upon as you become more experienced. Unfortunately, this is where the magic of photography seems to end. At first, you are in awe of what you captured, when you didn’t quite know how you got it; it all seemed to work like magic. But as you begin to read images, and dissect how they were crafted, that magic can seemingly disappear.
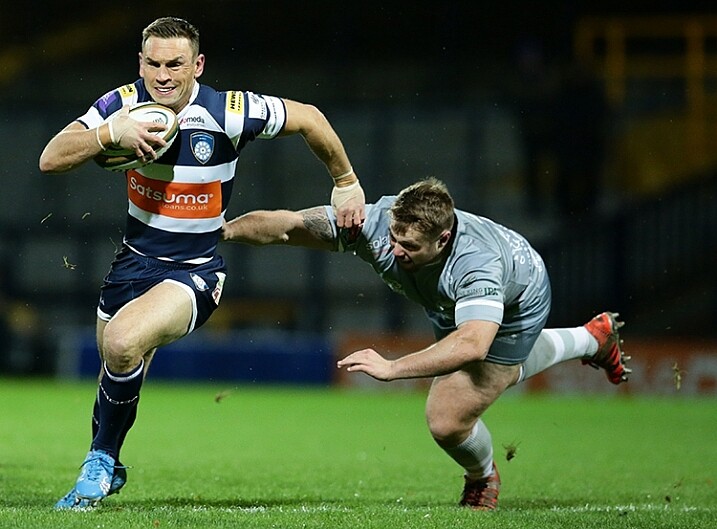
Here I used 1/1000th to freeze the action, f/3.5 to give less depth of field, and ISO 6400 to fill in the exposure gap. The ISO is quite high as this was a night game. © Daniel Smith / Getty Images.
But before you being to to read photos, you must first be very comfortable with not only the three exposure elements (aperture, shutter speed and ISO), but also how they visually affect images. Once you fully understand each element, you will be able to look at an image and say, “They’ve used a fast shutter speed for this” or, “The aperture used was very wide”.
You may not be able to determine the exact camera settings, but you will be able to put yourself in a much better starting point than when you first begun, when you had no idea where to begin! This illustration gives a very quick visual representation of how shutter speed, aperture and ISO affect the look of an image.
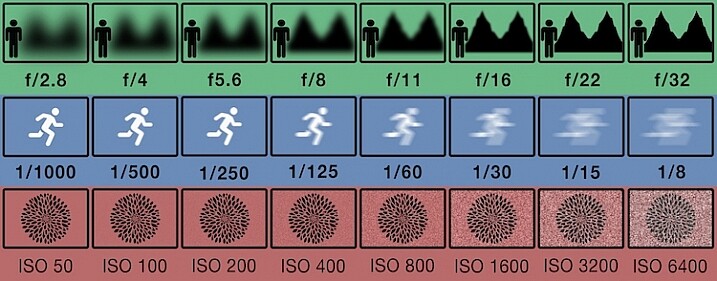
This illustration gives a visual guide to how aperture, shutter speed, and ISO affect an image. *Note: this is just an illustration and does not necessarily give exact representation for each.
Conclusion
So you now know why asking, “What camera setting did you use?” is not the most helpful. But rather than leave you there, let’s look at some alternative questions you can ask, while you develop your image reading skills, and get some education under your belt:
- How did you create this image?
- What post-processing methods did you use?
- How did you achieve (whatever part you are most intrigued about)?
- What camera/lens combination did you use?
- Why did you use that specific camera/lens combination?
- Why did you use those particular settings?
- What was the lighting like?
Now you are armed with some alternative questions to ask that will give you a better insight to how it was made, when you see an image you like.
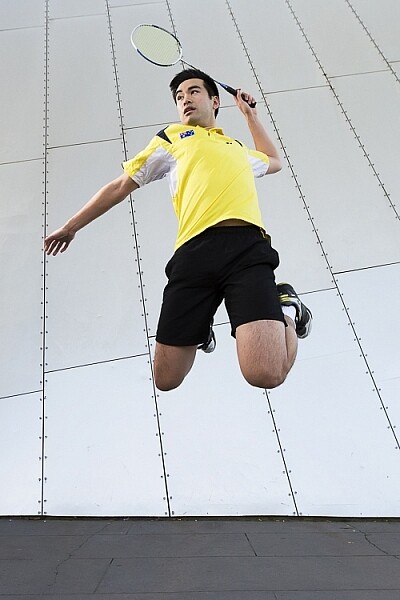
With this in mind, what questions would you ask about this image? Would you still ask for the camera settings, or how this image was created?
The post Why Asking What Camera Settings Were Used is Not as Helpful as You Think by Daniel appeared first on Digital Photography School.