In photography, teaching and learning can only get you so far. At some point, you will get to a skill level where it’s up to you to put in the time and effort to continue improving. However, dedication and self-learning aside, here are some advanced street photography tips that I think can help you significantly improve your skill level in this area.
1. Use your eyes instead of the viewfinder
When photographing, it is very common for people to look straight into the viewfinder and forget about the world around them, but this can make street photography tougher. Your vision through the viewfinder is hindered significantly, and that can hurt your ability to capture spontaneous moments. You need to see everything that is happening around you. This will help you to anticipate the special moments that are about to occur in front of your camera.
Your eyes are the real viewfinder, and you will be able to notice much more if you use them. Scan the area and look for subjects that are both near and far. Wait until you notice something with your eyes, then put your viewfinder to your eye to capture the moment. If you start with your head in the viewfinder, by the time the moment happens, your ability to notice it will be a half-second too slow.
2. Embrace spontaneity
This was one of the early tips that Garry Winogrand received in his photography education that set him on a path to become one of the most renowned photographers of all time. You should certainly spend a lot of time thinking about your work and what you like to shoot, but when you are out there going through the motions, embrace your gut feelings. Instead of worrying about every little detail and thinking about if you are doing a good job or not, put that all aside and have fun.
There is no need to worry about what other people will think. If you feel like there might be a chance for a good photograph, then go for it, no matter how weird the image may be. Don’t let your brain talk you out of it. That gut feeling exists for a reason, so use it to your advantage. If you use your instincts and shoot confidently, that will show in your photographs. They will feel more real and more you. Of course, you will probably take more bad photographs as well, but the good ones will be that much better. Trust your gut.
Keep in mind that some people may take this suggestion too far and machine-gun fire their camera every time they have an inkling that there’s a good photograph. That’s taking this tip too far. Turn off continuous shooting and make sure that you are able to recognize and capture tha moment with a shot or two.
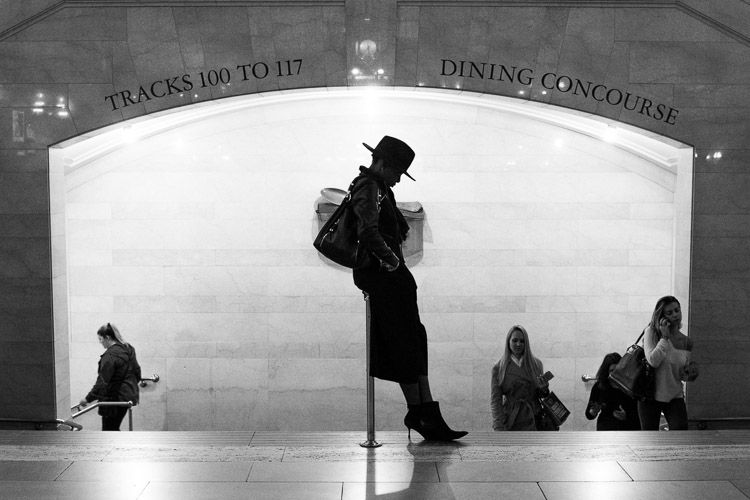
3. Think about how your photos are going to age
It is important to think about your work in a historical context. Think about classic photographs and what makes them special. Simple old photographs of window displays and fashions look incredible, but those photographs might have seemed very ordinary back then. If you could go back in time to photograph, what you might see as interesting then would probably be much different than what most photographers were shooting at that time.
What about your life and area is going to be interesting in the future? What is going to change? Are people still going to be staring at their cell phones every second with huge headphones on and completely disconnected from reality? Who knows, maybe?
Try not to take anything for granted, and if you notice yourself disregarding something, then think about why you feel that way. Occasionally, these situations can make the best photographs.
4. Create themes and consistency in your photography
The more you shoot, the more you will notice that you are attracted to certain types of photographs. Find these consistencies when you are editing and embrace them. Over time, these ideas can blossom into full-fledged projects and books.
Group these images together into collections, and think about the type of photographs that you would like to add to them. Then the next time you come across a moment that fits into that category, you will be quick to notice and capture it. Each individual photograph is a piece of art, but a collection of photographs is its own work of art. Play with the order of your photographs and the meaning that comes out with different sequences of them.
Consistency does not mean that you can’t photograph different types of subject matter or in both color and black and white. You can be very diverse in how you shoot, and you can change and evolve as you go along, but you can still group these consistencies into projects that fit well together.
5. Repetition
The real key to improving your photography is through repetition. It is necessary to photograph frequently to keep your eyes sharp and your hand-eye coordination ready. Your instincts will improve. The more often you do it, the better you will be. Keep the rust away. Even the best photographers need to continually photograph to keep their skills up.
The more you learn to enjoy the act of photographing, the easier it will be to walk out the door to shoot more. Photography shouldn’t be about feeling inspired or uninspired. You do not need to feel inspired to photograph if you enjoy the act of walking. Create a plan for how often you will photograph, just like the gym, and stick to it. Over time, it will become routine and your enjoyment for it will continue to grow.
There is no need to worry about coming back with good photographs. That is going to happen, and you shouldn’t feel sad if you didn’t get anything good in a session. The good photographs will come, but if you feel frustrated too often, then that will affect how you photograph. Just enjoy the process of being out in the world doing something you love. The more you enjoy that, the better you will be.
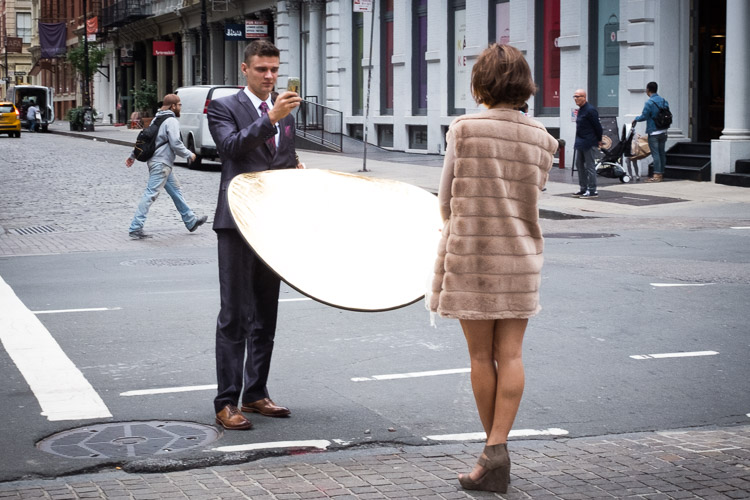
6. Photograph where you live
No matter where you live, whether it’s in the middle of a big city or in a small suburb, use that as a backdrop for a project. That is the area that you frequent the most, and know the best. Go to places that you think would be incredibly boring for photographs and figure out how to get a good photograph there. Don’t take things for granted. Absolutely anything can make a good and beautiful photograph. All it takes is dedication.
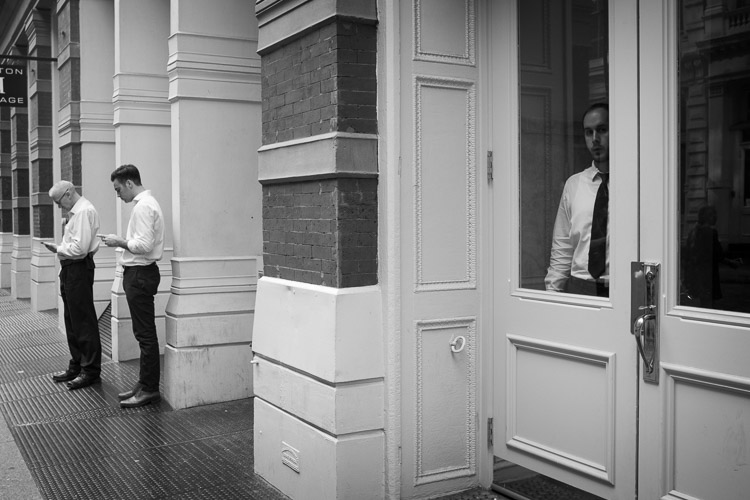
7. Emotion and gesture
As photographers, our job is to pass on an idea or an emotion to the viewers of our work. How you do that is something for you to figure out. Search for feeling and emotion when you are shooting. Aim to create evocative photographs.
If you are photographing people, it is important to capture them when they are portraying an emotion. This can be shown in a facial expression, what they are doing, or the gesture of their body. Sometimes, you will capture a unique looking person with no emotion or gesture and that will ruin the photograph. Other times, you will capture someone that you did not think would be a good subject, but the emotion shown on their face make the entire photograph. When you photograph people, this emotion is vital to focus on.
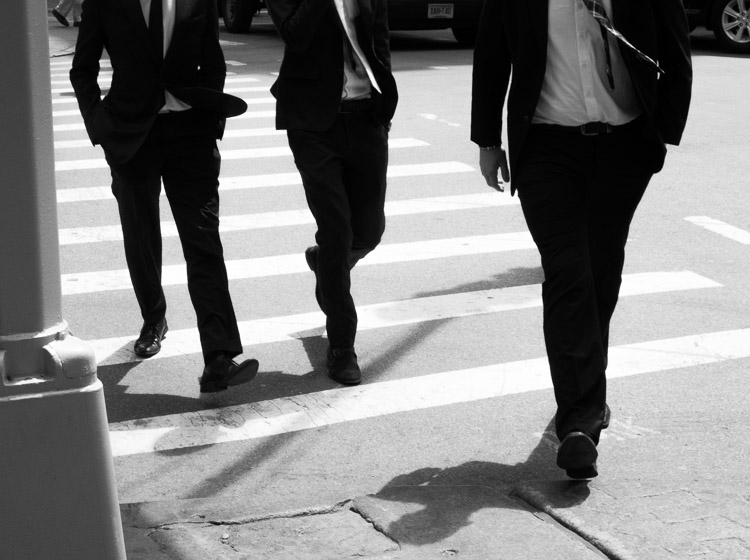
8. Zone focusing
Zone focusing is the toughest technical skill to learn in street photography, but it is very important to learn. At first, you will screw up a lot of photographs, but over time it becomes a more accurate way of obtaining sharp photographs.
Zone focusing works particularly well in busy areas, but it can be used any time once you get good at it. I tend to zone focus 60% of the time and autofocus the rest. If your subject isn’t moving and you have time to autofocus, it is always good to do that as it will guarantee perfect focus. But the rest of the time zone focusing can be the way to go.
What is zone focusing and how is it done?
This strategy of zone focusing is basically just using manual focus your camera and guessing the distance to subjects. Because of this, you will need a distance meter on either your lens or in your camera. You then want to turn your camera (or lens) to manual focus. Set the focus at a certain distance away from the camera. I prefer 8-10 feet, although I will do a smaller distance if I’m in a really busy area where people are closer together. Next, figure out how far that distance is away from your camera, and now you know that everything at that distance away from you will be sharp.
Zone focusing can be done well at very large apertures, even f/2, but it becomes much more difficult to do well. This focusing strategy works much better with apertures of f/16, f/11, and f/8 and a wide-angle lens such as 35mm. That will ensure there is a large depth of field in your image (make sure to also raise your ISO to achieve this and still keep an adequately fast shutter speed). Thus, there will be a significant area both in front and behind of the spot that you are focused on that will all be in sharp focus. This helps for situations where you miscalculate the distance when the perfect moment happens and it’s not exactly where are focused, and when you have multiple subjects at different distances that you want to be relatively sharp.
This is why it is always good to start off zone focusing in bright sunlight with a wide-angle lens. This will allow you to shoot at f/11 or f/16 so that a lot of your image will be sharp and you will barely have to worry. Set your focus to 8 or 10 feet away and pay attention to your subjects more than your focusing. It is a very freeing feeling, and the extra time you save not having to focus will aid you in catching those spontaneous and instantaneous moments that appear before you.
Conclusion
If you want even more street photography tips, check out: The Ultimate Guide to Street Photography (you can even download it as a PDF).
What things to you practice to up your street photography game? Please share your comments and images in the section below.
If you’d like to learn more about Street Photography, then please check out my ebook The Essentials of Street Photography.
The post 8 Advanced Street Photography Tips to Get You to the Next Level by James Maher appeared first on Digital Photography School.