As my nation (USA) celebrates 100 years of the National Park Service, renewed interest in our untouched landscapes is growing, and that’s a great thing. Even with the selfie-crazed tourists crowding our parks and national monuments, it’s a positive point that more of us are getting out into the great outdoors and connecting with this land of ours.
A side benefit of this movement is a renewed interest in nature and the outdoors in general. Even 58 national parks in the U.S., it may not be possible for all of us to get to them as often as we’d like. Luckily, we can enjoy nature in our own backyards, as there are state parks, forests, and trails for us to explore almost everywhere you turn in America (and likely wherever you live also).
As with any environment, forest photography brings its own unique challenges to the table, but at the same time offers an almost unlimited array of subject matter, due to the variety of flora and fauna in these locations. Add in the side benefits of experiencing the fresh air and sunlight of the outdoors (which our bodies were built for), and you have all the reasons you need to snap some photos in the woods!
Let’s cover a few tips and recommendations when heading for the trails, then get out there and enjoy!
1 – Safety first
As with any outdoor photography project, you need to consider the environment you’re going into. Be sure to bring a camera bag or backpack to store items in, and to keep your extra gear and accessories out of the weather. Items to bring could include snacks, a compass, a map (a topographical map is always best if available), sunscreen, bug spray and a dry towel or rag to remove moisture, dirt, or rain from any exposed gear.
2 – Gear up
As always with shooting landscapes, a tripod is a must. Both wide-angle and narrower primes lenses, such as a 50mm can come in handy. I personally use a 24mm prime lens to capture wider forest shots, to get many trees in the frame at once, but then switch to my 50mm to get closeups of things like leaves, insects, or flowers.
Though there are cases for and against using them, a clear ultraviolet (UV) filter can be useful to keep dirt and grime off of your lens element. I don’t use them myself, and find if I’m careful with my lenses I can keep them clean without needing a protective filter. Always use a microfiber cloth for cleaning your lenses, not rags or towels of any type, especially if you take one for other purposes while you’re out in the forest.
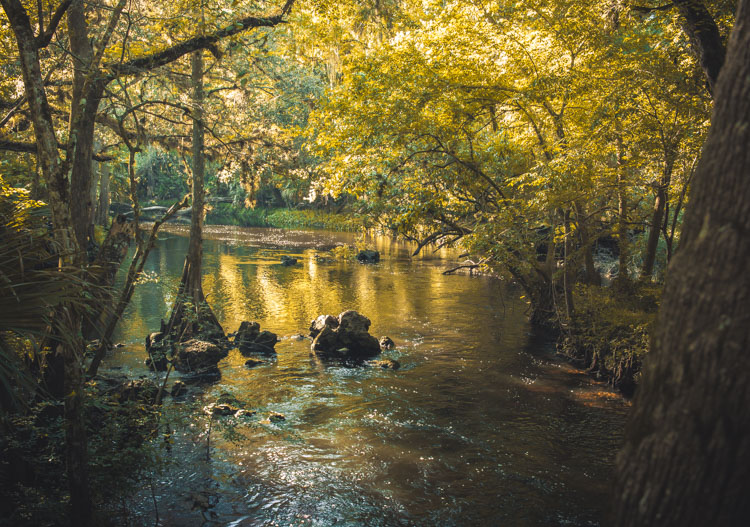
Finally, a polarizing filter can come in handy, as it will help cut reflections in any body of water such as a river or stream, and also deepen and enhance colors in the scene. Keep in mind that you’ll be reducing the amount of light coming into your camera when using a filter like this, so plan accordingly (just bring your tripod).
3 – When to get out there
As outdoor or natural light photographers, we know that the best times to shoot are early mornings or late evenings, and to do our napping at noon. But forest environments are one of those places that can still work well during bright, more direct sunlight.
This is due to the canopy above that you’ll usually have, which filters out some of the harsh light, and gives you more of a lighting situation you’d expect to find at the edges of the day. As in many situations, if you can’t avoid the light from directly overhead, you can always switch over to black and white, and take advantage of the sharper shadow edges, and higher contrast.
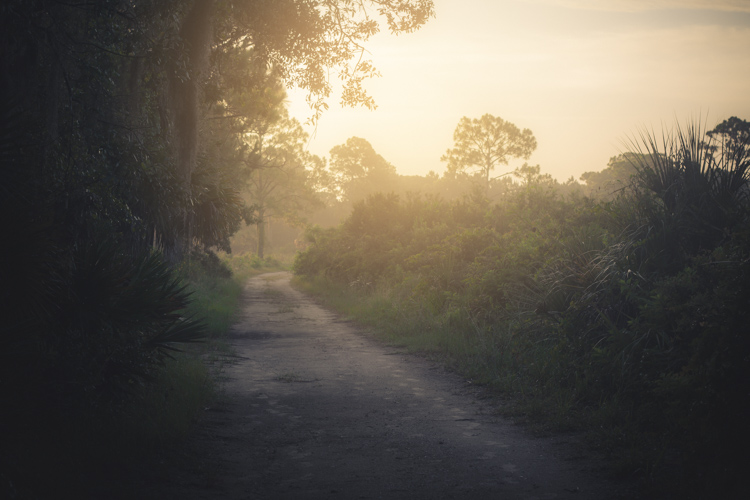
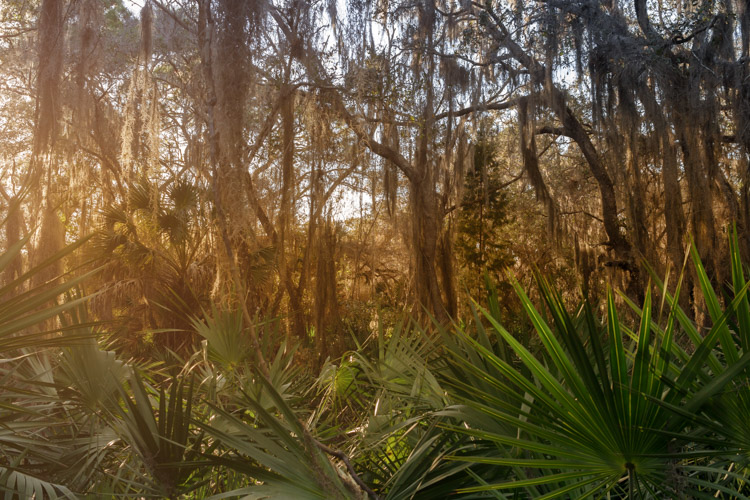
With that being said, your subject will almost always be more magical if you head out during the early hours of the morning, or late in the evening. If you’re near water, you may experience some ground fog, which can add serious mood to your images, and the sunlight will be dramatically cooler or warmer than in the middle of the day, depending on what time you decide to go.
In short, plan your excursion for the first two or three hours after sunrise, or before sunset, for the best results.
4 – Try vertical orientation
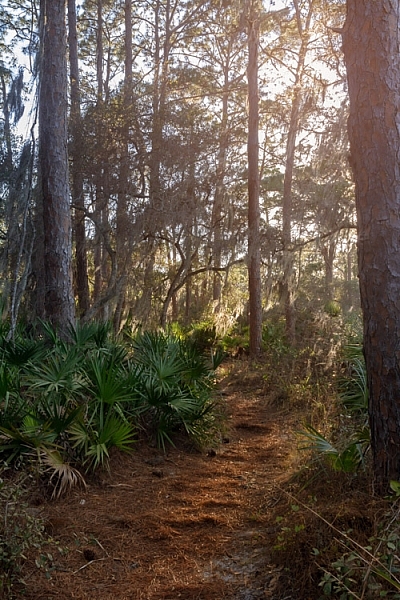
Landscape shooters are used to primarily using horizontal or landscape orientation for the majority of their images, but when you’re in the forest, portrait orientation can sometimes work better. Since you’re dealing with tall trees as your primary environment, wide-angle shots can capture more of a scene when shooting vertically, and give the image a sense of grandiose scale and height.
5 – Color contrast is key
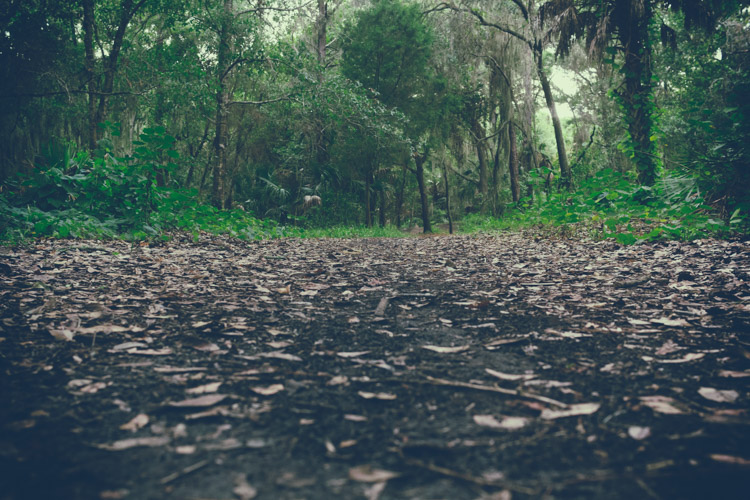
One drawback to shooting in a forest environment (unless you’re in the northeast United States during the fall, or any area where foliage changes near the end of the year) is the lack of color contrast. The majority of your environment will most likely be composed of green leaves and brown tree trunks.
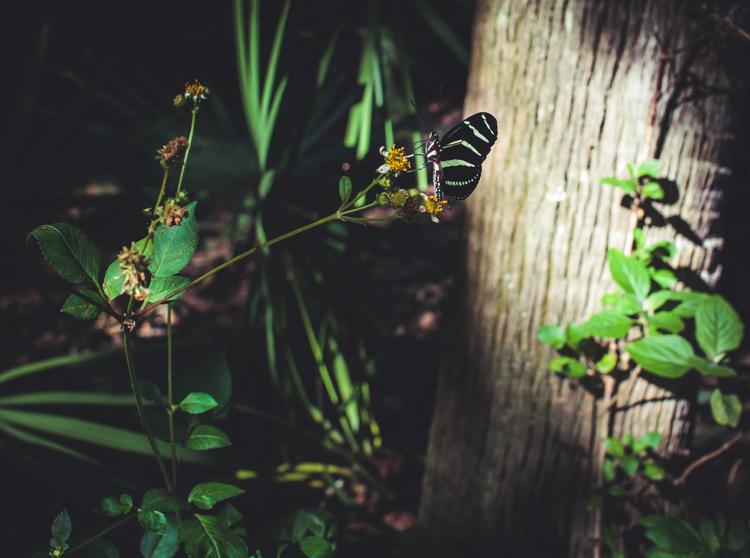
Flora can help break up the monotony by adding color to the scene. Look for patches of brightly colored flowers of yellow or red; even white flowers can change the contrast profile within the frame.
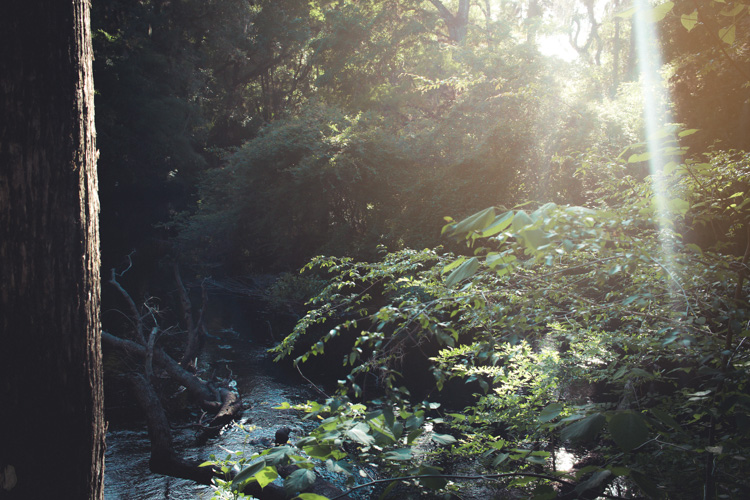
Playing the sun off of the environment can also add color, without needing a physical object. Golden-hour light and sun glare placed in your photo by composition, can inject the warmth of oranges and reds, and give your image a more vibrant look.
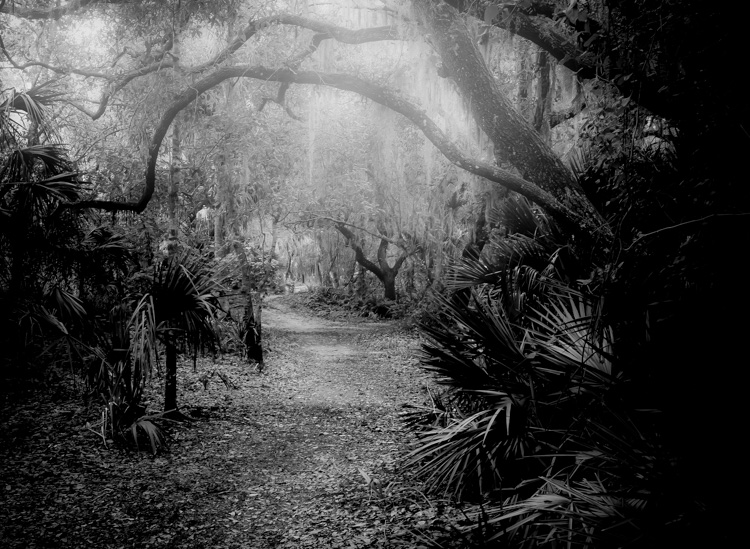
6 – Use Black and White
Sometimes when you’re shooting, nothing seems right. The light isn’t hitting the way you’d like, colors are off, or you just don’t get a sense of drama from your photo. This can happen in a forest environment, sometimes due to the general consistency of color from scene to scene; a lot of greens and browns can make it hard to highlight a subject.
Shooting in black and white (or processing the images later as monochrome) can let you concentrate on what the light is doing in your scene, by removing the element of color that can sometimes distract you from how varying levels of light affect the image.
If you’re going to shoot the photo itself in black and white in-camera, be sure to switch over to RAW + JPEG in your camera settings, that way you’ll have an unprocessed RAW file and a black and white JPEG for each frame you take. Or simply shoot in RAW mode so you’ll still have the full range of color data, in case you’re not happy with the results. But you’re shooting in RAW anyway right?
7 – Post-Processing the results
Photos taken in wooded areas benefit from many of the same post-processing workflow you’d normally do with other images, but there are some additional things you can do to give these images a bit more pop.
Lighting tends to be a little more dramatic in the forest, since you usually have a canopy of trees to filter some of the sun, and can result in gorgeous rays hitting the forest floor, or leaves and plants highlighted by shafts of light. You can enhance these by using a bit of contrast, specifically on these areas. You can also add a bit of vibrance to the image overall, and play around with the hue/saturation of the individual colors of green and brown, to bring out the natural feel of the shot.
For my own images, I like to soften the image overall via the Clarity slider in Lightroom (to give it a dreamy or magical feel), and then target the subject or other important areas of the photo and add clarity and sharpness back in with a local adjustment (+Clarity plus -Clarity balances out, for example: -30 Clarity plus +50 Clarity equals net +20 Clarity on the area targeted, use the Adjustment brush tool to apply this).
8 – Leave the forest as you found it
I love the planet we’re on, and it angers me to no end when I see evidence of people not caring about the effect they have on the natural surroundings. Beer can rings and cigarette butts at beaches, plastic bags on roads near the forest, and the list goes on.
We should consider it a privilege to document this incredible world we live in, and the most important thing we can do is also the simplest; leave the area as you found it. This means many things including; not littering the woods or forest with any traces of man-made products such as trash, as well as not interfering with nature by getting too close to wildlife, or disturbing sensitive plants or trees.
Little things like this may seem trivial, but if we all participate in this practice, we could have a positive effect on our natural world and keep it a little more serene for generations to come. As photographers, we have an even greater responsibility to be conscious about what impact our actions might have on our environment.
Conclusion
Most of us have access to forest areas, fortunately, so it’s easy to try out this kind of photography. While this type of nature photography presents a few challenges, as long as you’re prepared with the right gear and a little knowledge, it can be an enjoyable experience, will help connect you with our natural world, and maybe even enlighten you a bit.
Do you have any stories or images of your adventures in the wild woods or forest that you’d like to share? Engage with us by commenting below, and get out there and have fun!
This week we are doing a series of articles to help you do better nature photography. See previous articles here:
- 3 Habits Every Outdoor Photographer Should Develop to Avoid Missing Shots
- 5 Tips for Better Nature Photography
- 27 Serene Images of the Natural World
- Weekly Photography Challenge – Nature
- 10 Ideas for Photographing Nature in your Backyard
- 6 Tips for Capturing Character and Personality in Wildlife Photography
- 5 Tips for Setting the Focus in Your Landscape Photography
- 7 Tips for Better Marine Wildlife Photography
- Tips for Processing Landscape Photos – from Basic Edits to Artistic Interpretation
- 5 Tips for Avoiding Boring Photos of Mountains
The post 8 Quick Tips to Produce Better Forest Photography by Tim Gilbreath appeared first on Digital Photography School.